Spring Security provides a comprehensive set of security features for Java applications, covering authentication, authorization, session management, and protection against common security threats such as CSRF (Cross-Site Request Forgery). The Spring Security framework is highly customizable and allows developers to curate security configurations depending on their application needs. It provides a flexible architecture that supports various authentication mechanisms like Basic Authentication, JWT and OAuth.
Spring Security provides Basic Authentication out of the box. To understand how this works, refer to this article. In this article, we will deep-dive into the working of JWT and how to configure it with spring security.
Example Code
This article is accompanied by a working code example on GitHub.What is JWT
JWT (JSON Web Token) is a secure means of passing a JSON message between two parties. It is a standard defined in RFC 7519. The information contained in a JWT token can be verified and trusted because it is digitally signed. JWTs can be signed using a secret (with the HMAC algorithm) or a public/private key pair using RSA or ECDSA.
For this article, we will create a JWT token using a secret key and use it to secure our REST endpoints.
JWT Structure
In this section, we will take a look at a sample JWT structure. A JSON Web Token consists of three parts:
- Header
- Payload
- Signature
JWT Header
The header consists of two parts: the type of the token i.e. JWT and the signing algorithm being used such as HMAC SHA 256 or RSA. Sample JSON header:
{
  "alg": "HS256",
  "typ": "JWT"
}
This JSON is then Base64 encoded thus forming the first part of the JWT token.
JWT Payload
The payload is the body that contains the actual data. The data could be user data or any information that needs to be transmitted securely.
This data is also referred to as claims. There are three types of claims: registered, public and private claims.
Registered Claims
They are a set of predefined, three character claims as defined in RFC7519. Some frequently used ones are iss (Issuer Claim), sub (Subject Claim), aud (Audience Claim), exp (Expiration Time Claim), iat (Issued At Time), nbf (Not Before). Let’s look at each of them in detail:
- iss: This claim is used to specify the issuer of the JWT. It is used to identify the entity that issued the token such as the authentication server or identity provider.
- sub: This claim is used to identify the subject of the JWT i.e. the user or the entity for which the token was issued.
- aud: This claim is used to specify the intended audience of the JWT. This is generally used to restrict the token usage only for certain services or applications.
- exp: This claim is used to specify the expiration time of the JWT after which the token is no longer considered valid. Represented in seconds since Unix Epoch.
- iat: Time at which the JWT was issued. Can be used to determine age of the JWT. Represented in seconds since Unix Epoch.
- nbf: Identifies the time before which JWT can not be accepted for processing.
To view a full list of registered claims here. In the further sections, we will look at a few examples of how to use them.
Public Claims
Unlike registered claims that are reserved and have predefined meanings, these claims can be customized depending on the requirement of the application. Most of the public claims fall under the below categories:
- User/Client Data: Includes username, clientId, email, address, roles, permissions, scopes, privileges and any user/client related information used for authentication or authorization.
- Application Data: Includes session details, user preferences(e.g. language preference), application settings or any application specific data.
- Security Information: Includes additional security-related information such as keys, certificates, tokens and others.
Private Claims
Private claims are custom claims that are specific to a particular organization. They are not standardized by the official JWT specification but are defined by the parties involved in the JWT exchange.
JWT Claims Recommended Best Practices
- Use standard claims defined in JWT specification whenever possible. They are widely recognized and have well-defined meanings.
- The JWT payload should have only the minimum required claims for better maintainability and limit the token size.
- Public claims should have clear and descriptive names.
- Follow a consistent naming convention to maintain consistency and readability.
- Avoid including PII information to minimize the risk of data exposure.
- Ensure JWTs are encrypted with the recommended algorithms specified under the
algregistered claim. Thenonevalue in thealgclaim indicates the JWT is not signed and is not recommended.
JWT Signature
To create the signature, we encode the header, encode the payload, and use a secret to sign the elements with an algorithm specified in the header. The resultant token will have three Base64 URL strings separated by dots. A pictorial representation of a JWT is as shown below:
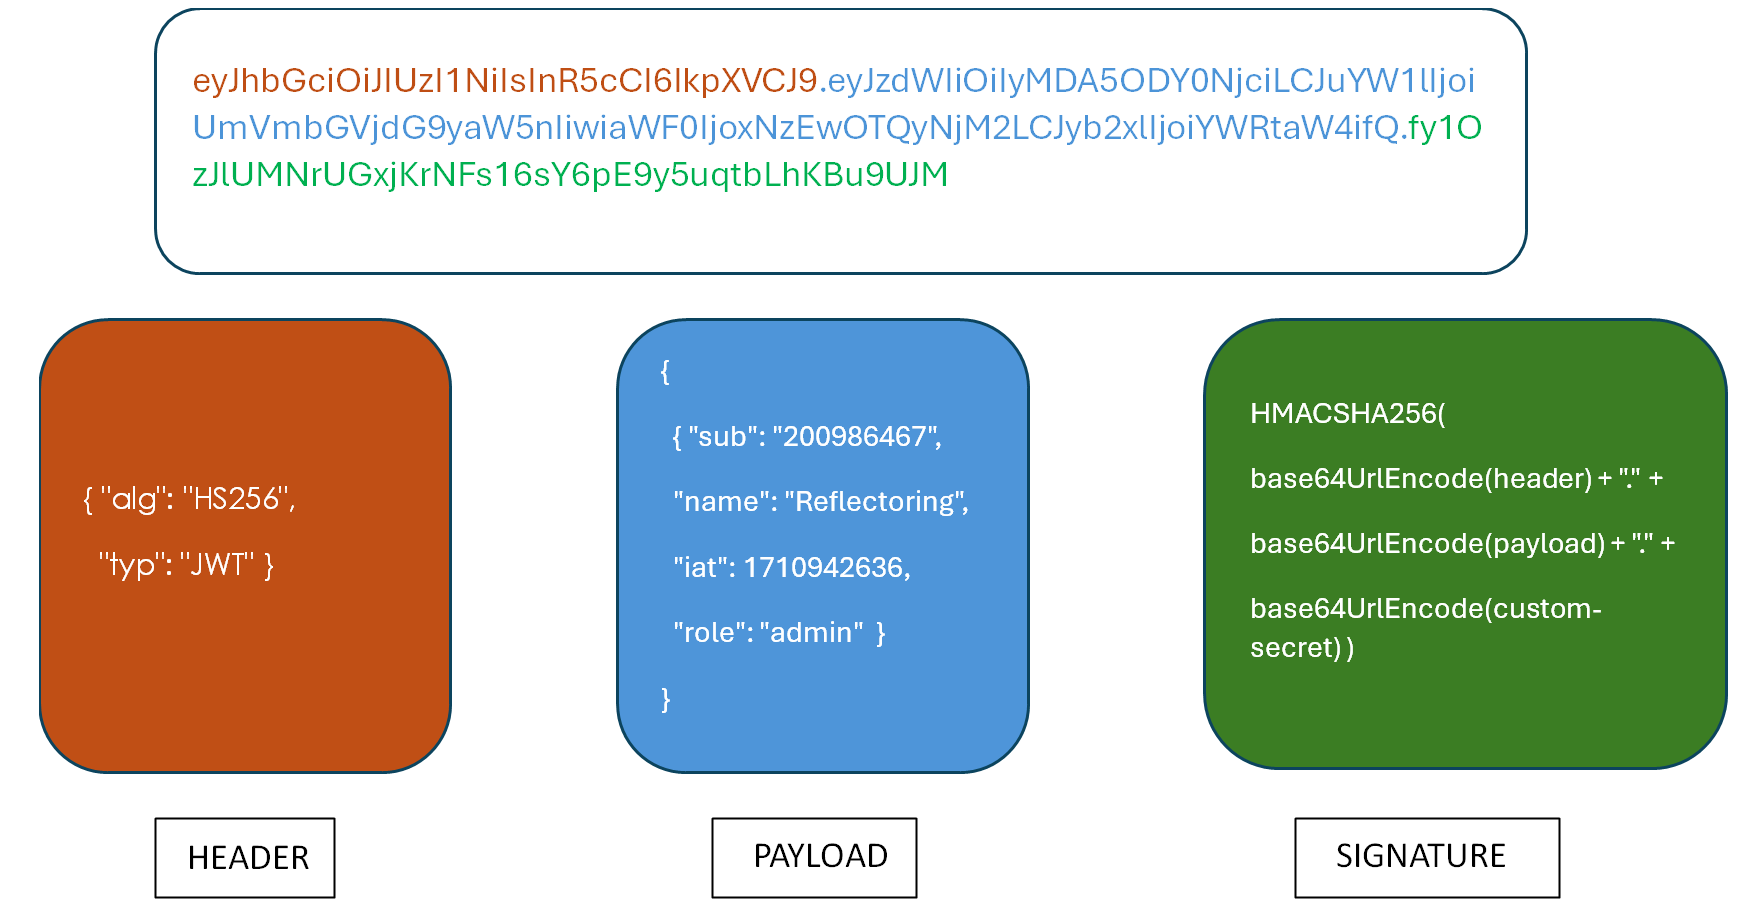
The purpose of the signature is to verify the message wasn’t changed along the way. Since they are also signed with a secret key, it can verify that the sender of the JWT is who it claims to be.
Common Use Cases of JWT
JWTs are versatile and can be used in a variety of scenarios as discussed below:
- Single Sign-On: JWTs facilitate Single Sign-On (SSO) by allowing user authentication across multiple services or applications. After a user logs in to one application, he receives a JWT that can be used to login to other services (that the user has access to) without needing to enter/maintain separate login credentials.
- API Authentication: JWTs are commonly used to authenticate and authorize access to APIs. Clients include the JWT token in the Authorization header of an API request to validate their access to the API. The APIs will then decode the JWT to grant or deny access.
- Stateless Sessions: JWTs help provide stateless session management as the session information is stored in the token itself.
- Information Exchange: Since JWTs are secure and reliable, they can be used to exchange not only user information but any information that needs to be transmitted securely between two parties.
- Microservices: JWTs are one of the most preferred means of API communication in a microservice ecosystem as a microservice can independently verify a token without relying on an external authentication server making it easier to scale.
Caveats of Using JWT
Now that we understand the benefits that JWT provides, let’s look at the downside of using JWT. The idea here is for the developer to weigh the options in hand and make an informed decision about using a token-based architecture within the application.
- In cases where JWTs replace sessions, if we end up using a big payload, the JWT token can bloat. On top of it, if we add a cryptographic signature, it can cause overall performance overhead. This would end up being an overkill for storing a simple user session.
- JWTs expire at certain intervals post which the token needs to be refreshed and a new token will be made available. This is great from a security standpoint, but the expiry time needs to be carefully considered. For instance, an expiry time of 24 hours would be a bad design consideration.
Now, that we’ve looked at the focus points, we will be able to make an informed decision around how and when to use JWTs. In the next section, we’ll create a simple JWT token in Java.
Creating a JWT Token in Java
JJWT is the most commonly used Java library to create JWT tokens in Java and Android. We will begin by adding its dependencies to our application.
Configure JWT Dependencies
Maven dependency:
<dependency>
    <groupId>io.jsonwebtoken</groupId>
    <artifactId>jjwt-api</artifactId>
    <version>0.11.1</version>
</dependency>
<dependency>
    <groupId>io.jsonwebtoken</groupId>
    <artifactId>jjwt-impl</artifactId>
    <version>0.11.1</version>
    <scope>runtime</scope>
</dependency>
<dependency>
    <groupId>io.jsonwebtoken</groupId>
    <artifactId>jjwt-jackson</artifactId>
    <version>0.11.1</version>
    <scope>runtime</scope>
</dependency>
Gradle dependency:
compile 'io.jsonwebtoken:jjwt-api:0.11.1'
runtime 'io.jsonwebtoken:jjwt-impl:0.11.1'
runtime 'io.jsonwebtoken:jjwt-jackson:0.11.1'
Our Java application is based on Maven, so we will add the above Maven dependencies to our pom.xml.
Creating JWT Token
We will use the Jwts class from the io.jsonwebtoken package. We can specify claims (both registered and public) and other JWT attributes and create a token as below:
public static String createJwt() {
        return Jwts.builder()
                .claim("id", "abc123")
                .claim("role", "admin")
                /*.addClaims(Map.of("id", "abc123",
                        "role", "admin"))*/
                .setIssuer("TestApplication")
                .setIssuedAt(java.util.Date.from(Instant.now()))
                .setExpiration(Date.from(Instant.now().plus(10, ChronoUnit.MINUTES)))
                .compact();
    }
This method creates a JWT token as below:
eyJhbGciOiJub25lIn0.eyJpZCI6ImFiYzEyMyIsInJvbGUiOiJhZG1pbiIsImlzcyI6IlR
lc3RBcHBsaWNhdGlvbiIsImlhdCI6MTcxMTY2MTA1MiwiZXhwIjoxNzExNjYxNjUyfQ.
Next, let’s take a look at the builder methods used to generate the token:
claim: Allows us to specify any number of custom name-value pair claims. We can also useaddClaimsmethod to add a map of claims as an alternative.setIssuer: This method corresponds to the registered claimiss.setIssuedAt: This method corresponds to the registered claimiat. This method takesjava.util.Dateas a parameter. Here we have set this value to the current instant.setExpiration: This method corresponds to the registered claimexp. This method takesjava.util.Dateas a parameter. Here we have set this value to 10 minutes from the current instant.
Let’s try to decode this JWT using an online JWT Decoder:
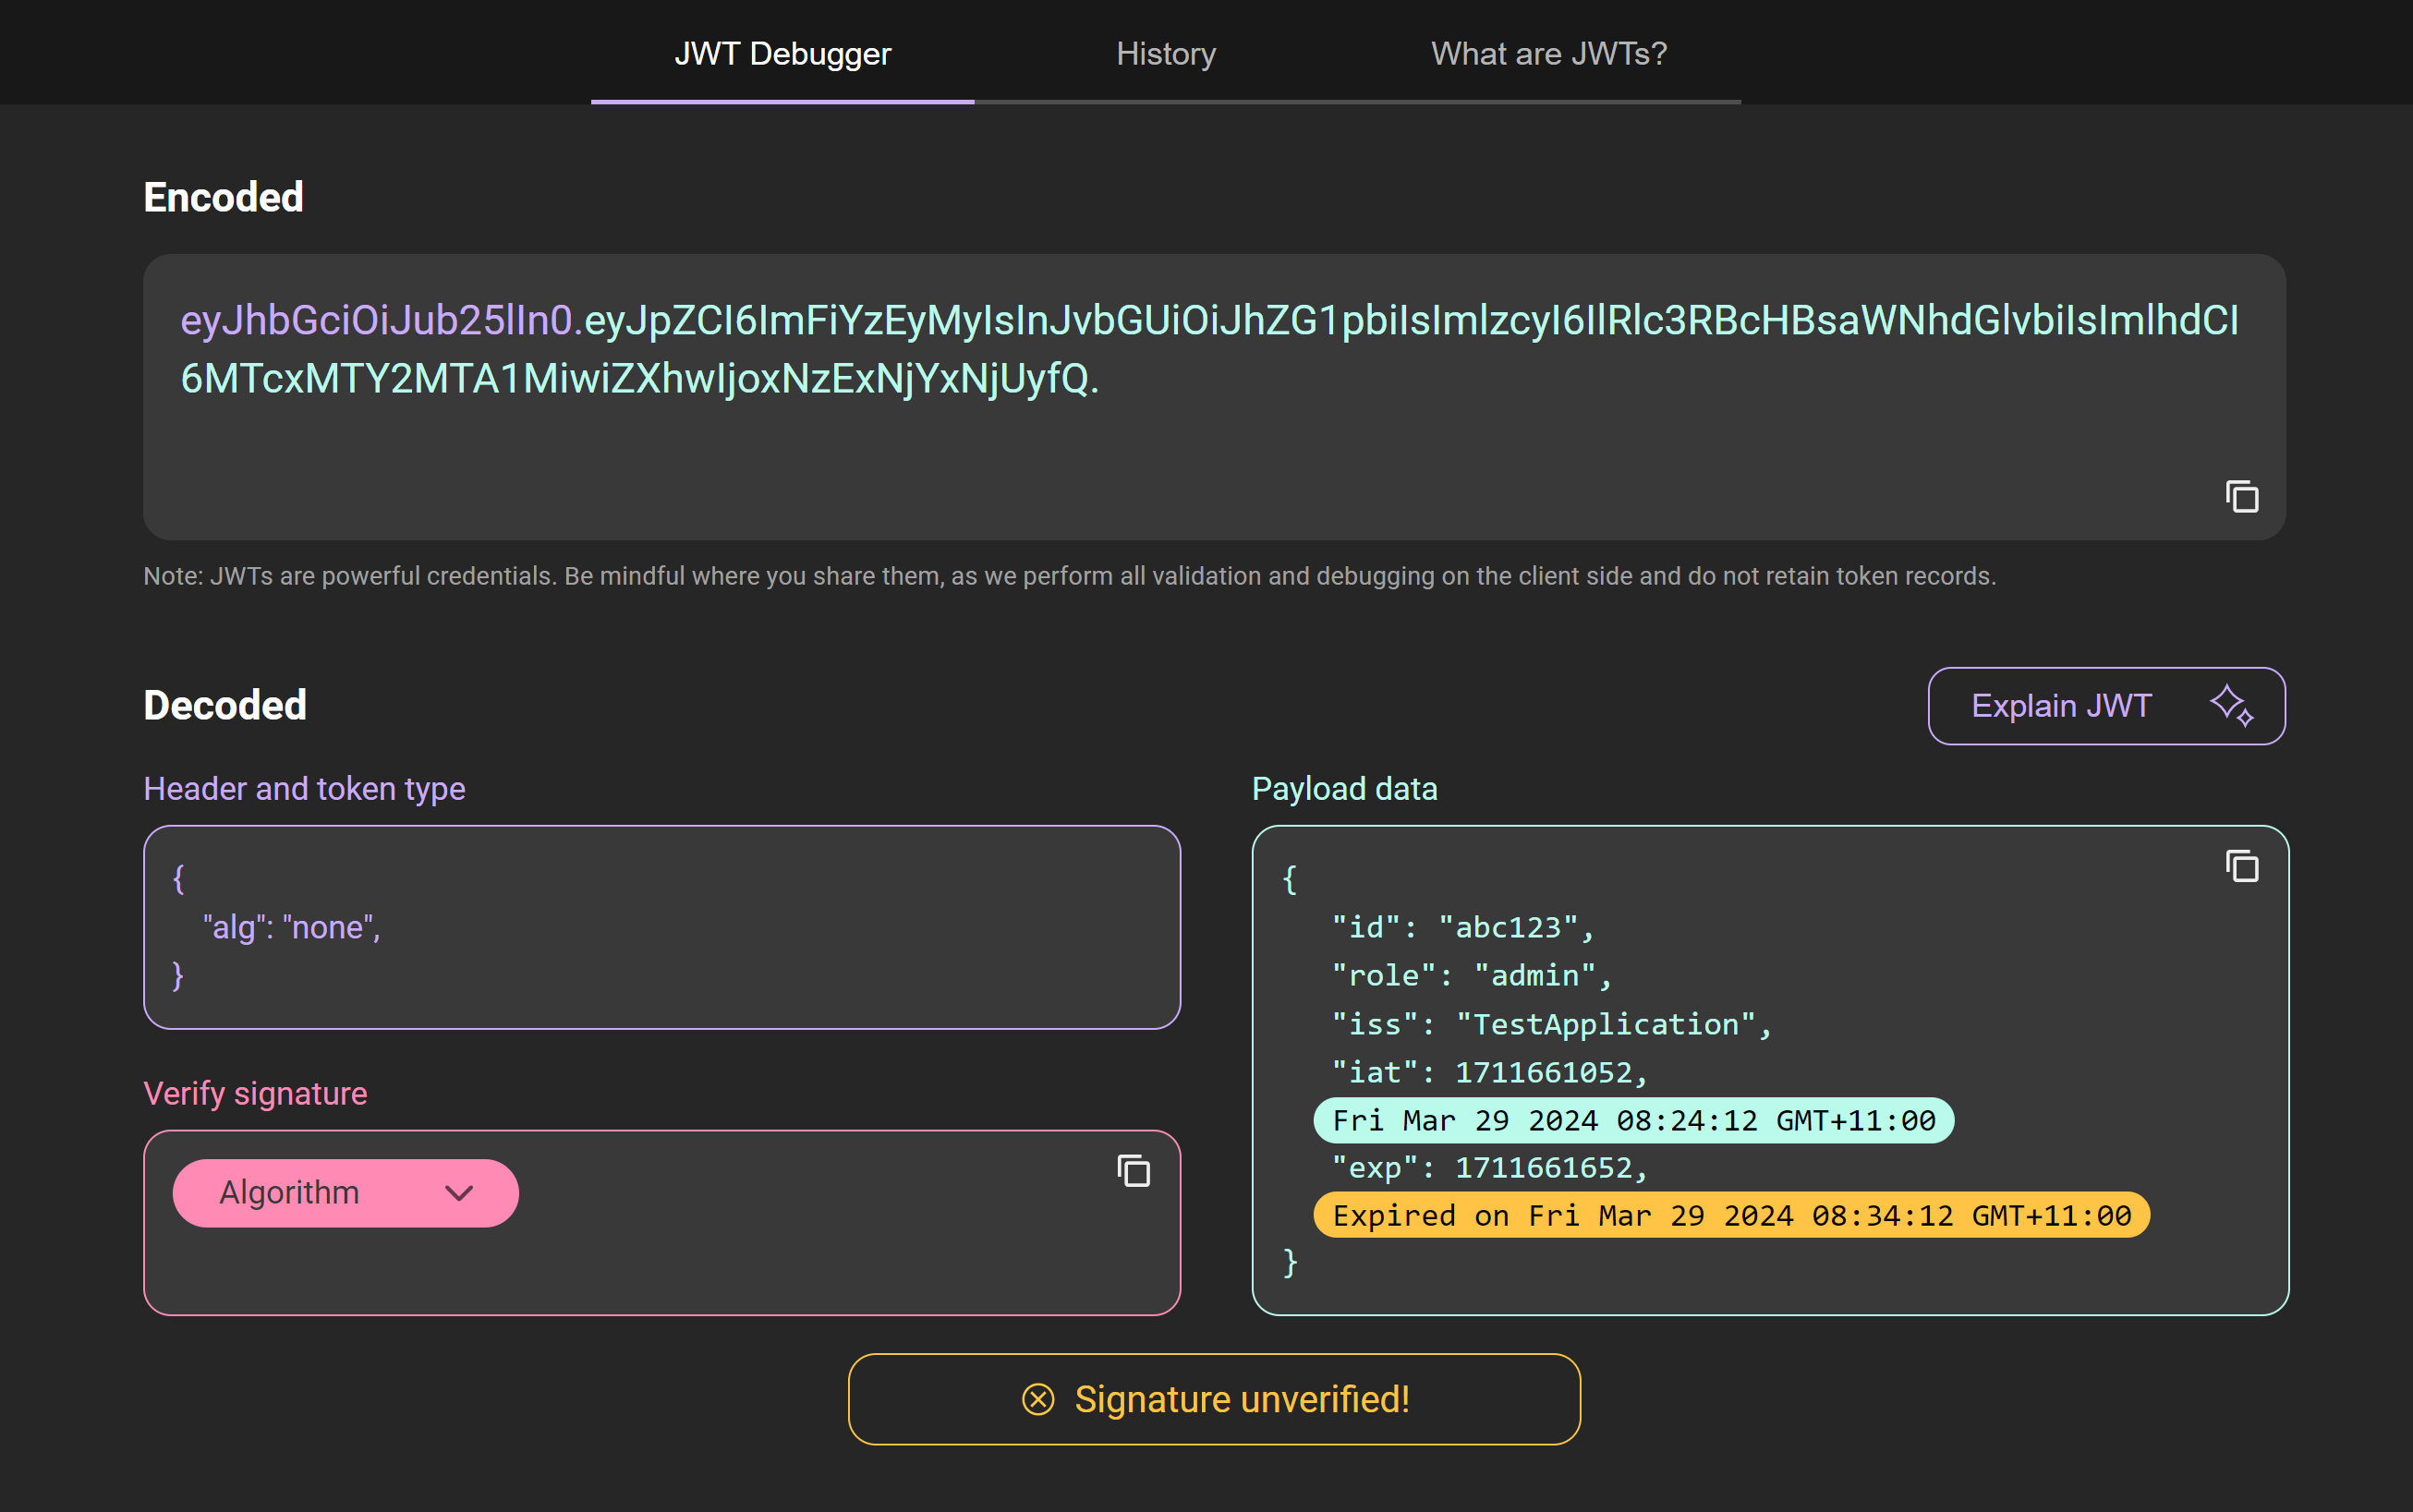
If we closely look at the header, we see alg:none. This is because we haven’t specified any algorithm to be used.
As we have already seen earlier, it is recommended that we use an algorithm to generate the signature.
So, let’s use the HMAC SHA256 algorithm in our method:
public static String createJwt() {
        // Recommended to be stored in Secret
        String secret = "5JzoMbk6E5qIqHSuBTgeQCARtUsxAkBiHwdjXOSW8kWdXzYmP3X51C0";
        Key hmacKey = new SecretKeySpec(Base64.getDecoder().decode(secret),
                SignatureAlgorithm.HS256.getJcaName());
        return Jwts.builder()
                .claim("id", "abc123")
                .claim("role", "admin")
                .setIssuer("TestApplication")
                .setIssuedAt(java.util.Date.from(Instant.now()))
                .setExpiration(Date.from(Instant.now().plus(10, ChronoUnit.MINUTES)))
                .signWith(hmacKey)
                .compact();
    }
The resultant token created looks like this:
eyJthbGciOiJIUzI1NiJ9.eyJpZCI6ImFiYzEyMyIsInJvbGUiOiJhZG1pbiIsImlz
cyI6IlRlc3RBcHBsaWNhdGlvbiIsImlhdCI6MTcxMjMyODQzMSwiZXhwIjoxNzEyMzI5MDMxfQ.
pj9AvbLtwITqBYazDnaTibCLecM-cQ5RAYw2YYtkyeA
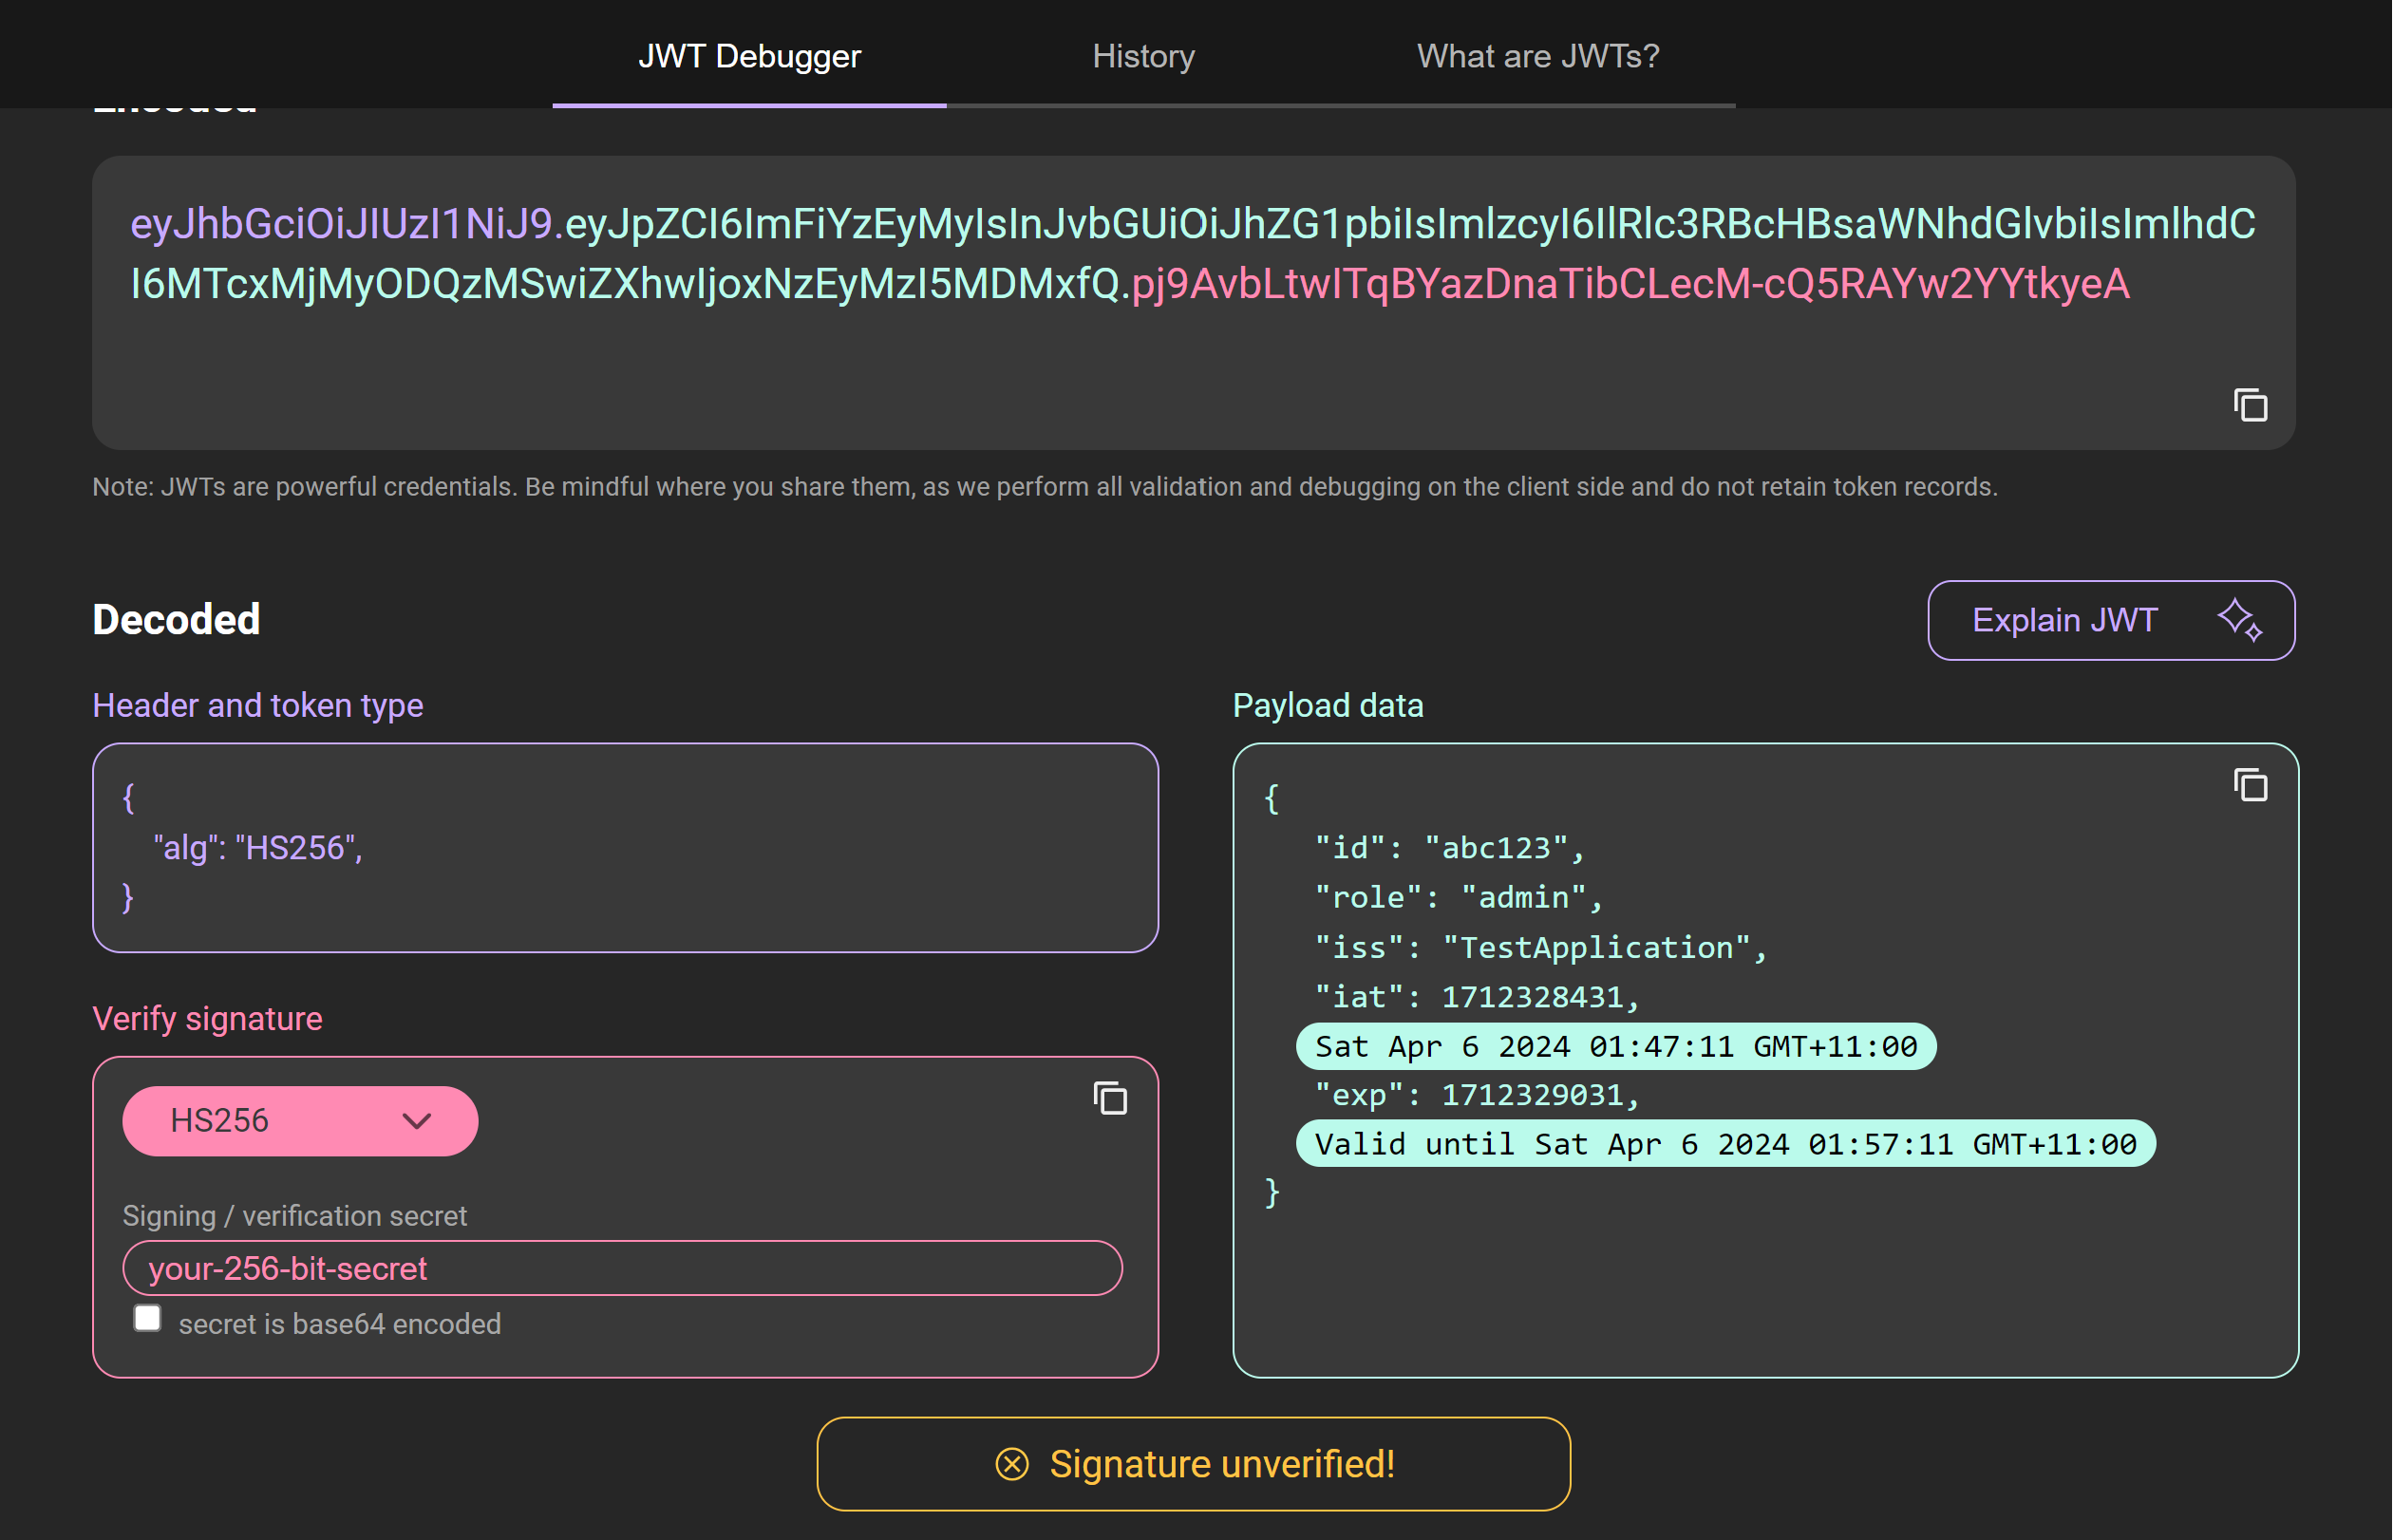
Decoding this JWT gives us:
Parsing JWT Token
Now that we have created the JWT, let’s look at how to parse the token to extract the claims. We can only parse the token if we know the secret key that was used to create the JWT in the first place. The below code can be used to achieve this:
public static Jws<Claims> parseJwt(String jwtString) {
        // Recommended to be stored in Secret
        String secret = "5JzoMbk6E5qIqHSuBTgeQCARtUsxAkBiHwdjXOSW8kWdXzYmP3X51C0";
        Key hmacKey = new SecretKeySpec(Base64.getDecoder().decode(secret),
                SignatureAlgorithm.HS256.getJcaName());

        Jws<Claims> jwt = Jwts.parserBuilder()
                .setSigningKey(hmacKey)
                .build()
                .parseClaimsJws(jwtString);

        return jwt;
    }
Here, the method parseJwt takes the JWT token as a String argument. Using the same secret key (used for creating the token) this token can be parsed to retrieve the claims.
This can be verified using the below test:
@Test
    public void testParseJwtClaims() {
        String jwtToken = JWTCreator.createJwt();
        assertNotNull(jwtToken);
        Jws<Claims> claims = JWTCreator.parseJwt(jwtToken);
        assertNotNull(claims);
        Assertions.assertAll(
                () -> assertNotNull(claims.getSignature()),
                () -> assertNotNull(claims.getHeader()),
                () -> assertNotNull(claims.getBody()),
                () -> assertEquals(claims.getHeader().getAlgorithm(), "HS256"),
                () -> assertEquals(claims.getBody().get("id"), "abc123"),
                () -> assertEquals(claims.getBody().get("role"), "admin"),
                () -> assertEquals(claims.getBody().getIssuer(), "TestApplication")
        );
    }
For a full list of the available parsing methods, refer to the documentation.
Comparing Basic Authentication and JWT in Spring Security
Before we dive into the implementation of JWT in a sample Spring Boot application, let’s look at a few points of comparison between BasicAuth and JWT.
| Comparison By | Basic Authentication | JWT |
|---|---|---|
| Authorization Headers | Sample Basic Auth Header: Authorization: Basic xxx. | Sample JWT Header: Authorization: Bearer xxx. |
| Validity and Expiration | Basic Authentication credentials are configured once and the same credentials need to be passed with every request. It never expires. | With JWT token, we can set validity/expiry using the exp registered claim after which the token throws a io.jsonwebtoken.ExpiredJwtException. This makes JWT more secure as the token validity is short. The user would have to resend the request to generate a new token. |
| Data | Basic Authentication is meant to handle only credentials (typically username-password). | JWT can include additional information such as id, roles, etc. Once the signature is validated, the server can trust the data sent by the client thus avoiding any additional lookups that maybe needed otherwise. |
Implementing JWT in a Spring Boot Application
Now that we understand JWT better, let’s implement it in a simple Spring Boot application. In our pom.xml, let’s add the below dependencies:
<dependency>
			<groupId>org.springframework.boot</groupId>
			<artifactId>spring-boot-starter-web</artifactId>
		</dependency>
		<dependency>
			<groupId>org.springframework.boot</groupId>
			<artifactId>spring-boot-starter-security</artifactId>
		</dependency>
		<dependency>
			<groupId>io.jsonwebtoken</groupId>
			<artifactId>jjwt-api</artifactId>
			<version>0.11.1</version>
		</dependency>
		<dependency>
			<groupId>io.jsonwebtoken</groupId>
			<artifactId>jjwt-impl</artifactId>
			<version>0.11.1</version>
			<scope>runtime</scope>
		</dependency>
		<dependency>
			<groupId>io.jsonwebtoken</groupId>
			<artifactId>jjwt-jackson</artifactId>
			<version>0.11.1</version>
			<scope>runtime</scope>
		</dependency>
We have created a simple spring boot Library application that uses an in-memory H2 database to store data. The application is configured to run on port 8083. To run the application:
mvnw clean verify spring-boot:run (for Windows)
./mvnw clean verify spring-boot:run (for Linux)
Intercepting the Spring Security Filter Chain for JWT
The application has a REST endpoint /library/books/all to get all the books stored in the DB. IF we make this GET call via Postman, we get a 401 UnAuthorized error:
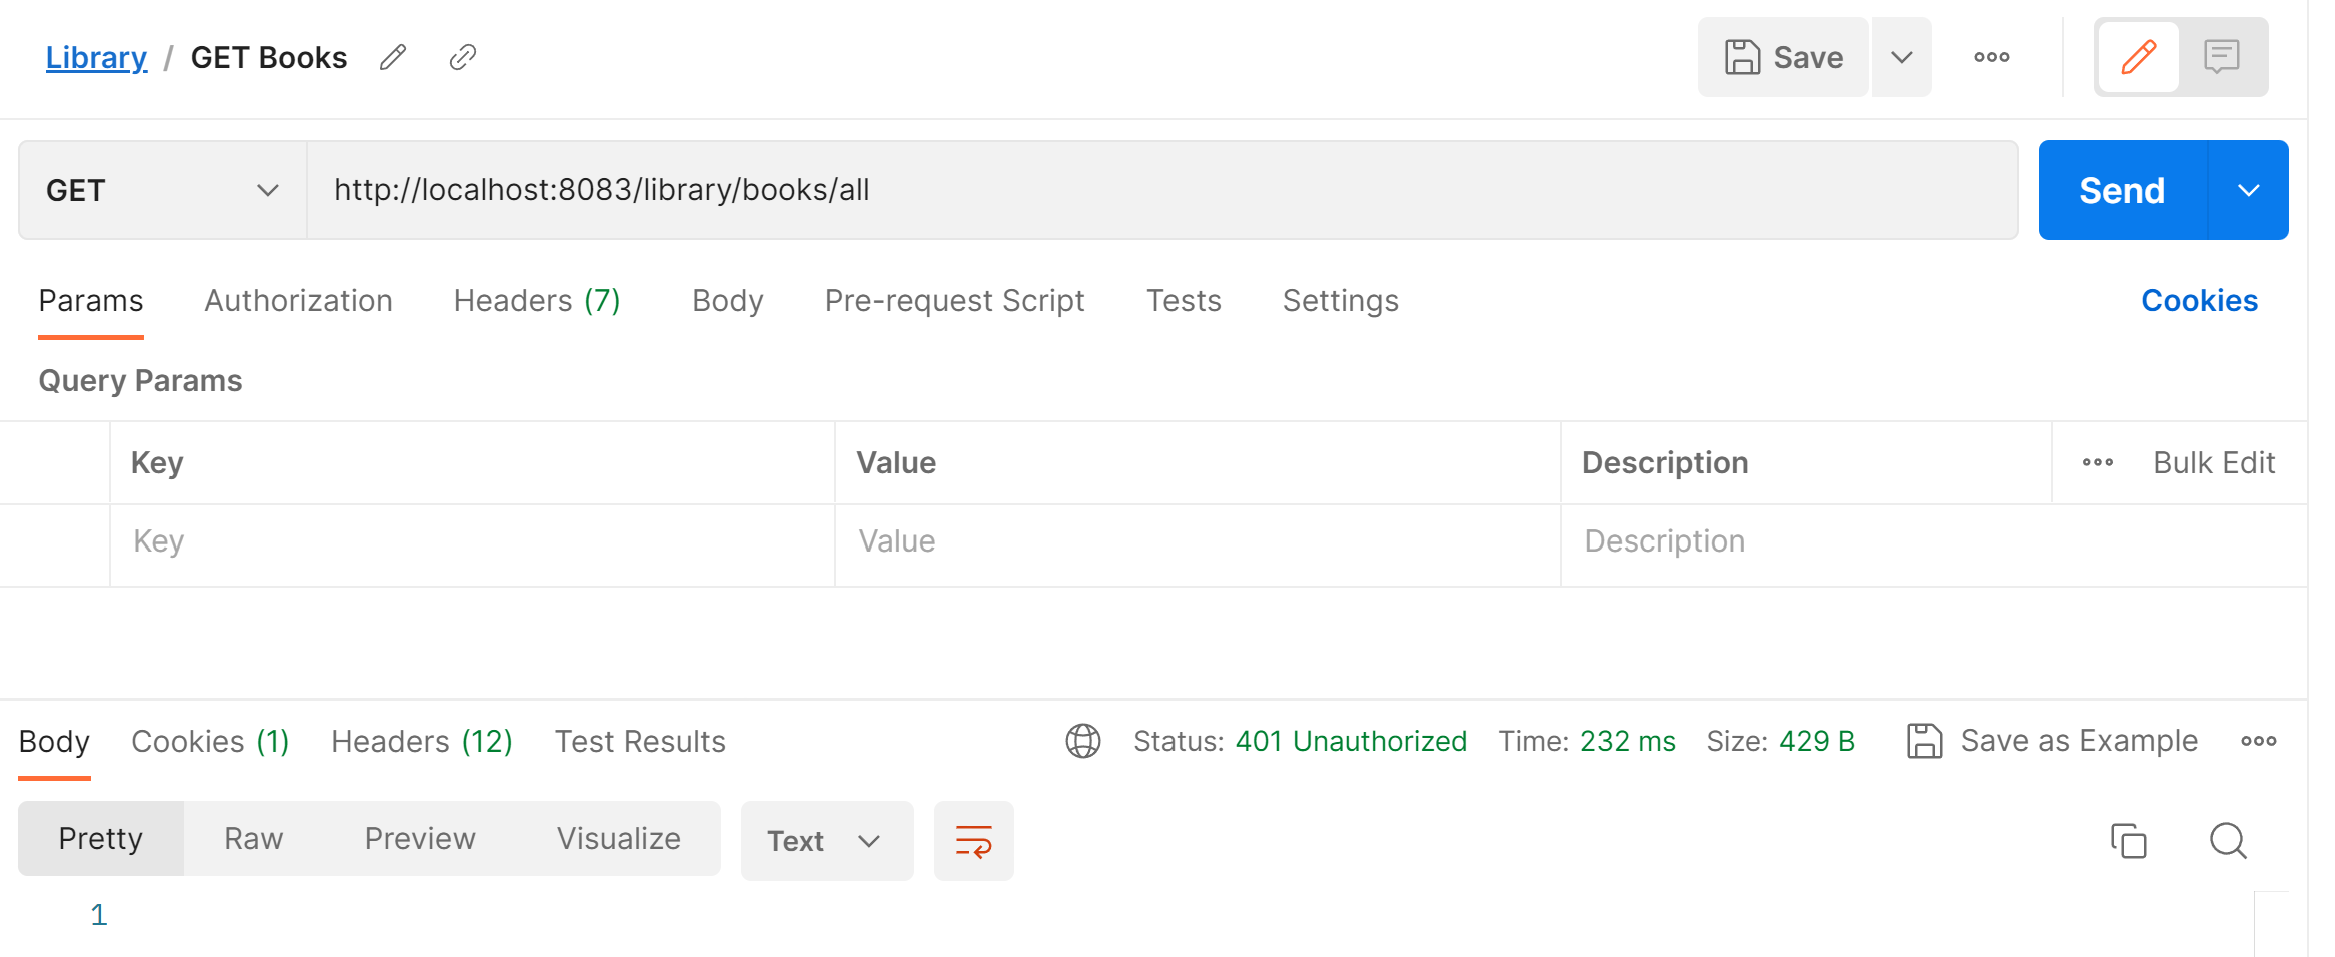
This is because, the spring-boot-starter-security dependency added in our pom.xml, automatically brings in Basic authentication to all the endpoints created.
Since we haven’t specified any credentials in Postman we get the UnAuthorized error.
For the purpose of this article, we need to replace Basic Authentication with JWT-based authentication.
We know that Spring provides security to our endpoints, by triggering a chain of filters that handle authentication and authorization for every
request. The UsernamePasswordAuthenticationFilter is responsible for validating the credentials for every request.
In order to override this filter, let’s create a new Filter called JwtFilter. This filter will extend the OncePerRequestFilter class as we want the filter to be called ony once per request:
@Component
@Slf4j
public class JwtFilter extends OncePerRequestFilter {

    private final AuthUserDetailsService userDetailsService;

    private final JwtHelper jwtHelper;

    public JwtFilter(AuthUserDetailsService userDetailsService, JwtHelper jwtHelper) {
        this.userDetailsService = userDetailsService;
        this.jwtHelper = jwtHelper;
    }


    @Override
    protected void doFilterInternal(HttpServletRequest request,
                                    HttpServletResponse response,
                                    FilterChain filterChain)
            throws ServletException, IOException {
        log.info("Inside JWT filter");
        // Code to validate the Authorization header
    }
}
The JwtHelper class is responsible for creating and validating the token. Let’s look at how to create a token first:
public String createToken(Map<String, Object> claims, String subject) {
    Date expiryDate =
        Date.from(Instant.ofEpochMilli(System.currentTimeMillis() +
        jwtProperties.getValidity()));
    Key hmacKey = new SecretKeySpec(Base64.getDecoder()
        .decode(jwtProperties.getSecretKey()),
            SignatureAlgorithm.HS256.getJcaName());
    return Jwts.builder()
            .setClaims(claims)
            .setSubject(subject)
            .setIssuedAt(new Date(System.currentTimeMillis()))
            .setExpiration(expiryDate)
            .signWith(hmacKey)
            .compact();
}
The following params are responsible for creating the token:
claimsrefers to an empty map. No user specific claims have been defined for this example.subjectrefers to the username passed by the user when making the API call to create a token.expiryDaterefers to the date after adding ‘x’ milliseconds to the current date. The value of ‘x’ is defined in the propertyjwt.validity.hmacKeyrefers to thejva.security.Keyobject used to sign the JWT request. For this example, the secret used is defined in propertyjwt.secretKeyandHS256algorithm is used.
This method returns a String token that needs to be passed to the Authorization header with every request.
Now that we have created a token, let’s look at the doFilterInternal method in the JwtFilter class and understand the responsibility of this Filter class:
@Override
protected void doFilterInternal(
    HttpServletRequest request,
    HttpServletResponse response,
    FilterChain filterChain
) throws ServletException, IOException {

      final String authorizationHeader = request.getHeader(AUTHORIZATION);
      String jwt = null;
      String username = null;
      if (Objects.nonNull(authorizationHeader) &&
              authorizationHeader.startsWith("Bearer ")) {
          jwt = authorizationHeader.substring(7);
          username = jwtHelper.extractUsername(jwt);
      }

      if (Objects.nonNull(username) &&
              SecurityContextHolder.getContext().getAuthentication() == null) {
          UserDetails userDetails =
              this.userDetailsService.loadUserByUsername(username);
          boolean isTokenValidated =
              jwtHelper.validateToken(jwt, userDetails);
          if (isTokenValidated) {
              UsernamePasswordAuthenticationToken usernamePasswordAuthenticationToken =
                      new UsernamePasswordAuthenticationToken(
                                  userDetails, null, userDetails.getAuthorities());
              usernamePasswordAuthenticationToken.setDetails(
                      new WebAuthenticationDetailsSource().buildDetails(request));
              SecurityContextHolder.getContext().setAuthentication(
                      usernamePasswordAuthenticationToken);
          }
      }

  filterChain.doFilter(request, response);
}
Step 1. Reads the Authorization header and extracts the JWT string.
Step 2. Parses the JWT string and extracts the username. We use the io.jsonwebtoken library Jwts.parseBuilder() for this purpose. The jwtHelper.extractUsername() looks as below:
public String extractUsername(String bearerToken) {
        return extractClaimBody(bearerToken, Claims::getSubject);
    }
public <T> T extractClaimBody(String bearerToken,
            Function<Claims, T> claimsResolver) {
        Jws<Claims> jwsClaims = extractClaims(bearerToken);
        return claimsResolver.apply(jwsClaims.getBody());
        }
private Jws<Claims> extractClaims(String bearerToken) {
        return Jwts.parserBuilder().setSigningKey(jwtProperties.getSecretKey())
        .build().parseClaimsJws(bearerToken);
        }
Step.3. Once the username is extracted, we verify if a valid Authentication object i.e. if a logged-in user is available using SecurityContextHolder.getContext().getAuthentication(). If not, we use the Spring Security UserDetailsService to load the UserDetails object.
For this example we have created AuthUserDetailsService class which returns us the UserDetails object.
public class AuthUserDetailsService implements UserDetailsService {

    private final UserProperties userProperties;

    @Autowired
    public AuthUserDetailsService(UserProperties userProperties) {
        this.userProperties = userProperties;
    }


    @Override
    public UserDetails loadUserByUsername(String username)
            throws UsernameNotFoundException {

        if (StringUtils.isEmpty(username) ||
                !username.equals(userProperties.getName())) {
            throw new UsernameNotFoundException(
                    String.format("User not found, or unauthorized %s", username));
        }

        return new User(userProperties.getName(),
                userProperties.getPassword(), new ArrayList<>());
    }
}
The username and password under UserProperties are loaded from application.yml as:
spring:
  security:
    user:
      name: libUser
      password: libPassword
Step.4. Next, the JwtFilter calls the jwtHelper.validateToken() to validate the extracted username and makes sure the jwt token has not expired.
public boolean validateToken(String token, UserDetails userDetails) {
        final String userName = extractUsername(token);
        return userName.equals(userDetails.getUsername()) && !isTokenExpired(token);
    }
private Boolean isTokenExpired(String bearerToken) {
        return extractExpiry(bearerToken).before(new Date());
        }
public Date extractExpiry(String bearerToken) {
        return extractClaimBody(bearerToken, Claims::getExpiration);
        }
Step.5. Once the token is validated, we create an instance of the Authentication object. Here, the object UsernamePasswordAuthenticationToken object is created (which is an implementation of the Authentication interface) and set it to SecurityContextHolder.getContext().setAuthentication(usernamePasswordAuthenticationToken). This indicates that the user is now authenticated.
Step.6. Finally, we call filterChain.doFilter(request, response) so that the next filter gets called in the FilterChain.
With this, we have successfully created a filter class to validate the token. We will look at exception handling in the further sections.
JWT Token Creation Endpoints
In this section, we will create a Controller class to create an endpoint, that will allow us to create a JWT token string. This token will be set in the Authorization header when we make calls to our Library application.
Let’s create a TokenController class:
@RestController
public class TokenController {

    private final TokenService tokenService;

    public TokenController(TokenService tokenService) {
        this.tokenService = tokenService;
    }

    @PostMapping("/token/create")
    public TokenResponse createToken(@RequestBody TokenRequest tokenRequest) {
        return tokenService.generateToken(tokenRequest);
    }
}
The request body TokenRequest class will accept username and password:
@Data
@NoArgsConstructor
@AllArgsConstructor
@Builder
public class TokenRequest {
    private String username;
    private String password;
}
The TokenService class is responsible to validate the credentials passed in the request body and call jwtHelper.createToken() as defined in the previous section.
In order to authenticate the credentials, we need to implement an AuthenticationManager. Let’s create a SecurityConfiguration class to define all Spring security related configuration.
@Configuration
@EnableWebSecurity
public class SecurityConfiguration {

    private final JwtFilter jwtFilter;

    private final AuthUserDetailsService authUserDetailsService;

    private final JwtAuthenticationEntryPoint jwtAuthenticationEntryPoint;

    @Autowired
    public SecurityConfiguration(JwtFilter jwtFilter,
                                 AuthUserDetailsService authUserDetailsService,
                                 JwtAuthenticationEntryPoint
                                             jwtAuthenticationEntryPoint) {

        this.jwtFilter = jwtFilter;
        this.authUserDetailsService = authUserDetailsService;
        this.jwtAuthenticationEntryPoint = jwtAuthenticationEntryPoint;
    }

    @Bean
    public DaoAuthenticationProvider authenticationProvider() {
        final DaoAuthenticationProvider daoAuthenticationProvider =
                new DaoAuthenticationProvider();
        daoAuthenticationProvider.setUserDetailsService(authUserDetailsService);
        daoAuthenticationProvider.setPasswordEncoder(
                PlainTextPasswordEncoder.getInstance());
        return daoAuthenticationProvider;
    }

    @Bean
    public AuthenticationManager authenticationManager(HttpSecurity httpSecurity)
            throws Exception {
        return httpSecurity.getSharedObject(AuthenticationManagerBuilder.class)
                .authenticationProvider(authenticationProvider())
                .build();
    }
}
The AuthenticationManager uses the AuthUserDetailsService which uses the spring.security.user property.
Now that we have the AuthenticationManager in place, let’s look at how the TokenService is defined:
@Service
public class TokenService {

    private final AuthenticationManager authenticationManager;

    private final AuthUserDetailsService userDetailsService;

    private final JwtHelper jwtHelper;

    public TokenService(AuthenticationManager authenticationManager,
                        AuthUserDetailsService userDetailsService,
                        JwtHelper jwtHelper) {
        this.authenticationManager = authenticationManager;
        this.userDetailsService = userDetailsService;
        this.jwtHelper = jwtHelper;
    }


    public TokenResponse generateToken(TokenRequest tokenRequest) {
        this.authenticationManager.authenticate(
                new UsernamePasswordAuthenticationToken(
                        tokenRequest.getUsername(), tokenRequest.getPassword()));
        final UserDetails userDetails =
                userDetailsService.loadUserByUsername(tokenRequest.getUsername());
        String token = jwtHelper.createToken(
                Collections.emptyMap(), userDetails.getUsername());
        return TokenResponse.builder()
                .token(token)
                .build();
    }
}
TokenResponse is the Response object that contains the token string:
@Data
@NoArgsConstructor
@AllArgsConstructor
@Builder
public class TokenResponse {

    private String token;

}
With the API now created, let’s start our application and try to hit the endpoint using Postman.
We see a 401 Unauthorized error as below:
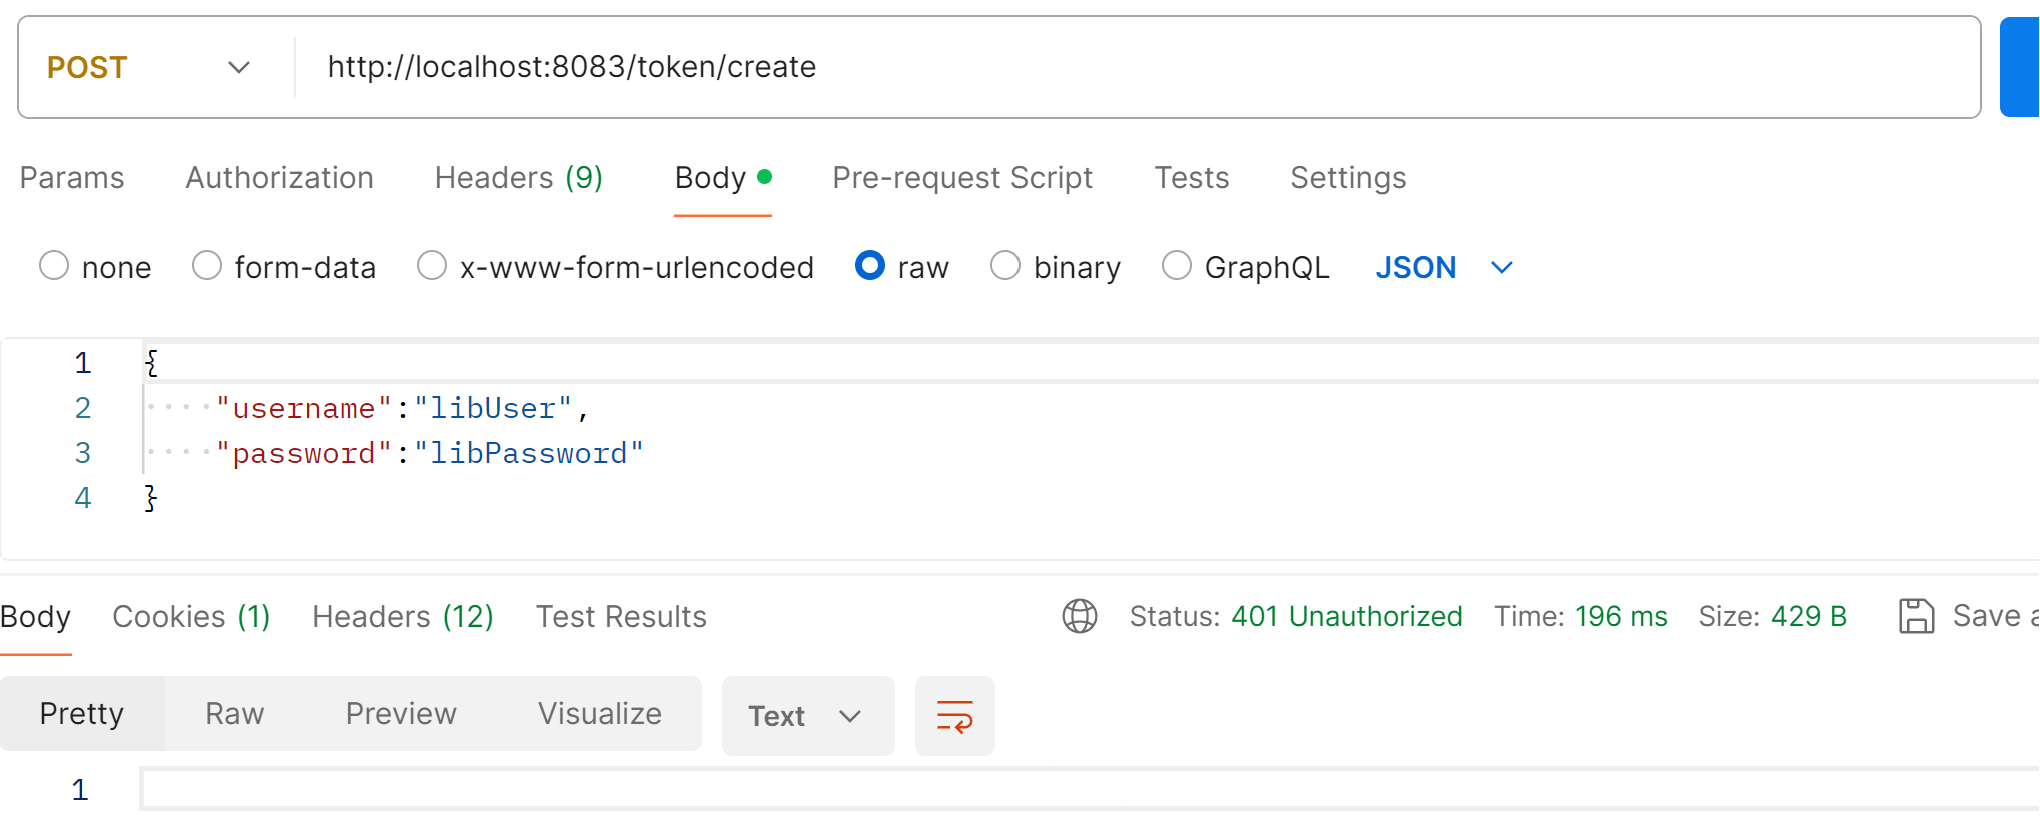
The reason is the same as we encountered before. Spring Security secures all endpoints by default.
We need a way to exclude only the token endpoint from being secured.
Also, on startup logs we can see that although we have defined JwtFilter and we expect this filter to override UsernamePasswordAuthenticationFilter, we do not see this filter being wired in the security chain as below:
2024-05-22 15:41:09.441  INFO 20432 --- [           main]
o.s.s.web.DefaultSecurityFilterChain     :
Will secure any request with
    [org.springframework.security.web.session.DisableEncodeUrlFilter@14d36bb2,
org.springframework.security.web.context.request.async.
    WebAsyncManagerIntegrationFilter@432448,
org.springframework.security.web.context.SecurityContextPersistenceFilter@54d46c8,
org.springframework.security.web.header.HeaderWriterFilter@c7cf8c4,
org.springframework.security.web.csrf.CsrfFilter@17fb5184,
org.springframework.security.web.authentication.logout.LogoutFilter@42fa5cb,
org.springframework.security.web.authentication.
    UsernamePasswordAuthenticationFilter@70d7a49b,
org.springframework.security.web.authentication.ui.
    DefaultLoginPageGeneratingFilter@67cd84f9,
org.springframework.security.web.authentication.ui.
    DefaultLogoutPageGeneratingFilter@4452e13c,
org.springframework.security.web.authentication.www.
    BasicAuthenticationFilter@788d9139,
org.springframework.security.web.savedrequest.RequestCacheAwareFilter@5c34b0f2,
org.springframework.security.web.servletapi.
    SecurityContextHolderAwareRequestFilter@7dfec0bc,
org.springframework.security.web.authentication.
    AnonymousAuthenticationFilter@4d964c9e,
org.springframework.security.web.session.SessionManagementFilter@731fae,
org.springframework.security.web.access.ExceptionTranslationFilter@66d61298,
org.springframework.security.web.access.intercept.FilterSecurityInterceptor@55c20a91]
In order to chain the JwtFilter to the other set of filters and to exclude securing the token endpoint, let’s create a SecurityFilterChain bean in our SecurityConfiguration class:
@Bean
    public SecurityFilterChain configure (HttpSecurity http) throws Exception {
        return http.csrf().disable()
                .authorizeRequests()
                .antMatchers("/token/*").permitAll()
                .anyRequest().authenticated().and()
                .sessionManagement(session ->
                    session.sessionCreationPolicy(SessionCreationPolicy.STATELESS))
                .addFilterBefore(jwtFilter,
                    UsernamePasswordAuthenticationFilter.class)
                .exceptionHandling(exception ->
                    exception.authenticationEntryPoint(jwtAuthenticationEntryPoint))
                .build();
    }
In this configuration, we are interested in the following:
- antMatchers("/token/*").permitAll() - This will allow API endpoints that match the pattern
/token/*and exclude them from security. - anyRequest().authenticated() - Spring Security will secure all other API requests.
- addFilterBefore(jwtFilter, UsernamePasswordAuthenticationFilter.class) - This will wire the
JwtFilterbeforeUsernamePasswordAuthenticationFilterin the FilterChain. - exceptionHandling(exception -> exception.authenticationEntryPoint(jwtAuthenticationEntryPoint) - In case of authentication exception,
JwtAuthenticationEntryPointclass will be called. Here we have created aJwtAuthenticationEntryPointclass that implementsorg.springframework.security.web.AuthenticationEntryPointin order to handle unauthorized errors gracefully. We will look at handling exceptions in detail in the further sections.
With these changes, let’s restart our application and inspect the logs:
2024-05-22 16:13:07.803  INFO 16188 --- [           main]
o.s.s.web.DefaultSecurityFilterChain     : Will secure any request with
[org.springframework.security.web.session.DisableEncodeUrlFilter@73e25780,
org.springframework.security.web.context.request.async.
    WebAsyncManagerIntegrationFilter@1f4cb17b,
org.springframework.security.web.context.SecurityContextPersistenceFilter@b548f51,
org.springframework.security.web.header.HeaderWriterFilter@4f9980e1,
org.springframework.security.web.authentication.logout.LogoutFilter@6b92a0d1,
com.reflectoring.security.filter.JwtFilter@5961e92d,
org.springframework.security.web.savedrequest.RequestCacheAwareFilter@56976b8b,
org.springframework.security.web.servletapi.
    SecurityContextHolderAwareRequestFilter@74844216,
org.springframework.security.web.authentication.
    AnonymousAuthenticationFilter@280099a0,
org.springframework.security.web.session.SessionManagementFilter@144dc2f7,
org.springframework.security.web.access.ExceptionTranslationFilter@7a0f43dc,
org.springframework.security.web.access.intercept.
    FilterSecurityInterceptor@735167e1]
We see the JwtFilter being chained which indicates that the Basic auth has now been overridden by token based authentication.
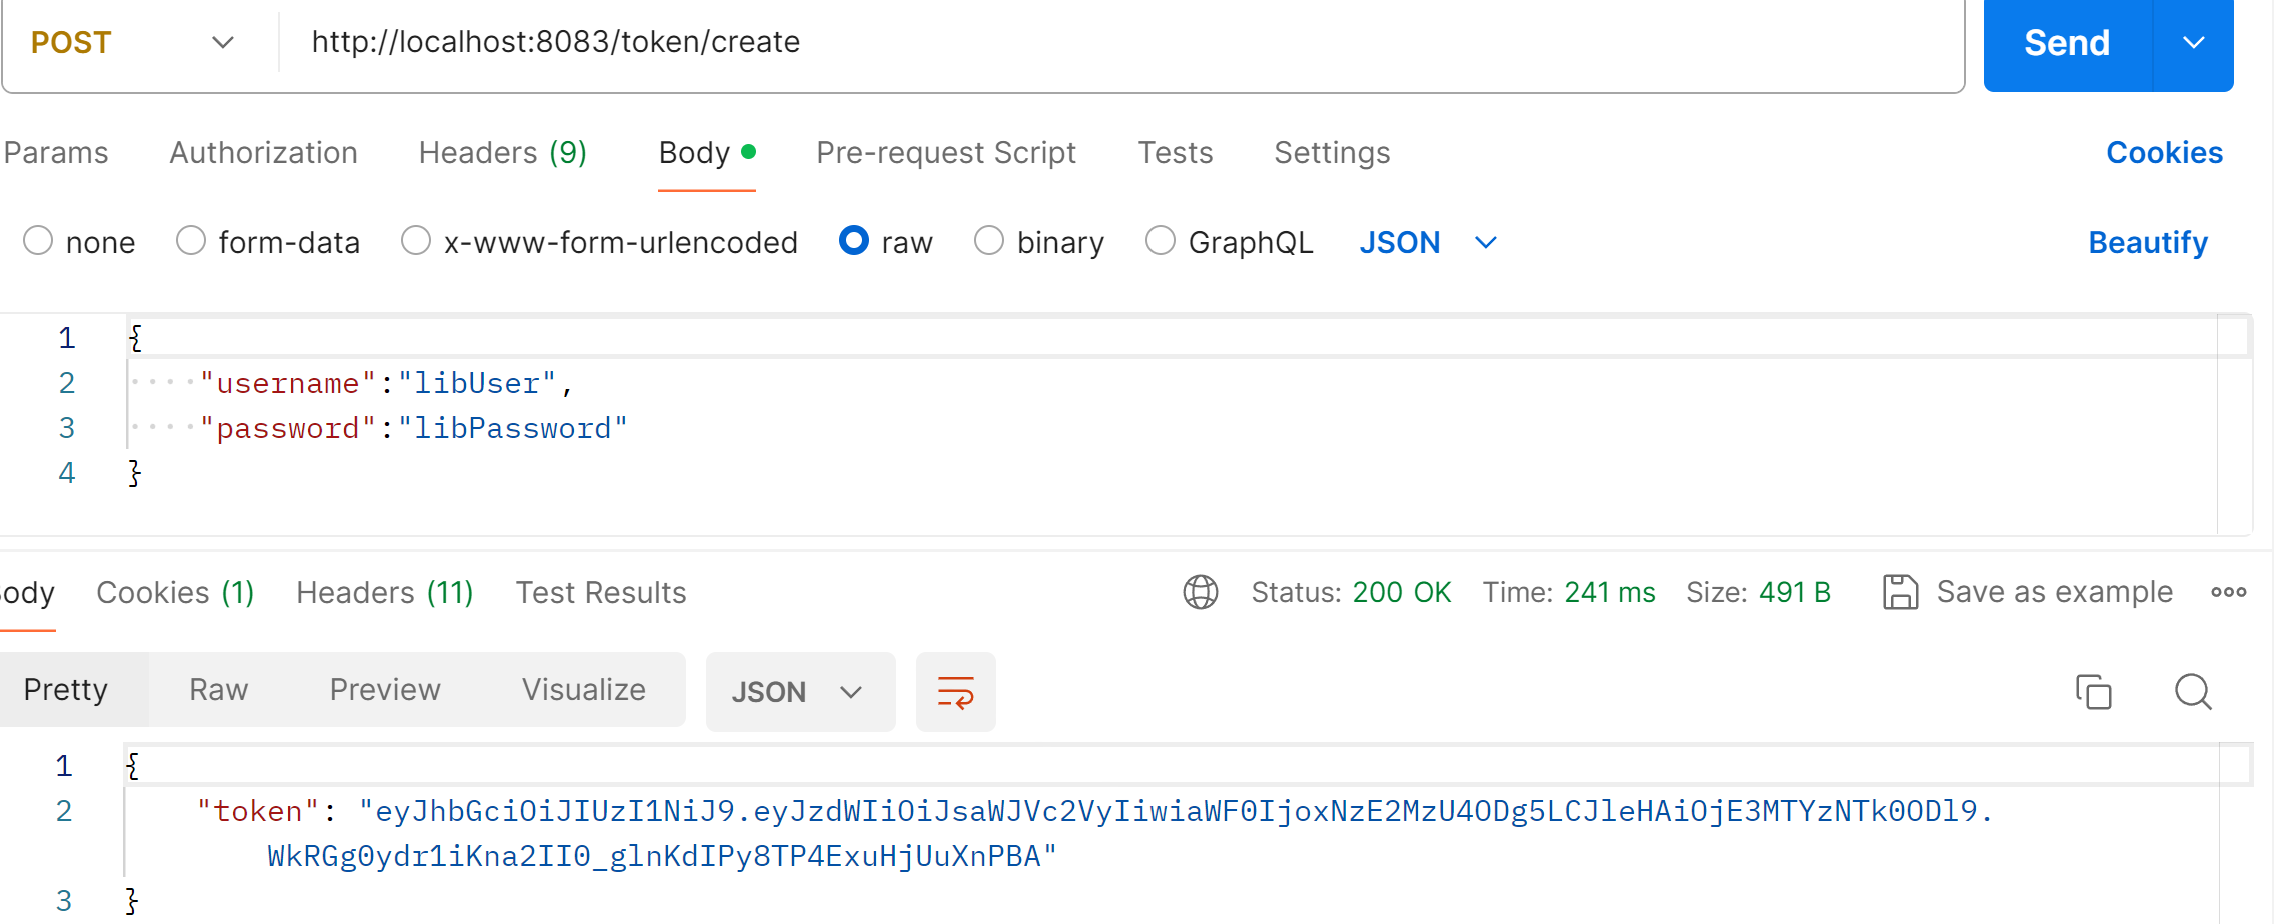
Now, let’s try to hit the /token/create endpoint again. We see that the endpoint is now able to successfully return the generated token:
Securing Library Application Endpoints
Now, that we are able to successfully create the token, we need to pass this token to our library application to successfully call /library/books/all.
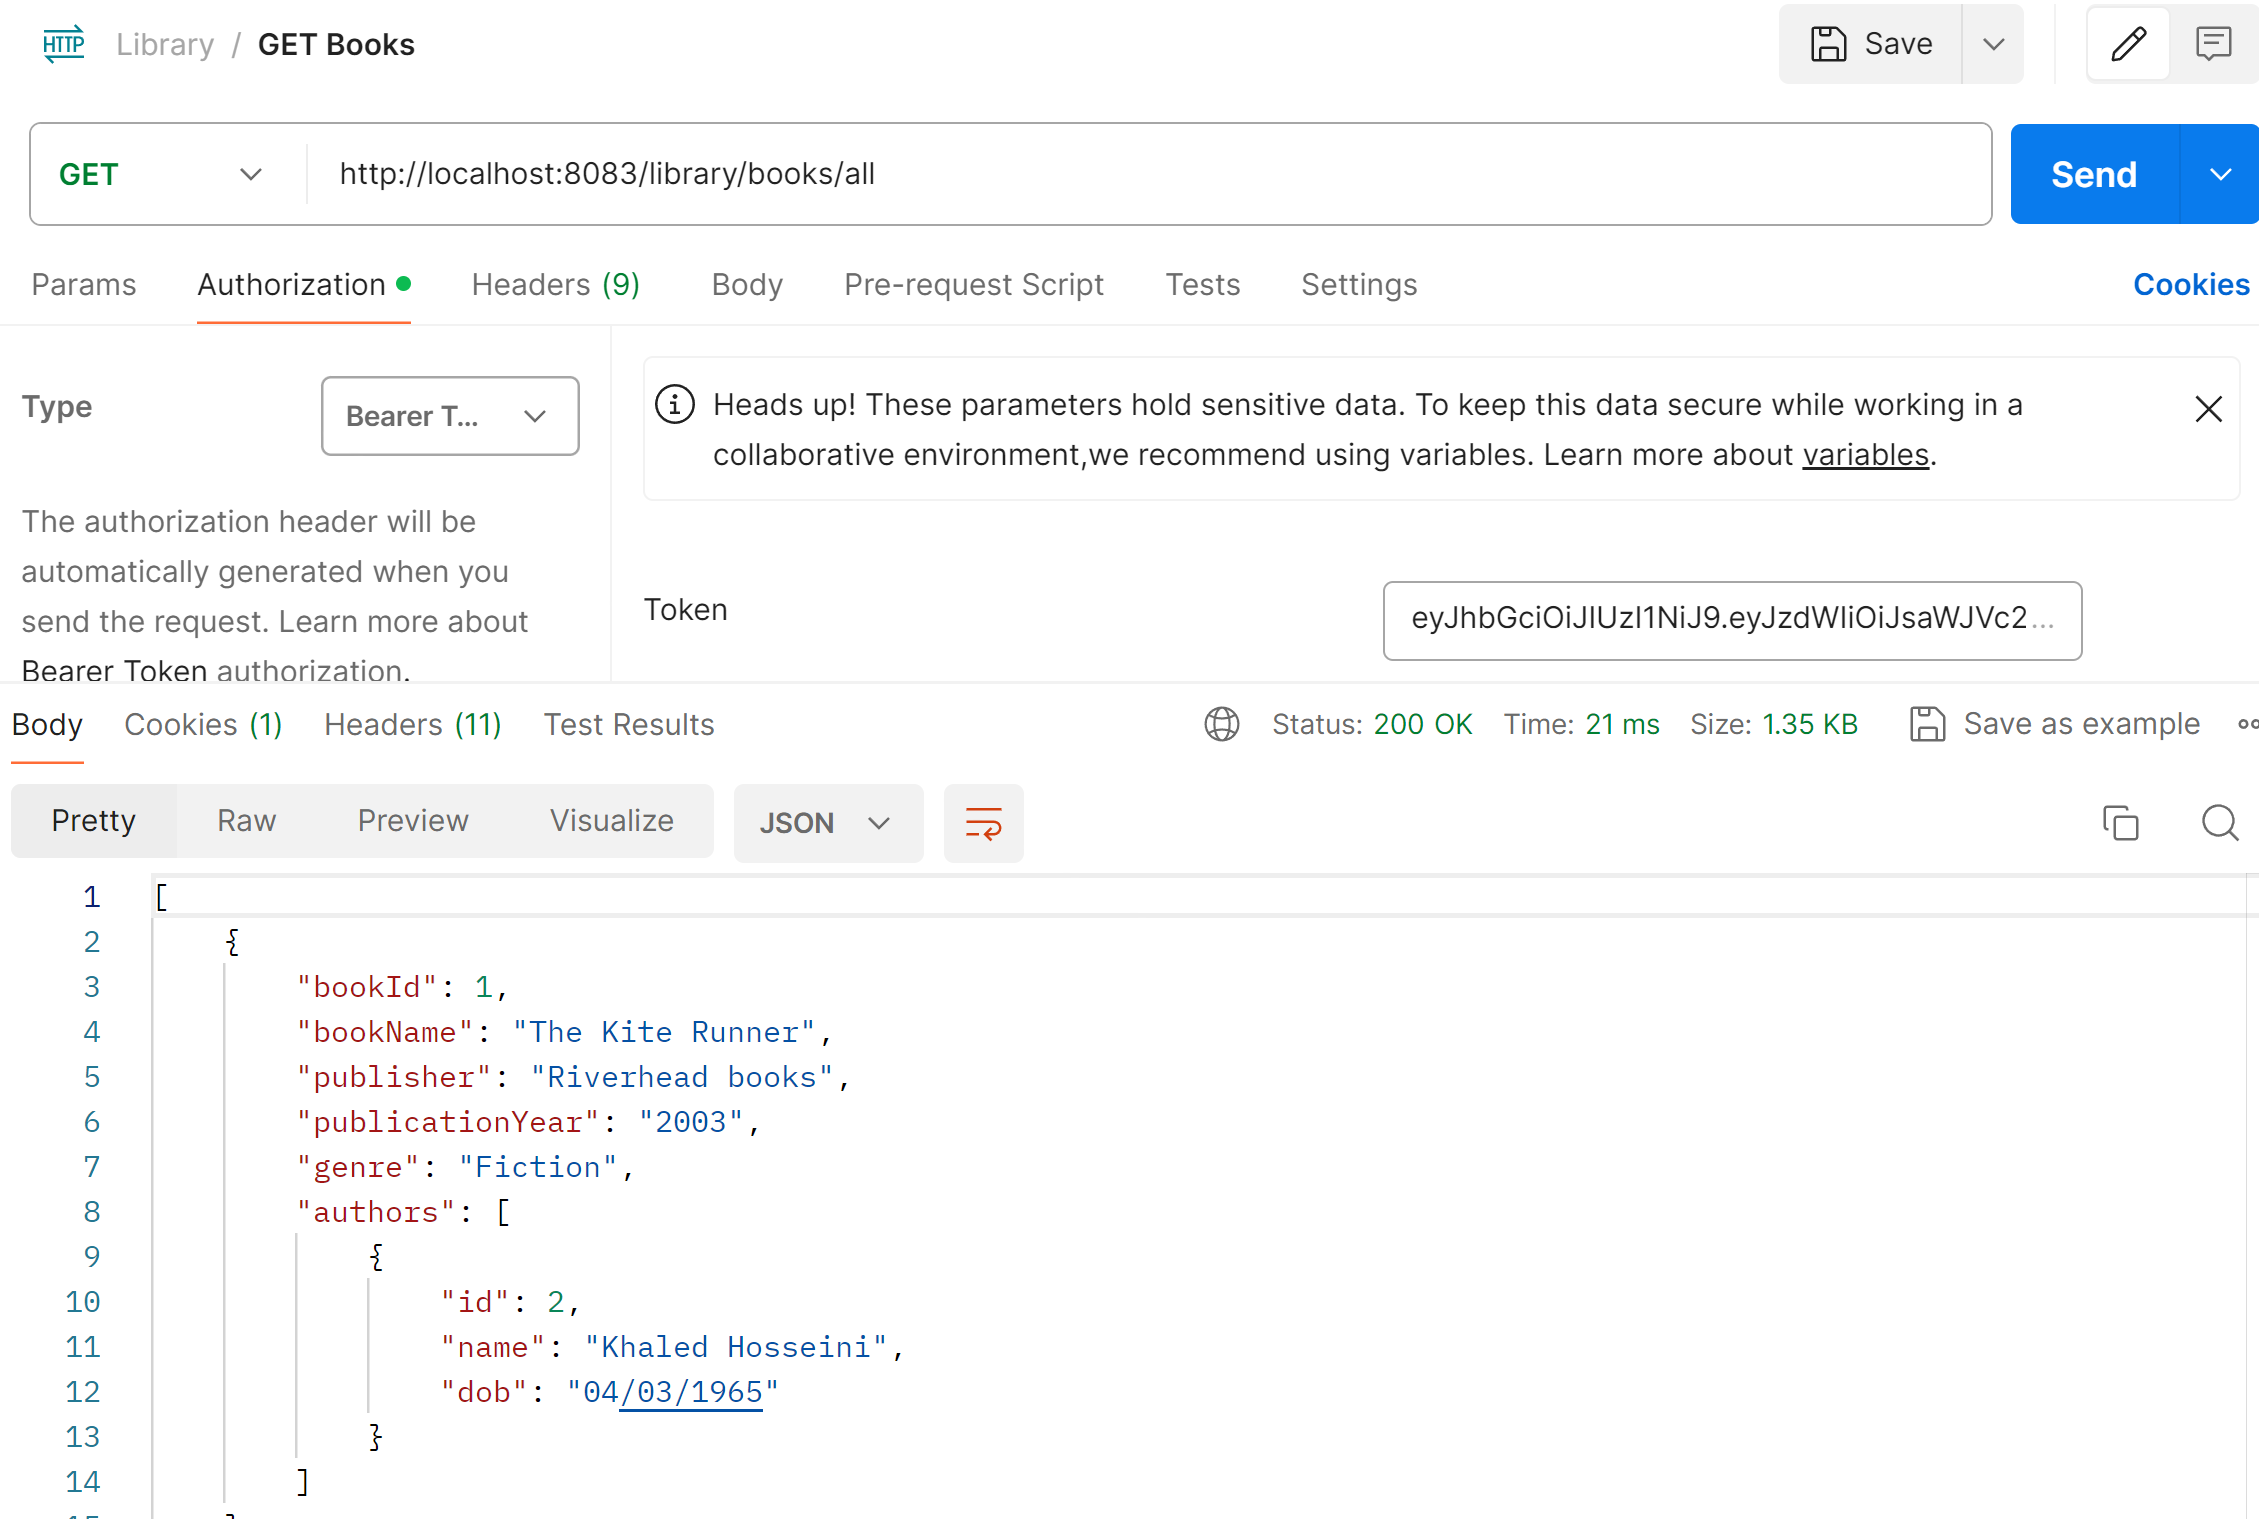
Let’s add an Authorization header of type Bearer Token with the generated token value and fire the request.
We can now see a 200 OK response as below:
Exception Handling with JWT
In this section, we will take a look at some commonly encountered exceptions from the io.jsonwebtoken package:
- ExpiredJwtException - The JWT token contains the expired time. When the token is parsed, if the expiration time has passed, an ExpiredJwtException is thrown.
- UnsupportedJwtException - This exception is thrown when a JWT is received in a format that is not expected. The most common use case of this error is when we try to parse a signed JWT with the method
Jwts.parserBuilder().setSigningKey(jwtProperties.getSecretKey()) .build().parseClaimsJwtinstead ofJwts.parserBuilder().setSigningKey(jwtProperties.getSecretKey()) .build().parseClaimsJws - MalformedJwtException - This exception indicates the JWT is incorrectly constructed.
- IncorrectClaimException - Indicates that the required claim does not have the expected value. Therefore, the JWT is not valid.
- MissingClaimException - This exception indicates that a required claim is missing in the JWT and hence not valid.
In general, it is considered a good practice to handle authentication related exceptions gracefully. In case of basic authentication, Spring security by default adds the BasicAuthenticationEntryPoint to the Security filter chain which wraps basic auth related errors to 401 Unauthorized.
Similarly, in our example we have explicitly created a JwtAuthenticationEntryPoint to handle possible authentication errors such as spring security’s BadCredentialsException or JJwt’s MalformedJwtException:
@Component
@Slf4j
public class JwtAuthenticationEntryPoint implements AuthenticationEntryPoint {
    @Override
    public void commence(HttpServletRequest request,
                         HttpServletResponse response,
                         AuthenticationException authException)
            throws IOException, ServletException {
        Exception exception = (Exception) request.getAttribute("exception");
        response.setStatus(HttpServletResponse.SC_UNAUTHORIZED);
        response.setContentType(APPLICATION_JSON_VALUE);
        log.error("Authentication Exception: {} ", exception, exception);
        Map<String, Object> data = new HashMap<>();
        data.put("message", exception != null ?
                exception.getMessage() : authException.getCause().toString());
        OutputStream out = response.getOutputStream();
        ObjectMapper mapper = new ObjectMapper();
        mapper.writeValue(out, data);
        out.flush();
    }
}
In our JwtFilter class, we are adding the exception message to the HttpServletRequest exception attribute. This allows us to use request.getAttribute("exception") and write it to the output stream.
public class JwtFilter extends OncePerRequestFilter {
   @Override
   protected void doFilterInternal(HttpServletRequest request,
                                   HttpServletResponse response,
                                   FilterChain filterChain)
           throws ServletException, IOException {
      try {
         //validate token here
      } catch (ExpiredJwtException jwtException) {
         request.setAttribute("exception", jwtException);
      } catch (BadCredentialsException |
               UnsupportedJwtException |
               MalformedJwtException e) {
         log.error("Filter exception: {}", e.getMessage());
         request.setAttribute("exception", e);
      }
      filterChain.doFilter(request, response);
   }
}
With these changes, we can now see an exception message with 401 Unauthorized exceptions as below:
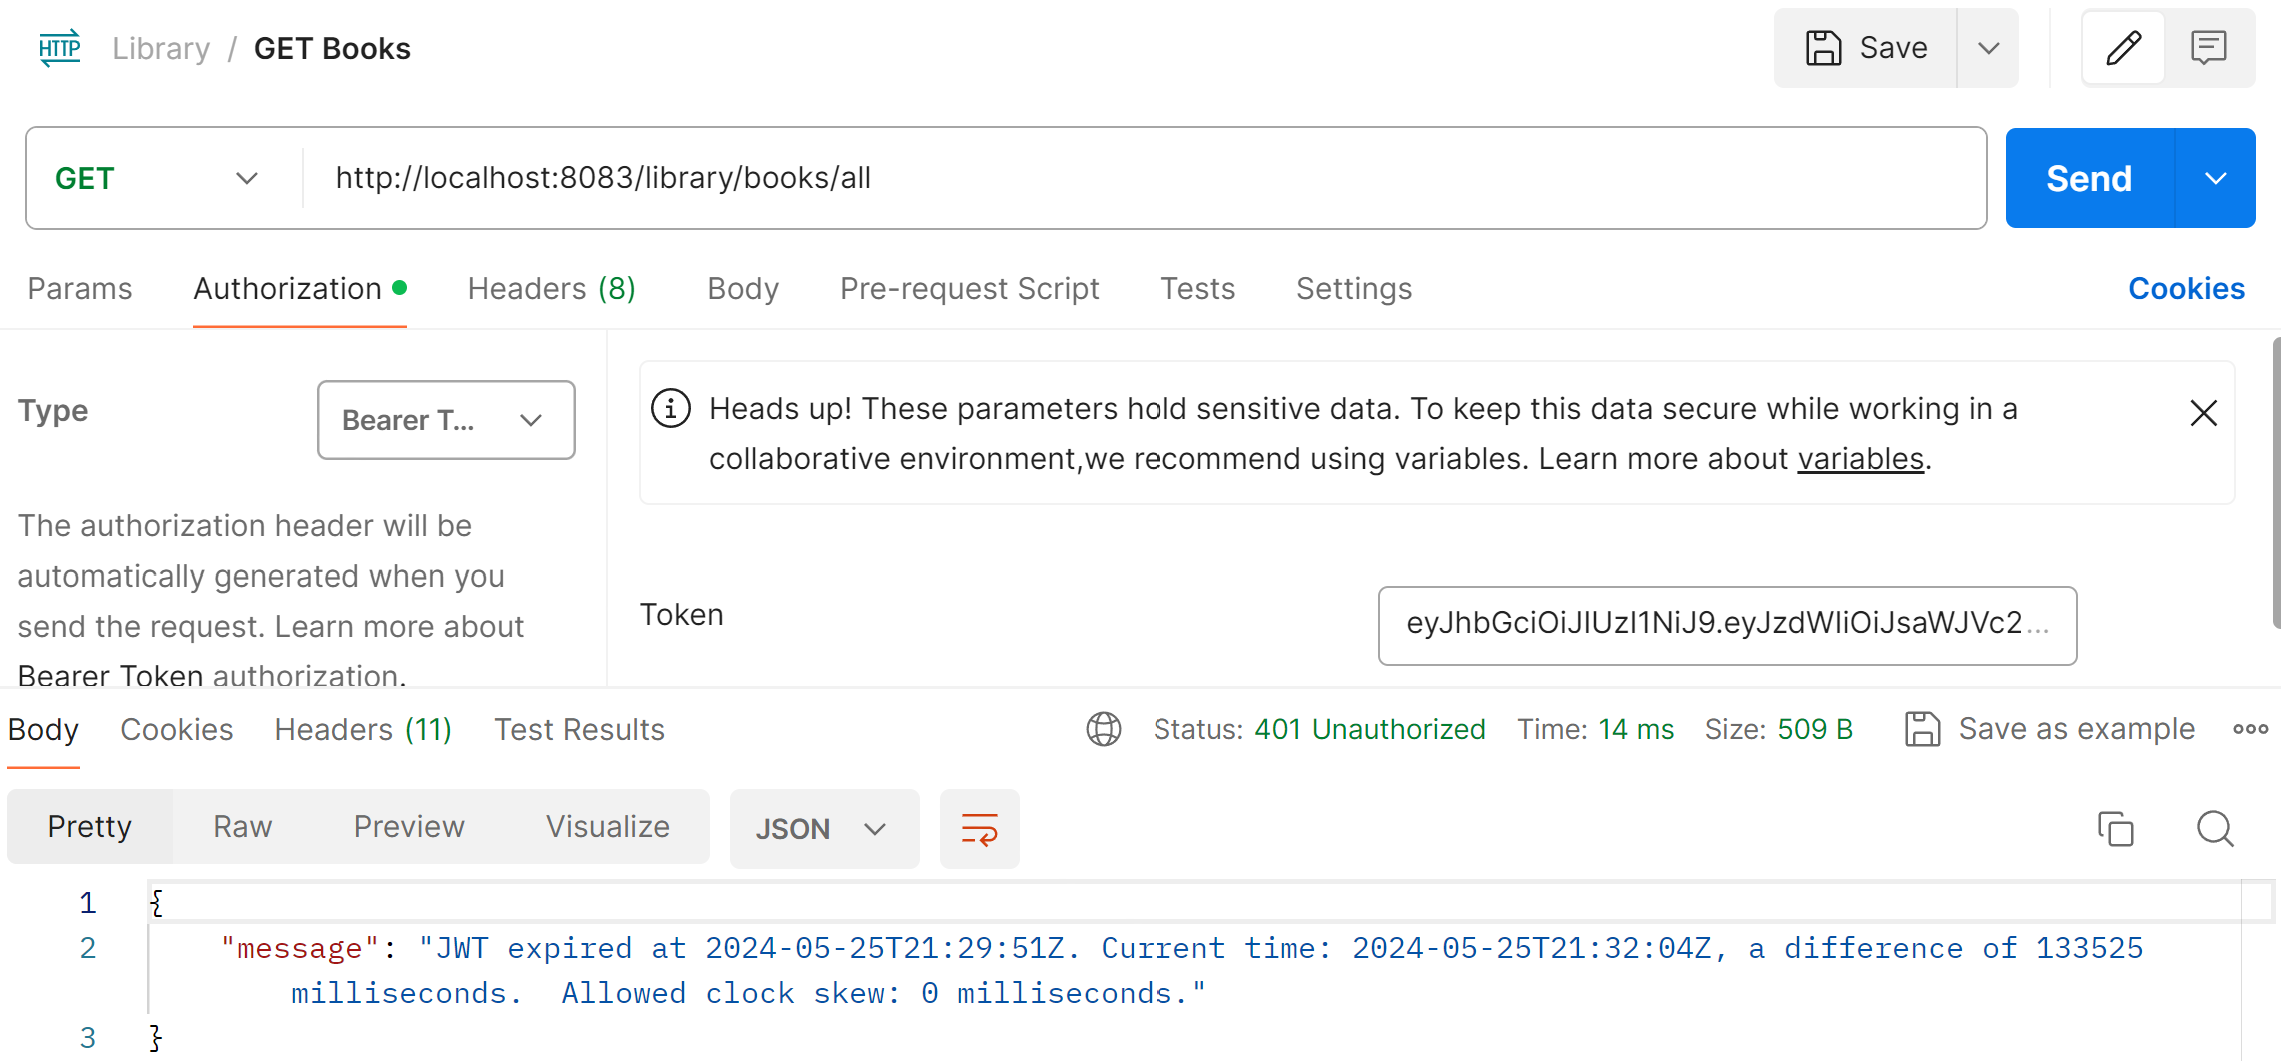
However, it is important to note that JwtFilter only gets called for the endpoints that are secured by spring security through the spring security filter chain. In our case the endpoint is /library/books/all.
Since, we have excluded the token endpoint /token/create from spring security, the exception handling done under JwtAuthenticationEntryPoint will not apply here. For such cases, we will handle exceptions using Spring’s global exception handler.
@ControllerAdvice
public class GlobalExceptionHandler {
    @ExceptionHandler({BadCredentialsException.class})
    public ResponseEntity<Object> handleBadCredentialsException(BadCredentialsException exception) {
        return ResponseEntity
                .status(HttpStatus.UNAUTHORIZED)
                .body(exception.getMessage());
    }
}
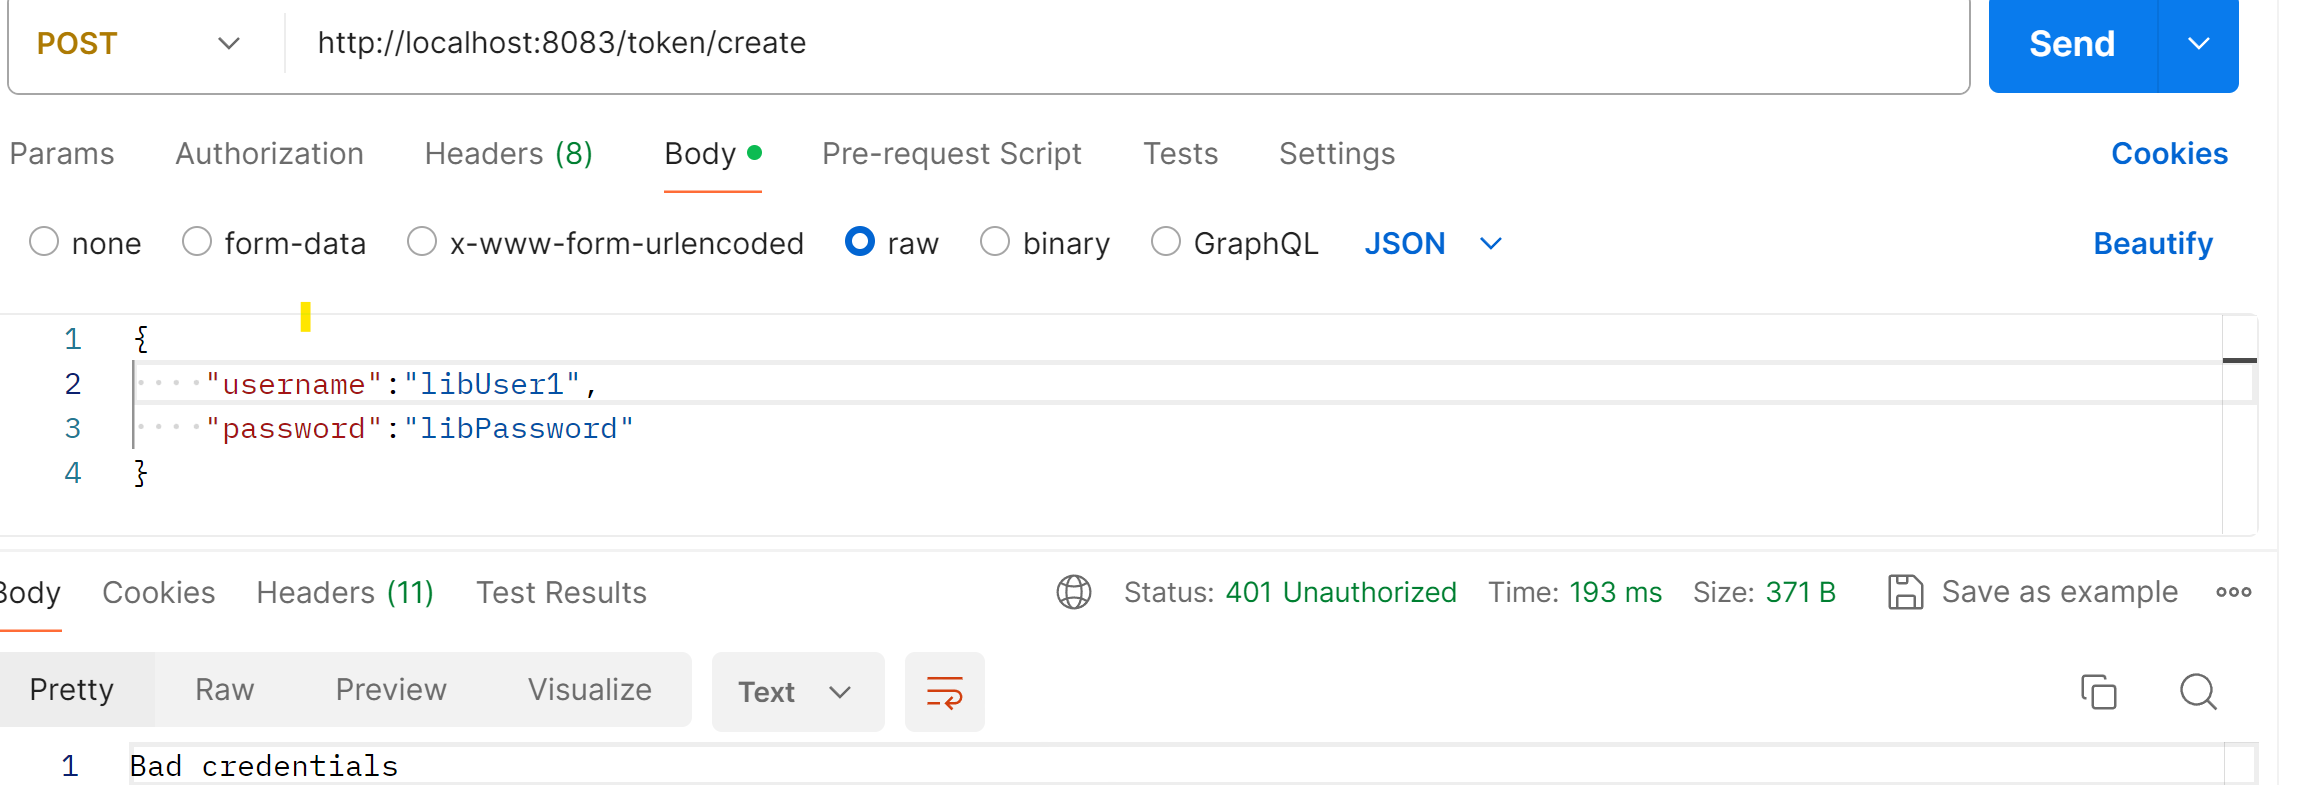
With this exception handling, exception caused due to bad credentials will now be handled with 401 Unauthorized error:
Swagger documentation
In this section, we’ll look at how to configure Open API for JWT. We will add the below Maven dependency:
<dependency>
   <groupId>org.springdoc</groupId>
   <artifactId>springdoc-openapi-ui</artifactId>
   <version>1.7.0</version>
</dependency>
Next, let’s add the below configuration:
@OpenAPIDefinition(
        info = @Info(
                title = "Library application",
                description = "Get all library books",
                version = "1.0.0",
                license = @License(
                        name = "Apache 2.0",
                        url = "http://www.apache.org/licenses/LICENSE-2.0"
                )),
        security = {
                @SecurityRequirement(
                        name = "bearerAuth"
                )
        }
        )
@SecurityScheme(
        name = "bearerAuth",
        description = "JWT Authorization",
        scheme = "bearer",
        type = SecuritySchemeType.HTTP,
        bearerFormat = "JWT",
        in = SecuritySchemeIn.HEADER
)
public class OpenApiConfig {
}
Here, security is described using one or more @SecurityScheme. The type defined here SecuritySchemeType.HTTP applies to both basic auth and JWT.
The other attributes like scheme and bearerFormat depend on this type attribute.
After defining the security schemes, we can apply them to the whole application or individual operations by adding the
security section on the root level or operation level.
In our example, all API operations will use the bearer token authentication scheme.
For more information, on configuring multiple security schemes and applying a different scheme at the API level, refer to its documentation..
Next, let’s add some basic swagger annotations to our controller classes, in order to add descriptions to the API operations.
@RestController
@Tag(name = "Library Controller", description = "Get library books")
public class BookController {
}

@RestController
@Tag(name = "Create Token", description = "Create Token")
public class TokenController {
}
Also, we will use the below property to override the URL where Springdoc’s Swagger-UI loads.
springdoc:
  swagger-ui:
    path: /swagger-ui
With this configuration, swagger ui will now be available at http://localhost:8083/swagger-ui/index.html
Let’s try to run the application and load the swagger page at the mentioned URL. When we try to hit the endpoint, we see this:

This is because all endpoints in the application are automatically secured. We need a way to explicitly exclude the swagger endpoint from being secured.
We can do this by adding the WebSecurityCustomizer bean and excluding the swagger endpoints in our SecurityConfiguration class.
@Bean
    public WebSecurityCustomizer webSecurityCustomizer() {
        return web -> web.ignoring().antMatchers(
                ArrayUtils.addAll(buildExemptedRoutes()));
    }

    private String[] buildExemptedRoutes() {
        return new String[] {"/swagger-ui/**","/v3/api-docs/**"};
    }
Now, when we run the application, the swagger page will load as below:
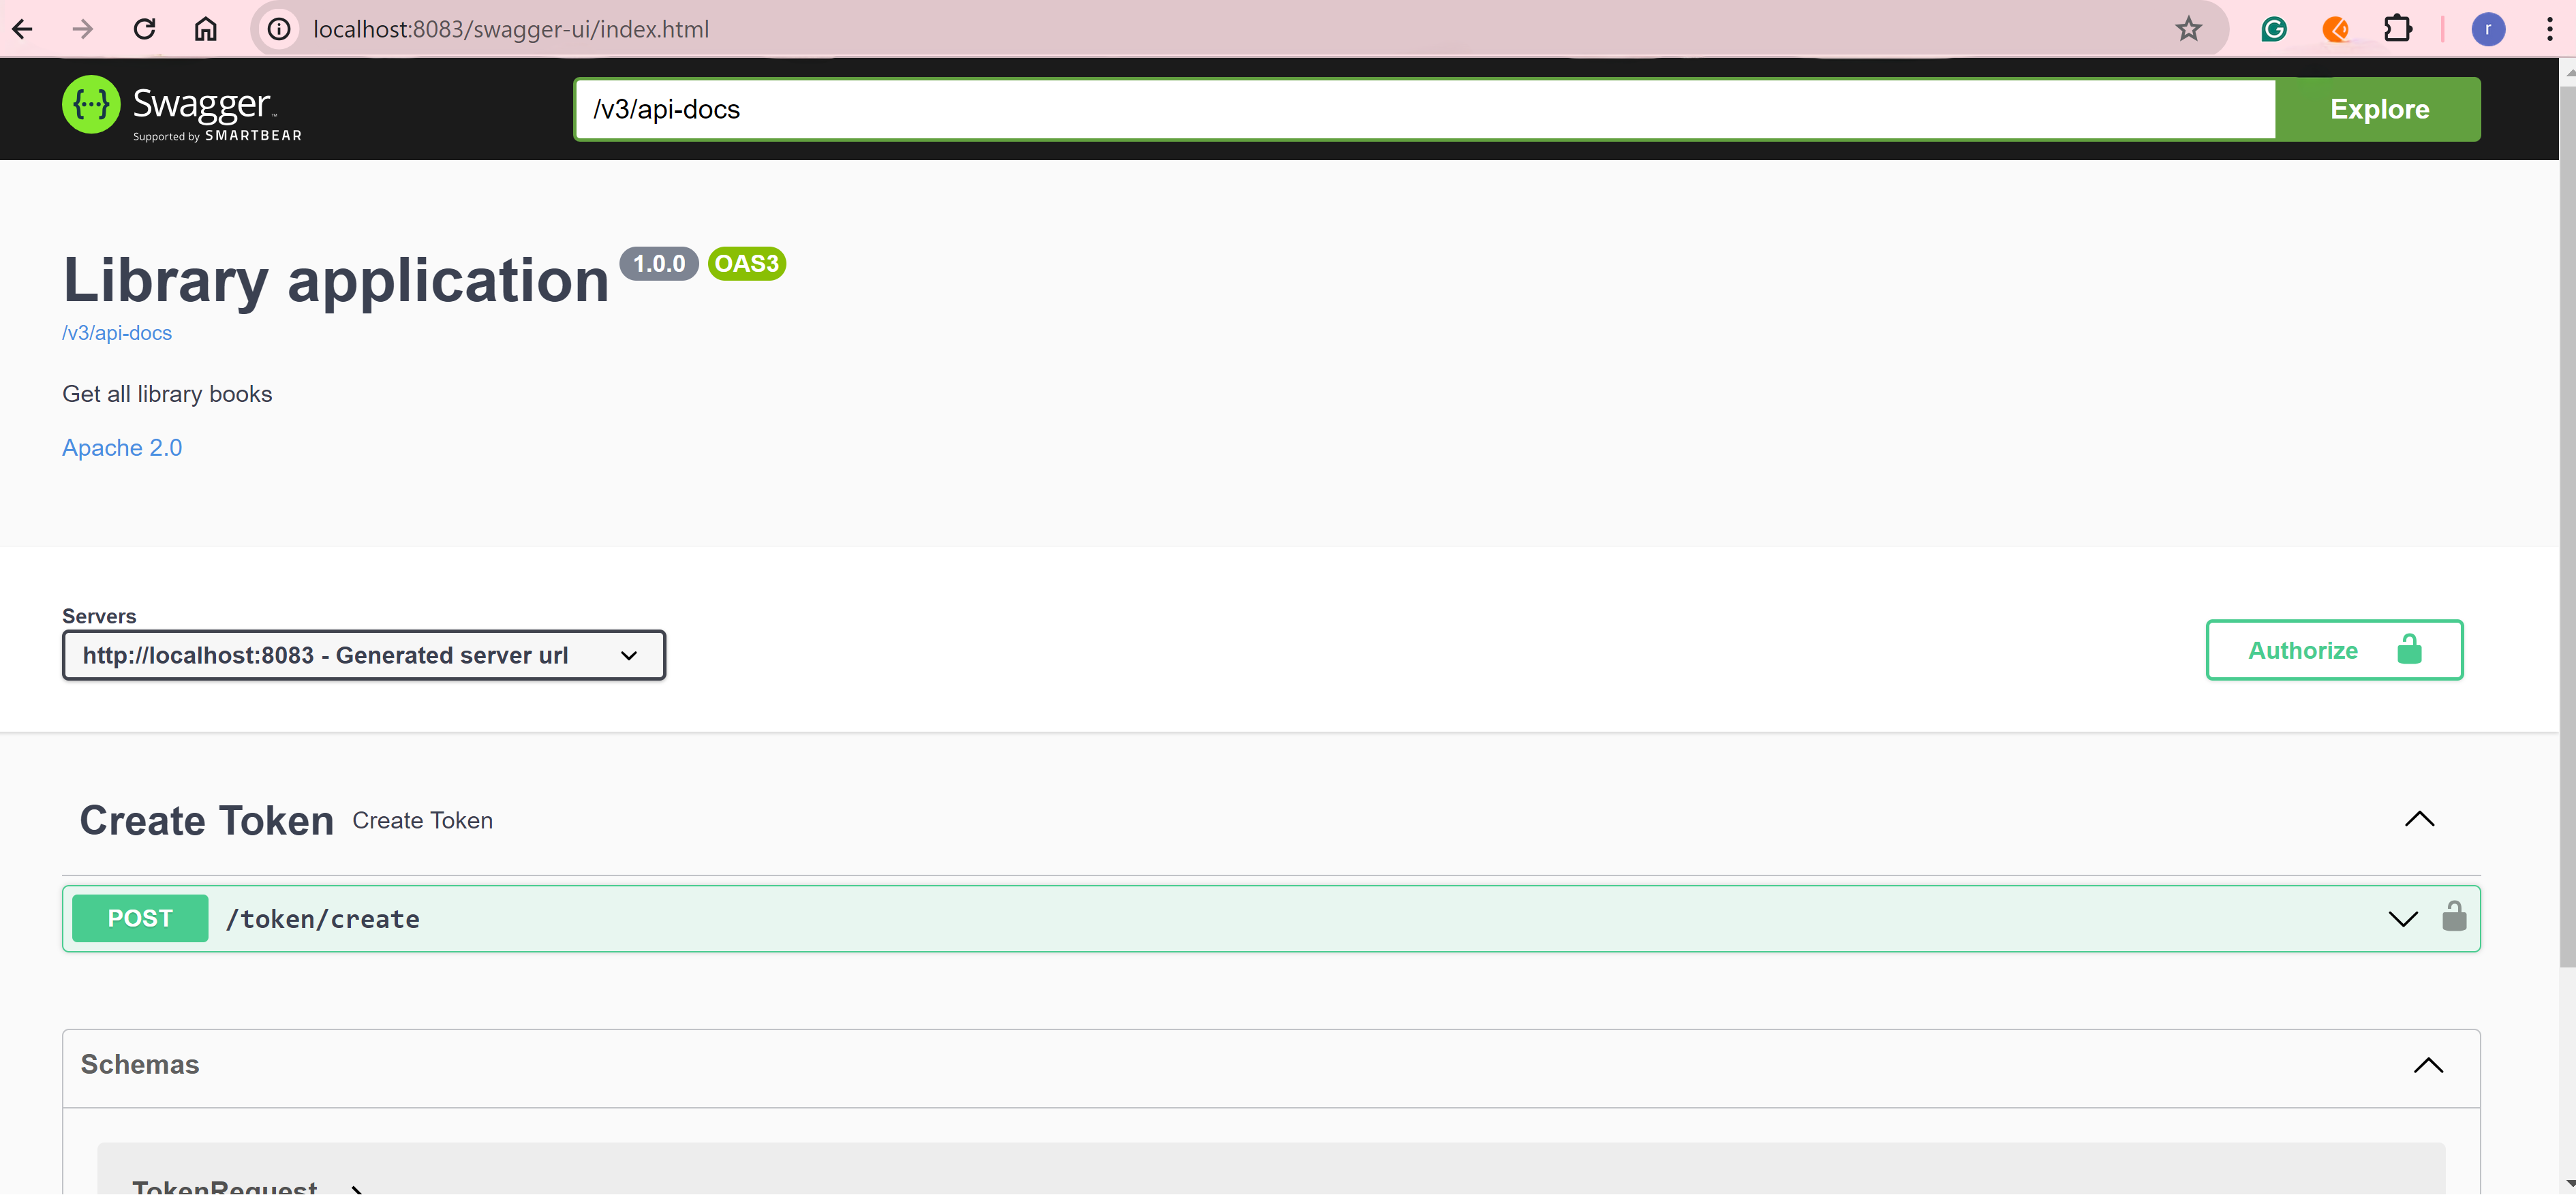
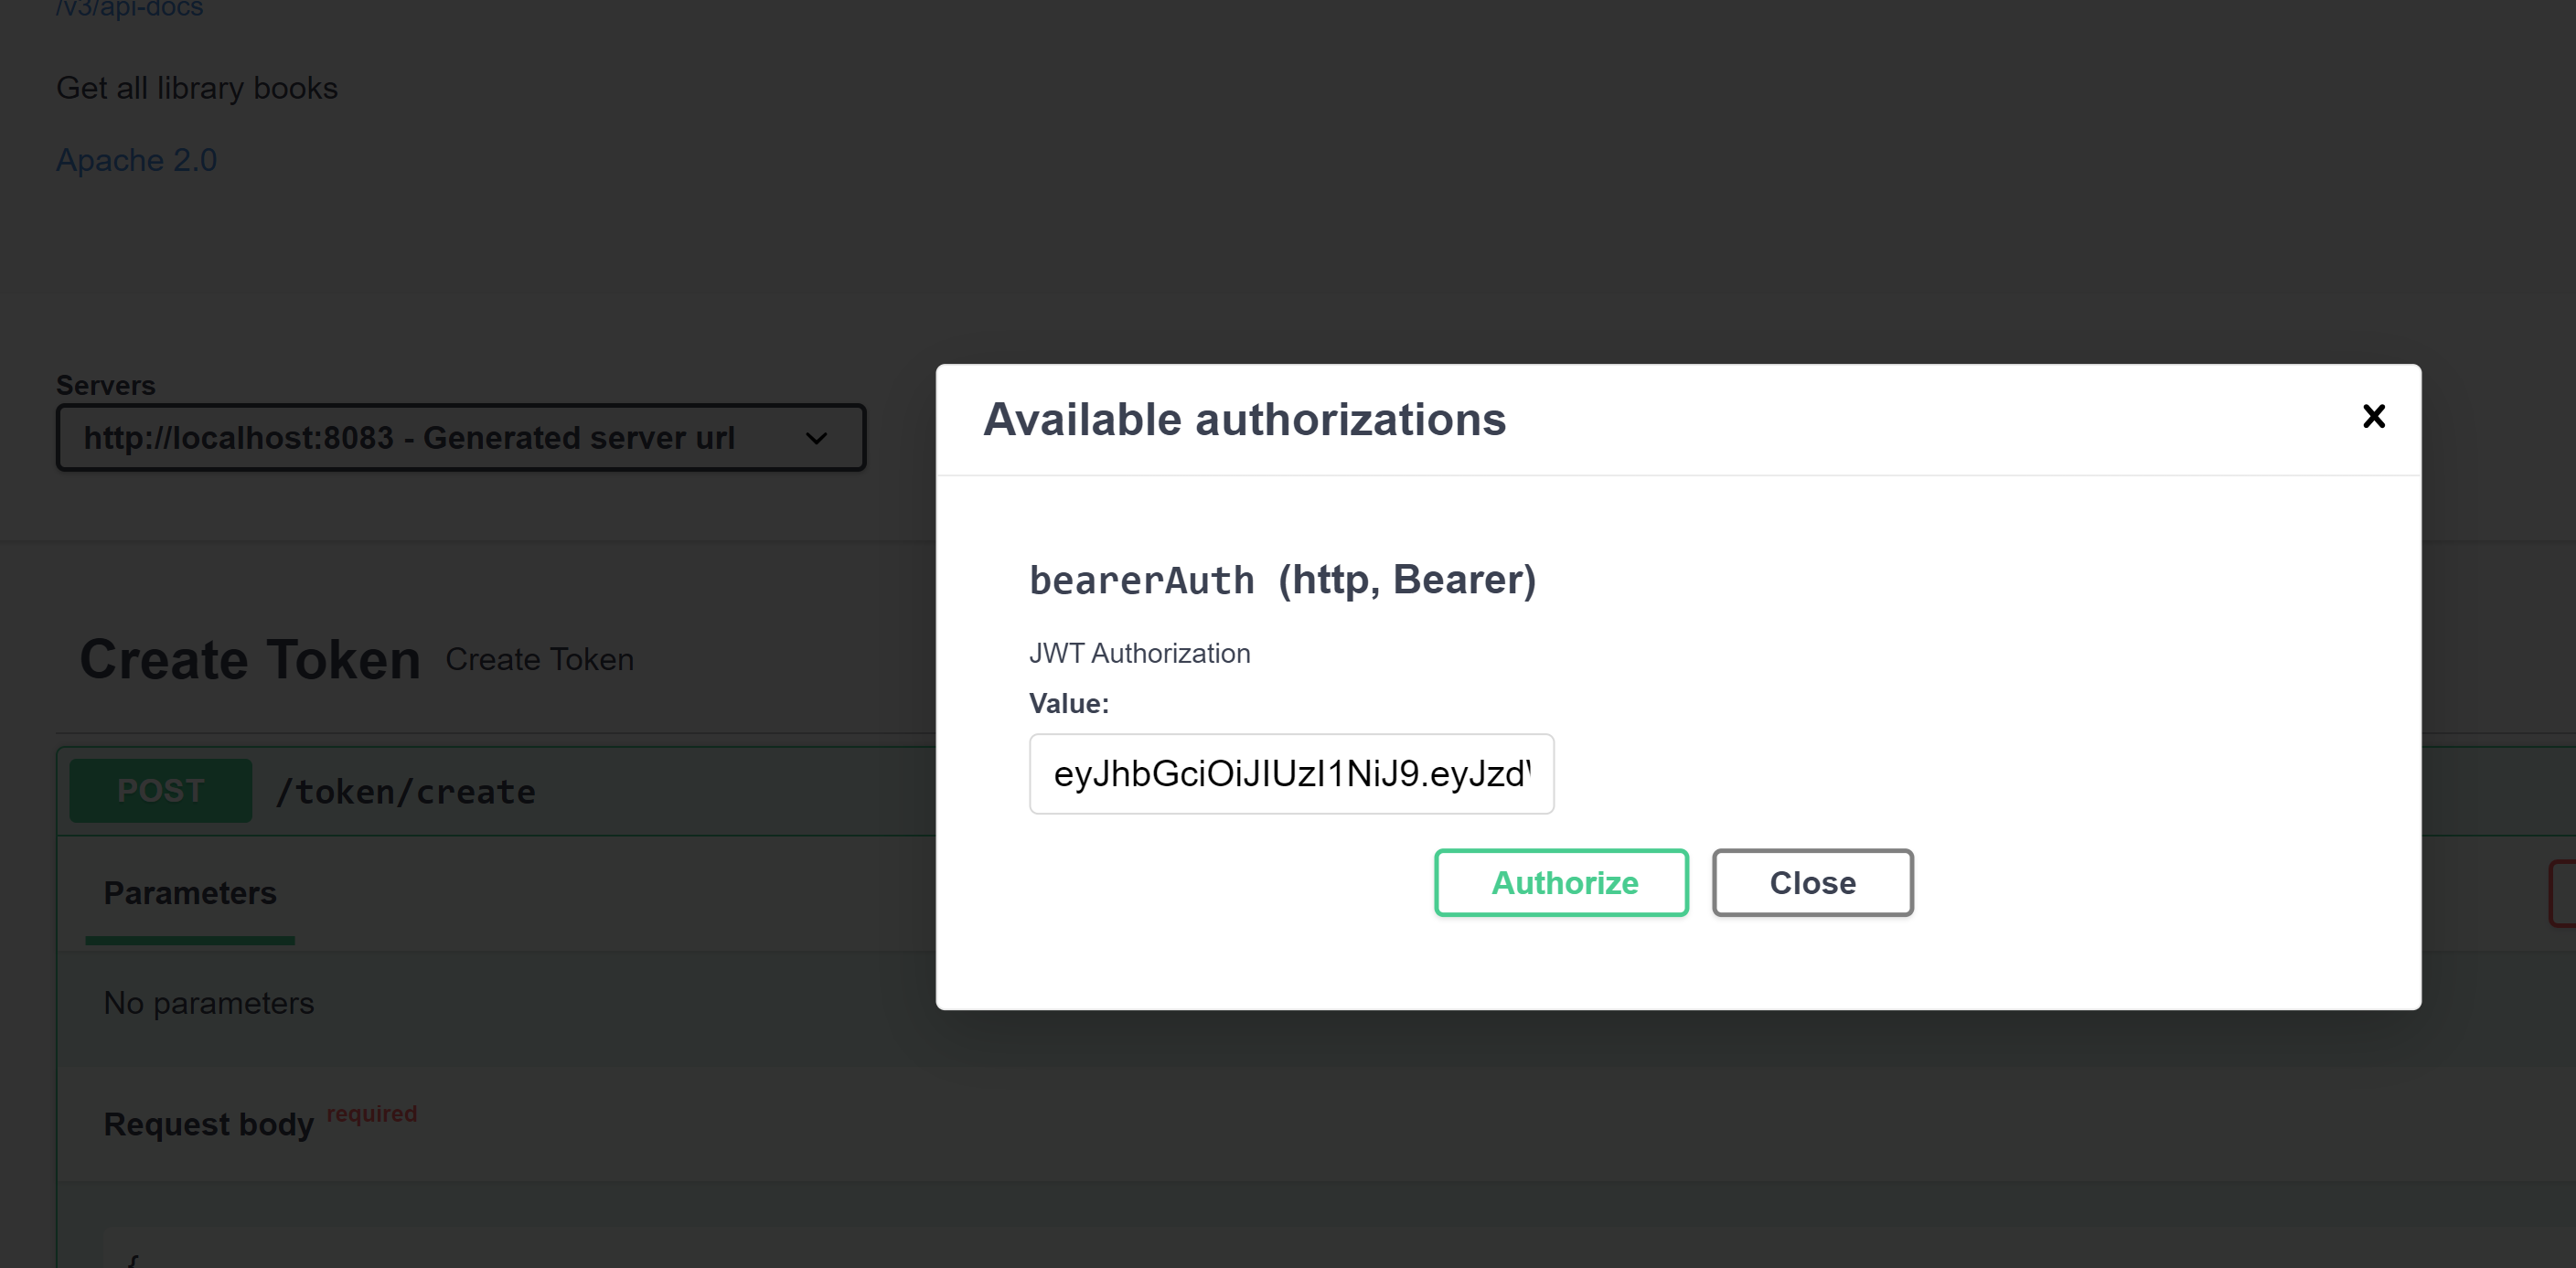
Since we have only one security scheme, let’s add the JWT token to the Authorize button at the top of the swagger page:
With the bearer token set, let’s try to hit the /library/books/all endpoint:
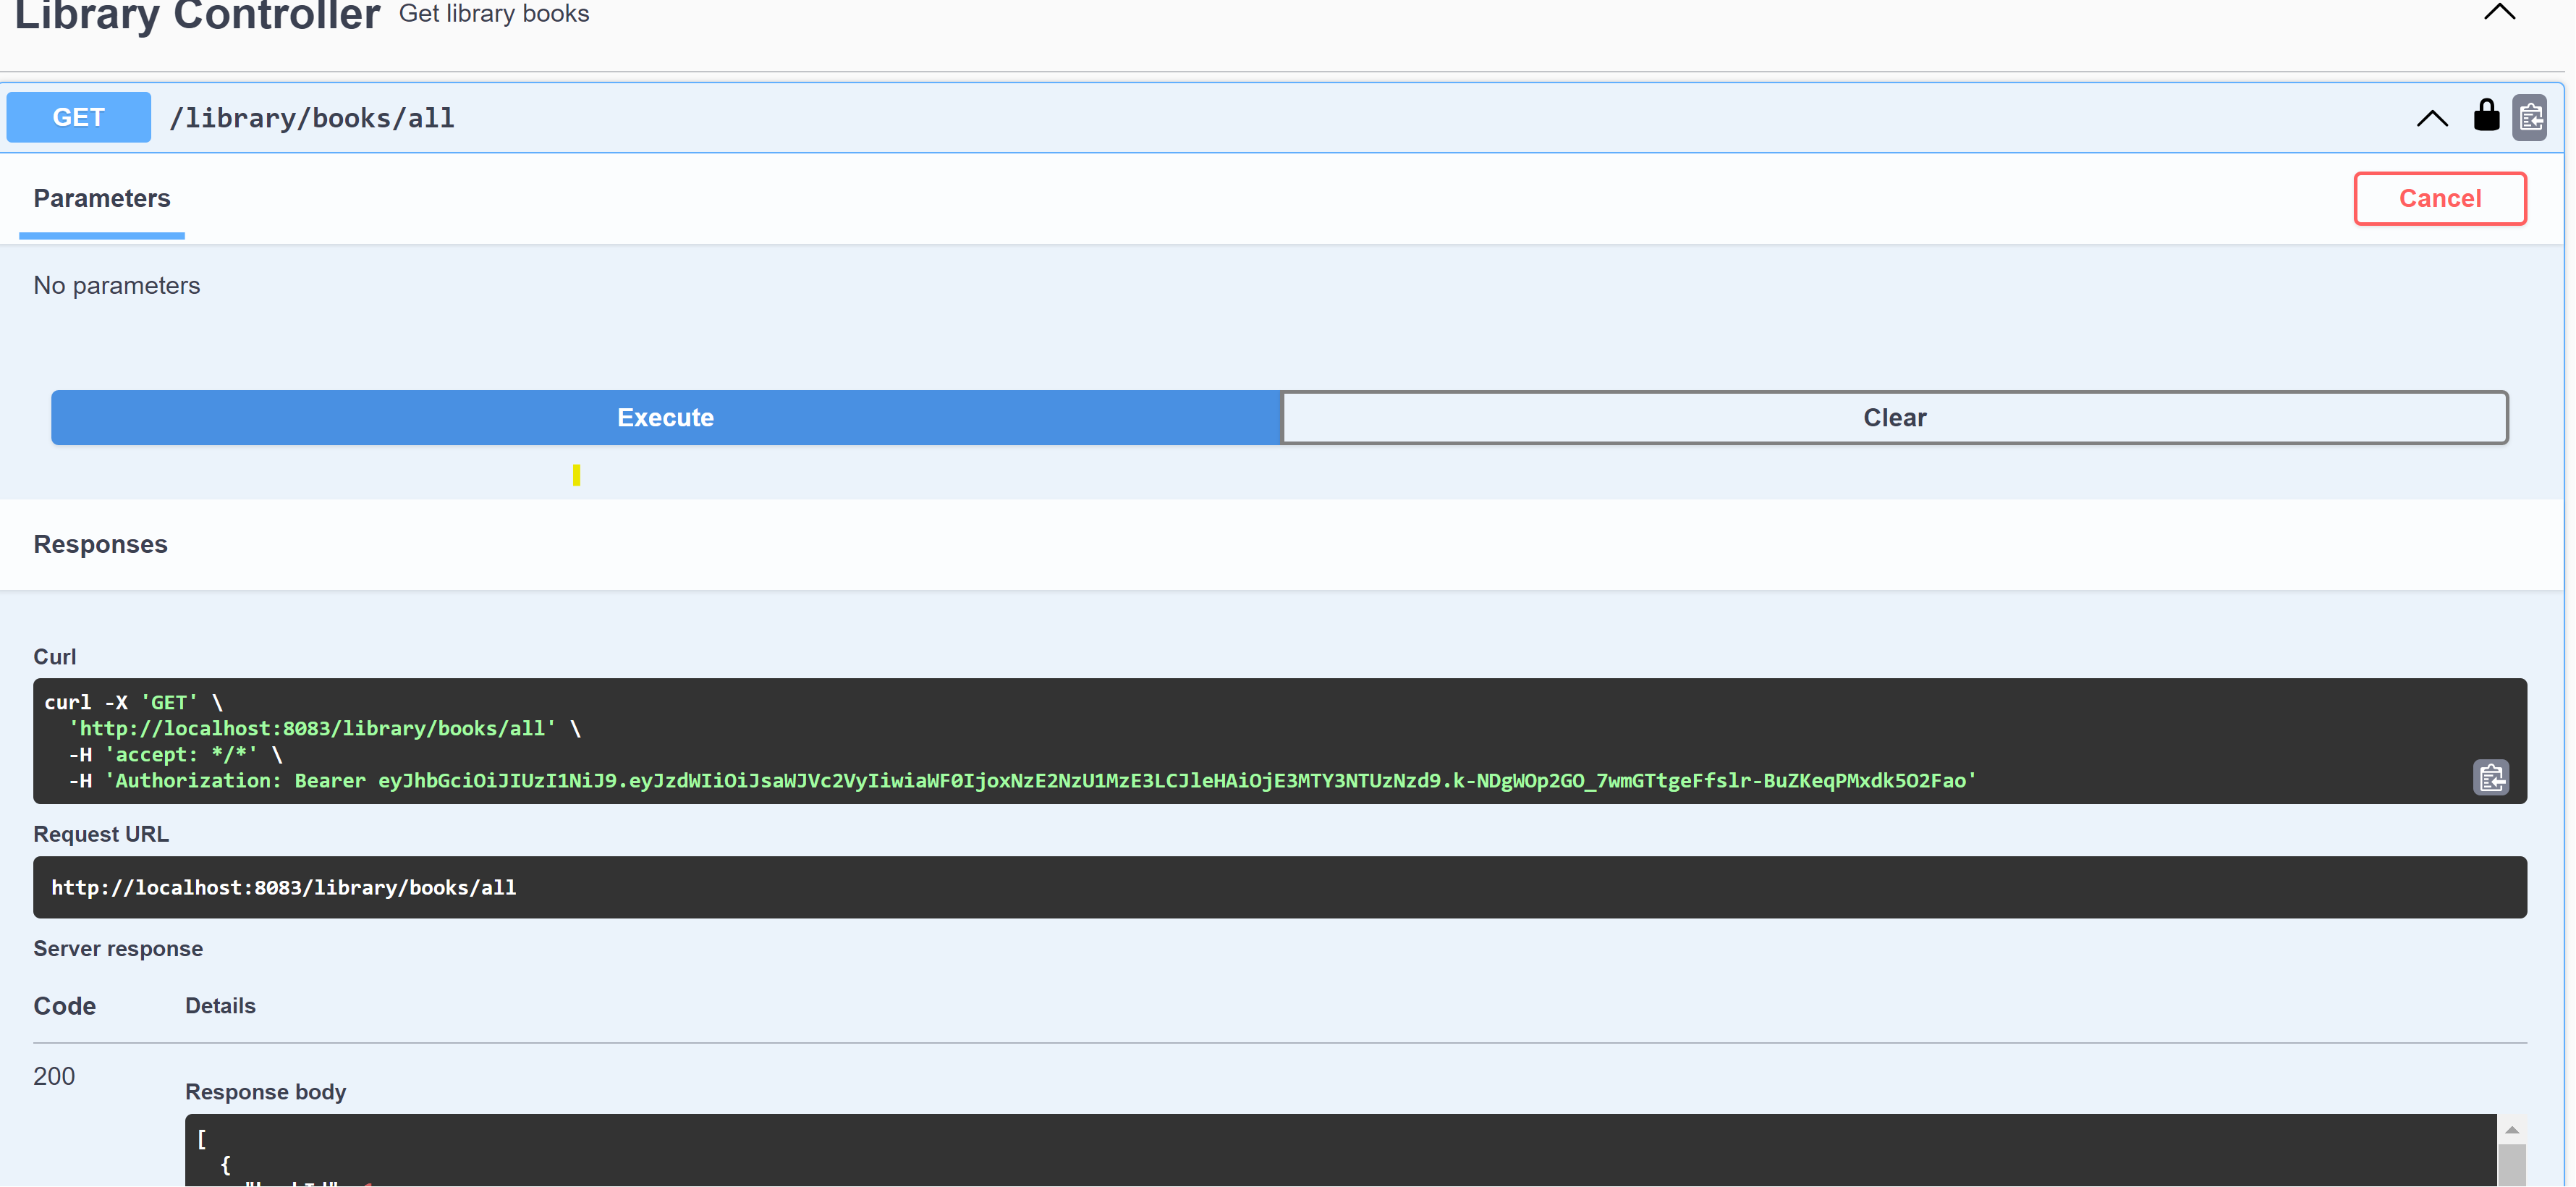
With this, we have successfully configured swagger endpoints for our application.
Adding Spring Security Tests
In our example, we need to write tests to test our token endpoint and another test for our Library application.
Let’s add some required properties for our tests along with an in-memory database to work with real data.
Test application.yml:
spring:
  security:
    user:
      name: libUser
      password: libPassword
  datasource:
    driver-class-name: org.hsqldb.jdbc.JDBCDriver
    url: jdbc:hsqldb:mem:testdb;DB_CLOSE_DELAY=-1
    username: sa
    password:

jwt:
  secretKey: 5JzoMbk6E5qIqHSuBTgeQCARtUsxAkBiHwdjXOSW8kWdXzYmP3X51C0
  validity: 600000
Next, let’s write tests to verify our token endpoint:
@SpringBootTest
@AutoConfigureMockMvc
public class TokenControllerTest {
    @Autowired
    private MockMvc mvc;

    @Test
    public void shouldNotAllowAccessToUnauthenticatedUsers() throws Exception {
        TokenRequest request = TokenRequest.builder()
                .username("testUser")
                .password("testPassword")
                .build();
        mvc.perform(MockMvcRequestBuilders.post("/token/create")
                        .contentType(MediaType.APPLICATION_JSON)
                        .content(new ObjectMapper().writeValueAsString(request)))
                .andExpect(status().isUnauthorized());
    }

    @Test
    public void shouldGenerateAuthToken() throws Exception {
        TokenRequest request = TokenRequest.builder()
                .username("libUser")
                .password("libPassword")
                .build();
        mvc.perform(MockMvcRequestBuilders.post("/token/create")
                        .contentType(MediaType.APPLICATION_JSON)
                        .content(new ObjectMapper().writeValueAsString(request)))
                .andExpect(status().isOk());
    }
}
Here, we will use @MockMvc to verify our TokenController class endpoint is working as expected in both positive and negative scenarios.
Similarly, our BookControllerTest will look like this:
@SpringBootTest
@AutoConfigureMockMvc
@SqlGroup({
        @Sql(value = "classpath:init/first.sql",
                executionPhase = BEFORE_TEST_METHOD),
        @Sql(value = "classpath:init/second.sql",
                executionPhase = BEFORE_TEST_METHOD)
})

public class BookControllerTest {

    @Autowired
    private MockMvc mockMvc;

    @Test
    void failsAsBearerTokenNotSet() throws Exception {
        mockMvc.perform(get("/library/books/all"))
                .andDo(print())
                .andExpect(status().isUnauthorized());
    }

    @Test
    void testWithValidBearerToken() throws Exception {
        TokenRequest request = TokenRequest.builder()
                .username("libUser")
                .password("libPassword")
                .build();
        MvcResult mvcResult = mockMvc.perform(
                MockMvcRequestBuilders.post("/token/create")
                        .contentType(MediaType.APPLICATION_JSON)
                        .content(new ObjectMapper().writeValueAsString(request)))
                .andExpect(status().isOk()).andReturn();
        String resultStr = mvcResult.getResponse().getContentAsString();
        TokenResponse token = new ObjectMapper().readValue(
                resultStr, TokenResponse.class);
        mockMvc.perform(get("/library/books/all")
                        .header("Authorization", "Bearer " + token.getToken()))
                .andDo(print())
                .andExpect(status().isOk())
                .andExpect(jsonPath("$", hasSize(5)));
    }

    @Test
    void testWithInvalidBearerToken() throws Exception {
        mockMvc.perform(get("/library/books/all")
                        .header("Authorization", "Bearer 123"))
                .andDo(print())
                .andExpect(status().isUnauthorized());
    }

}
To test the application endpoints, we will be using the Spring MockMvc class and load the in-memory database
with data using sample sql scripts. For this we will make use of annotations @SqlGroup and @Sql and the insert scripts
will be placed within /resources/init folders.
In order to verify the successful run of the endpoint testWithValidBearerToken(), we will make a call first to the /token/create
endpoint using MockMvc, extract the token from the response and set the token in the Authorization header of the next call
to /library/books/all.
Conclusion
In summary, JWT authentication is one step ahead to Spring’s Basic authentication in terms of security. It is one of the most sought after means of authentication and authorization. In this article, we have explored some best practices, advantages of using JWT and looked at configuring a simple Spring Boot application to use JWT for security.


