One of the most fulfilling things in developing an open source project is getting feedback from the users of your project. To give feedback, the users need to have something to play around with. So, to get the most up-to-date feedback possible, you might want to give your users access to the current (unstable) development version of your project - often called a “snapshot”. This article shows how to publish snapshots of your Java projects to oss.jfrog.org and how your users can access those snapshots from their own projects.
Example Code
This article is accompanied by a working code example on GitHub.oss.jfrog.org vs. Bintray
Before we start, a couple words on oss.jfrog.org. It’s the place we’re going to publish our snapshots to and an instance of Artifactory, an artifact repository application by JFrog. If you know Nexus, it’s similar, allowing to automatically deploy and serve artifacts of different types. In my opinion, however, Artifactory is easier to handle and integrate into your development cycle.
So what distinguishes oss.jfrog.org from Bintray, which is another product of JFrog? As said above, oss.jfrog.org is an installation of Artifactory, which is an application you can also buy and install on-premise to setup your own local artifact repository. Also, oss.jfrog.org is obiously intended for hosting open source software only.
Bintray, on the other hand, is a “cloud service” which offers high-volume delivery of files, using CDNs and stuff like that. Thus, Bintray is more focused on delivering content, while oss.jfrog.org is more focused on providing support during the development of a project. The difference between Artifactory and Bintray is also explained in an answer to this Stackoverflow answer.
With the focus of oss.jfrog.org and Bintray clear, we choose oss.jfrog.org to host our snapshots and Bintray - with its automatic sync to the JCenter and Maven Central repositories - to host our stable releases.
Set up a Bintray Repository
To be able to publish snapshots to oss.jfrog.org, you need to set up a repository on Bintray first. To do that, follow the steps from another article in this series:
Activate your Snapshot Repository
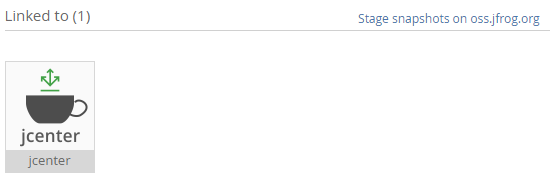
Having set up a Bintray account, you now need to create a repository on oss.jfrog.org where you want to put your snapshots. You can do this by clicking on “add to JCenter” on the homepage of your bintray package (see image below) and then providing a group id under which you want to publish your snapshots.

If you already have added your repository to JCenter, you can still activate the snapshot repository by clicking “stage snapshots on oss.jfrog.org” (see image below).
It takes from a couple hours up to a day or so for the JFrog people to check your request and activate your snapshot repository.
You can check if it’s available by browsing the Artifact Repository on oss.jfrog.org. If there
is an entry within oss-snapshot-local with the namespace you requested, you’re good to go.
Set up your build.gradle
Now that the target repository for our snapshots is available,you can go on to create a script that deploys your snapshots there.
In order to create the desired artifacts, follow these steps from another article:
Then, add the artifactory plugin like so:
plugins {
  id "com.jfrog.artifactory" version "4.5.4"
}
If you want to create snapshots, you will probably want to have a version number like 1.0.1-SNAPSHOT. And you don’t really want to
manually remove and add the -SNAPSHOT part each time you make a release. So, we allow to pass in a system property
called snapshot. If it has the value true Gradle automatically adds the snapshot suffix:
version = '1.0.1' + (Boolean.valueOf(System.getProperty("snapshot")) ? "-SNAPSHOT" : "")
Next, we add the information for publishing to oss.jfrog.org.
artifactory {
    contextUrl = 'http://oss.jfrog.org'
    publish {
        repository {
            repoKey = 'oss-snapshot-local'
            username = System.getProperty('bintray.user')
            password = System.getProperty('bintray.key')
        }
        defaults {
            publications('mavenPublication')
            publishArtifacts = true
            publishPom = true
        }
    }
    resolve {
        repoKey = 'jcenter'
    }
    clientConfig.info.setBuildNumber(System.getProperty('build.number'))
}
Important to note here is the repoKey which should contain oss-snapshot-local. The username is your bintray
username and the password is your bintray API key. To define what to publish, we reference the mavenPublication defined earlier
in the step Define what to publish. In the
clientConfig section, we add a build number, which is read from a system property. This makes it easy for CI
systems to later provide that build number to our script.
Publish a Snapshot
Once everything is set up, you can publish a snapshot with the following Gradle command:
./gradlew artifactoryPublish -Dsnapshot=true -Dbintray.user=$BINTRAY_USER -Dbintray.key=$BINTRAY_KEY -Dbuild.number=$BUILD_NUMBER
where $BINTRAY_USER, $BINTRAY_KEY and $BUILD_NUMBER are replaced by their respective values. You should get
an output like this:
:artifactoryPublish
Deploying artifact: http://oss.jfrog.org/oss-snapshot-local/.../...-1.0.1-SNAPSHOT-javadoc.jar
Deploying artifact: http://oss.jfrog.org/oss-snapshot-local/.../...-1.0.1-SNAPSHOT-sources.jar
Deploying artifact: http://oss.jfrog.org/oss-snapshot-local/.../...-1.0.1-SNAPSHOT.jar
Deploying artifact: http://oss.jfrog.org/oss-snapshot-local/.../...-1.0.1-SNAPSHOT.pom
Deploying build descriptor to: http://oss.jfrog.org/api/build
Build successfully deployed. Browse it in Artifactory under http://oss.jfrog.org/webapp/builds/.../$BUILD_NUMBER
Access a Snapshot
You can now tell the users of your project that they can access the latest snapshot version like this:
repositories {
	maven { url 'https://oss.jfrog.org/artifactory/oss-snapshot-local' }
}

dependencies {
	compile('group.id:myAwesomeLib:1.0.1-SNAPSHOT')
}
Also, you can access a specific snapshot version like this:
repositories {
	maven { url 'https://oss.jfrog.org/artifactory/oss-snapshot-local' }
}

dependencies {
	compile('group.id:myAwesomeLib:1.0.1-20171220.200812-2')
}
You can find out which specific versions are available by browsing the artifacts on oss.jfrog.org.
What next?
There comes a time when a version is complete and you want to release the real thing. Then, you might want to follow the guide to publishing stable releases to bintray. When this is all set up, you might want to have a CI tool create snapshots and releases automatically, which is covered in this blog post.


