“Release early, release often”. This philosophy should be a goal for every software project. Users can only give quality feedback when they have early access to a software release. And they can only give feedback to new features and fixes if they have access to the latest version. Releasing often is a major pain when the release process is not automated. This article is a guide to a fully automated release chain that is able to publish snapshots and releases from a Github repository using Gradle, Bintray and Travis CI.
Example Code
This article is accompanied by a working code example on GitHub.The Release Chain
The following image shows the release chain we’re going to build.
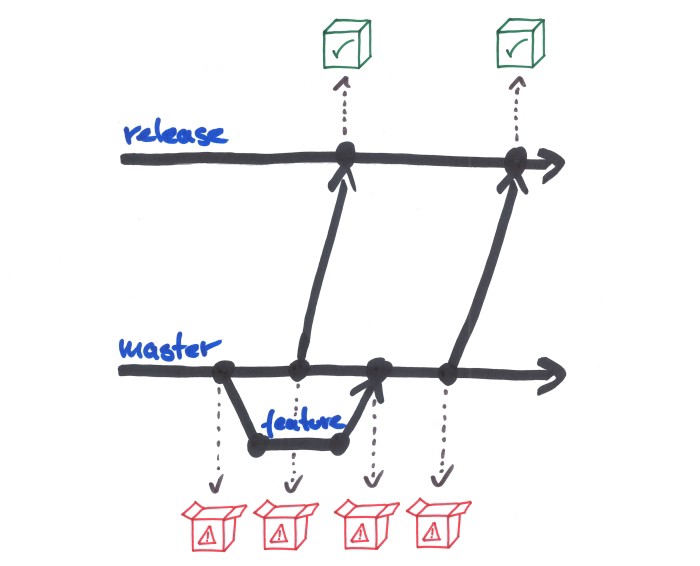
In a simplified Git Flow fashion, we have two branches in our Git repository:
The master branch contains the current state of work. Here, all features and bugfixes currently being developed come together.
The release branch contains only those versions of the codebase that are to be released.
Additionally, there may be optional feature branches in which some features are developed in isolation.
Here’s what we’re going to automate:
Each time someone pushes a commit to the master branch (or merges a feature branch into master), a snapshot will be published by our CI pipeline so that users can test the current state of work at any time.
Each time someone pushes a commit to the release branch, a stable release will be published by our CI pipeline so that users can work with the stable version.
Naturally, a snapshot or release will only be published if all tests have run successfully.
Prerequisites
To create an automated release chain as described in this article, we need to create a Bintray account and set up a Gradle build as described in my previous articles:
Once the build.gradle file is set up as described in those articles, we’re ready to configure
Travis CI to do the publishing work for us automatically.
Configure Travis CI
To enable Travis CI, we need to create an account on https://about.travis-ci.com and link it to our Github account.
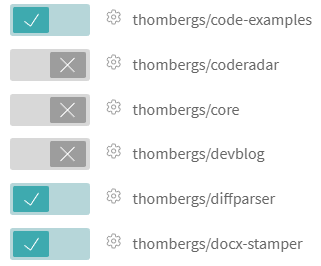
Activate
Once logged into the Travis account, we activate Travis CI for the repository we want to publish snapshots and releases for:
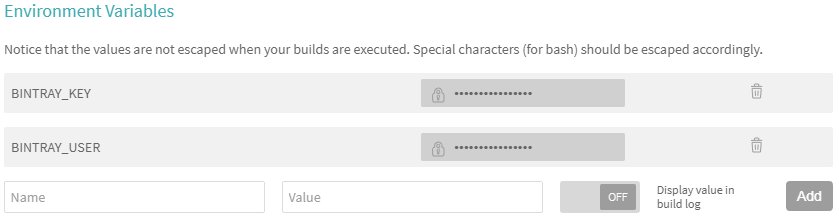
Set Environment Variables
In the settings of the repository on Travis CI, we now set the environment variables
BINTRAY_KEY and BINTRAY_USER to our Bintray credentials:
The .travis.yml File
Next, we need to put a file called .travis.yml into the codebase and push
it to Github. This file contains all configuration for the CI build.
Let’s look at the contents of this file.
Basic Setup
language: java
install: true

sudo: false
addons:
  apt:
    packages:
      - oracle-java8-installer

before_install:
  - chmod +x gradlew
With the language property, we tell Travis that it’s a Java project.
install: true tells Travis that we want to take care of running the Gradle build
ourselves (otherwise Travis runs gradlew assemble before each build stage).
We tell Travis to install the oracle-java8-installer that in turn takes care of installing
the most current Java 8 JDK.
The last line makes the gradlew file executable so that Travis can run it.
Declare Build Stages
In the next section of .travis.yml, we’re making use of Travis CI’s build stages feature
to divide our build into several steps.
stages:
  - name: build
  - name: snapshot
    if: branch = master
  - name: release
    if: branch = release
The build stage is going to run the gradle build and check if everything compiles and all tests are running.
The snapshot stage is responsible for publishing a snapshot release and thus should only run on the master branch.
The release stage is responsible for publishing a stable release and thus should only run on the release branch.
Define Build Jobs
The last thing left to do now is to configure the actual jobs that should run within the build stages we declared above:
jobs:
  include:
    - stage: build
      script: ./gradlew build
    - stage: snapshot
      script: ./gradlew artifactoryPublish -x test -Dsnapshot=true -Dbintray.user=$BINTRAY_USER -Dbintray.key=$BINTRAY_KEY -Dbuild.number=$TRAVIS_BUILD_NUMBER
    - stage: release
      script: ./gradlew bintrayUpload -x test -Dbintray.user=$BINTRAY_USER -Dbintray.key=$BINTRAY_KEY -Dbuild.number=$TRAVIS_BUILD_NUMBER
In the build stage we’re simply running our Gradle build. If this stage fails, the other stages will not be started at all.
In the snapshot stage, we’re running the artifactoryPublish task that takes care of
publishing the current build as a snapshot to oss.jfrog.org. The details of the Gradle configuration
are explained here.
We pass on the environment variables
BINTRAY_USER, BINTRAY_KEY and TRAVIS_BUILD_NUMBER, so that the Gradle script can make use of them.
In the release stage, we’re running the bintrayUpload task that takes care of
publishing a stable release to Bintray, again passing in the necessary environment variables. The details of the Gradle configuration are explained
here.
What now?
And that’s it. All in all this is a pretty straightforward way to publish open source Java projects with Gradle, Bintray and Travis CI.
You can tailor the process to your project as needed. Especially in projects maintaining multiple versions at the same time you might have to move toward a more complex branching strategy more like the original Git Flow. In this case, you would have to add more branches from which snapshots and releases should be published to the Travis configuration.


