Application logs are the most important resource when it comes to investigating issues and incidents. Imagine something goes wrong during your on-call rotation and you don’t have any logs!
If applied smartly, we can even harvest important business metrics from our logs.
Having no logs is equivalent to driving a car with your eyes closed. You don’t know where you’re going and you’re very likely to crash.
To make log data usable, we need to send it to the right place. When developing an app locally, we usually want to send the logs to the console or a local log file. When the app is running in a staging or production environment, we’ll want to send the logs to a log server that the whole team has access to.
In this tutorial, we’re going to configure a Java application to send logs to the console or to a cloud logging provider depending on the environment the application is running in.
As the cloud logging provider, we’re going to use logz.io, which provides a managed ELK stack solution with a nice frontend for querying logs. But even if you use a different logging provider, this tutorial will help you configure your Java application’s logging.
We’re going to look at:
- How to configure a plain Java application with Log4J
- How to configure a plain Java application with Logback, and
- How to configure a Spring Boot application with Logback.
In all cases, the application will be started with certain environment variables that control the logging behavior to send logs either to the console or the cloud.
Why Should I Send My Logs to a Log Server?
Before we look at the logging configuration details, let’s answer the question of why we’re going through all the fuss to configure our logging at all. Isn’t it enough to just log everything to standard out or a log file?
That’s how it was done back in the days. There were sysadmins who guarded the log files. Every time I wanted to access the logs, I would write an email to the sysadmins. Once they read their mail (which was totally dependent on the time of day and their mood), they would run some scripts to collect the log files from all server instances, filter them for the time period I was interested in and put the resulting files on a shared network folder from where I would download them.
Then I would use command-line tools like grep and sed to search the log files for anything I’m interested in. Most often, I would find that the logs I had access to were not enough and I would have to repeat the whole procedure with the sysadmins for logs from a different time period - that was no fun!
At some point, log servers like Logstash and Graylog came along. Instead of sending logs into files, we could now send the logs to a server. Instead of asking sysadmins to send us the logs we need, we could now search the logs through a web UI!
The whole team now had access to a web UI to search the logs. Everybody who needs log data can easily get it.
A log server is a key enabler for a “you built it, you run it” culture! It also reduces the mean time to restore (MTTR) - i.e. the time a team needs to restore a service after an incident - because the log data is directly available for analysis. DevOps is unthinkable without a log server!
To make things even easier, today we don’t even have to set up our own log server, but we can send the logs to a fully managed log server provider in the cloud. In this article, we’ll be sending logs to logz.io and then query the logs via their web UI.
So, we’ll definitely want to send our logs to a log server. Either by logging to standard out and having some infrastructure in place that forwards them from there to the log server or by configuring our application to send the logs directly to the log server.
In this article, we’re going to look at configuring our application to send them directly to the log server. But, we only want to send the logs to the server in a staging or production environment. During local development, we don’t want to be dependent on an external log server.
Let’s see what we can do to achieve this.
Setting Up a Logz.io Account
If you want to follow along with sending logs to the cloud, set up a free trial account with logz.io. When logged in, click on the gear icon in the upper right and select Settings -> General. Under “Account settings”, the page will show your “shipping token”. Copy this token - we’ll need it later to configure our application to send logs to the cloud.
Per-Environment Logging for a Plain Java Application
Let’s first discuss how we can configure the logging behavior of a plain Java application. We’ll have a look at both Log4J and Logback and how to configure them to do different things in different runtime environments.
You can clone or browse the full example applications on GitHub (Log4J app, Logback app).
Example Application
Our example application is very simple:
public class Main {
  public static void main(String[] args) {
    Logger logger = LoggerFactory.getLogger(Main.class);
    logger.debug("This is a debug message");
    logger.info("This is an info message");
    logger.warn("This is a warn message");
    logger.error("This is an error message");
  }
}
It’s just a small Java program with a main() method that logs a few lines using an SLF4J Logger instance. This program is a placeholder for any real Java application.
SLF4J is a logging API that abstracts over the actual logging implementation, so we can use it for both Log4J and Logback (and other logging implementations, for that matter). This allows us to always implement against the same logging API, even if we decide to swap out the actual logging library underneath.
Passing Environment Variables to the Application
We want to make the logging behave differently depending on the environment the application is running in. If the application is running on the local machine, we want the above log events to be sent to the console. If it’s running in a staging or production environment, we want it to log to our cloud logging provider.
But how does the application decide which environment it’s running in? This is exactly what environment variables are there for.
We’ll pass an environment variable with the name LOG_TARGET to the application on startup. There are two possible values for this variable:
CONSOLE: the app shall send the logs to the consoleLOGZIO: the app shall send the logs to logz.io cloud
This command will then start the app in “local” logging mode:
LOG_TARGET=CONSOLE java -jar app.jar
And this command will start the app in “staging”, or “production” logging mode:
LOG_TARGET=LOGZIO java -jar app.jar
Let’s now see how we can configure Log4J and Logback in our application to respect the LOG_TARGET environment variable.
Configuring Log4J with Environment Variables
You can browse or clone the full example code of the Log4J application on GitHub.
Log4J Dependencies
To get Log4J working properly, we need to add the following dependencies to our application’s pom.xml:
<dependencies>
  <dependency>
    <groupId>org.apache.logging.log4j</groupId>
    <artifactId>log4j-api</artifactId>
    <version>2.14.1</version>
  </dependency>
  <dependency>
    <groupId>org.apache.logging.log4j</groupId>
    <artifactId>log4j-core</artifactId>
    <version>2.14.1</version>
  </dependency>
  <dependency>
    <groupId>org.apache.logging.log4j</groupId>
    <artifactId>log4j-slf4j-impl</artifactId>
    <version>2.14.1</version>
  </dependency>
  <dependency>
    <groupId>io.logz.log4j2</groupId>
    <artifactId>logzio-log4j2-appender</artifactId>
    <version>1.0.12</version>
  </dependency>
</dependencies>
The first two dependencies are the log4j API and the log4J implementation. We could implement logging with just these two dependencies, but we additionally add the log4j-slf4j-impl dependency to include SLF4J. This way, we can use the SLF4J API for our logging instead of relying directly on the Log4J API.
The last dependency is a log appender that sends the logs to logz.io so we can view them online.
Log4J Configuration
Next, we need to create a log4j2.xml file in the src/main/resources folder of the codebase. Log4J will automatically pick up this configuration file from the classpath when the application starts up:
<?xml version="1.0" encoding="UTF-8"?>
<Configuration status="WARN">

  <Appenders>
    <Console name="CONSOLE" target="SYSTEM_OUT">
      <PatternLayout pattern="%d{HH:mm:ss.SSS} [%t] %-5level %logger{36} - %msg%n"/>
    </Console>

    <LogzioAppender name="LOGZIO">
      <logzioToken>${env:LOGZIO_TOKEN}</logzioToken>
      <logzioUrl>https://listener.logz.io:8071</logzioUrl>
      <logzioType>log4j-example-application</logzioType>
    </LogzioAppender>
  </Appenders>

  <Loggers>
    <Root level="INFO">
      <AppenderRef ref="${env:LOG_TARGET:-CONSOLE}"/>
    </Root>
  </Loggers>
</Configuration>
In the log4j2.xml file above we have configured two appenders. An appender is a Log4J concept that takes log events, transforms them, and then sends them to a certain destination.
The appender with the name CONSOLE is a standard Log4J appender that sends the logs to standard out. We can define a pattern in which to format the log output.
The appender with the name LOGZIO is a special appender that sends the logs to logz.io. We can only use the <LogzioAppender> XML element because we have included the dependency to logzio-log4j2-appender in the pom.xml above. If you want to try sending logs, you have to put the “shipping token” from your logz.io account into the <logzioToken> element (or, even better, set the LOGZIO_TOKEN environment variable when starting the app).
Finally, in the <Root> element, we configure which appender the root logger should use. We could just put one of the appender names into the ref attribute of the <AppenderRef> element, but this would hard-code the appender and it wouldn’t be configurable.
So, instead, we set it to ${env:LOG_TARGET:-CONSOLE}, which tells Log4J to use the value of the LOG_TARGET environment variable, and if this variable is not set, use the value CONSOLE as a default.
You can read all about the details of Log4J’s configuration in the Log4J docs.
That’s it. If we run the app without any environment variables, it will log to the console. If we set the environment variable LOG_TARGET to LOGZIO, it will log to logz.io.
Don't Put Secrets Into Configuration Files!
In the configuration files of Log4J and Logback, you will see that we're using an environment variable called LOGZIO_TOKEN. This variable contains a secret token that you get when creating a logz.io account.
You could just as well hard-code the token into the configuration files, but that's a security risk. You will probably want to push the configuration file to a Git repository and a Git repository is no place for secrets, even if it's a private repository!
Instead, use environment variables to store secrets and set their values when starting the application so you don't have to handle files with secret contents in a Git repo.
Configuring Logback with Environment Variables
Let’s see how we can configure Logback to send logs to different places depending on an environment variable.
The full example application is available on GitHub.
Logback Dependencies
To include Logback in the application, we need to add these dependencies to our pom.xml:
<dependencies>
  <dependency>
    <groupId>ch.qos.logback</groupId>
    <artifactId>logback-classic</artifactId>
    <version>1.2.3</version>
  </dependency>
  <dependency>
    <groupId>io.logz.logback</groupId>
    <artifactId>logzio-logback-appender</artifactId>
    <version>1.0.24</version>
  </dependency>
</dependencies>
Logback’s dependencies are a bit more convenient than Log4J’s. We only have to include the logback-classic dependency to enable Logback. It automatically pulls in the SLF4J dependencies so we can use the SLF4J logging abstraction without explicitly adding a dependency to it.
The second dependency is a Logback-specific appender that can send logs to logz.io.
Logback Configuration
The logback configuration looks very similar to the configuration we’ve done for Log4J above. We create a file named logback.xml in the src/main/resources folder so Logback finds it in the classpath:
<?xml version="1.0" encoding="UTF-8"?>
<configuration>

  <shutdownHook class="ch.qos.logback.core.hook.DelayingShutdownHook"/>

  <appender name="CONSOLE" class="ch.qos.logback.core.ConsoleAppender">
    <encoder>
      <pattern>%d{HH:mm:ss.SSS} [%thread] %-5level %logger{36} - %msg%n</pattern>
    </encoder>
  </appender>

  <appender name="LOGZIO" class="io.logz.logback.LogzioLogbackAppender">
    <token>${LOGZIO_TOKEN}</token>
    <logzioUrl>https://listener.logz.io:8071</logzioUrl>
    <logzioType>logback-example-application</logzioType>
  </appender>

  <root level="debug">
    <appender-ref ref="${LOG_TARGET}"/>
  </root>
</configuration>
In the logback.xml file, we declare two appenders. The appender concept is the same as in Log4J - it takes log data, potentially transforms it, and then sends it to a destination.
The CONSOLE appender formats logs in a human-readable way and then sends the logs to standard out.
The LOGZIO appender transforms the logs into JSON and sends them to logz.io. We have to specify the “shipping token” from the logz.io account in the <token> element so that logz.io knows it’s us sending the logs.
Finally, we configure the root logger to use the appender that we define with the environment variable LOG_TARGET. If LOG_TARGET is set to CONSOLE, the application will log to standard out, and if it’s set to LOGZIO, the application will log to logz.io.
You might notice the <shutdownHook> element in the logging configuration. The shutdown hook takes care of sending all logs that are currently still in the buffer to the target location when the application shuts down. If we don’t add this hook, the logs from our sample application might never be sent to logz.io, because the application shuts down before they are sent. Using the hook we can be reasonably sure that the logs of a dying application still reach their destination.
You can read about more details of Logback configuration in the Logback docs.
Per-Environment Logging with Spring Boot
As we’ve seen above, configuring a plain Java application to log to different destinations requires managing environment variables. To add more environment-specific configuration, we would have to add more and more environment variables. This would quickly become cumbersome.
When we’re building a Spring Boot application, we can make use of Spring Boot’s powerful configuration mechanism to make our logging configuration a bit more elegant.
The full example project is available on GitHub.
Using Spring Profiles
Spring supports the notion of configuration “profiles”. Each profile is made up of a set of configuration properties with specific values.
Since we need a different set of configuration properties for every environment that our application is running in (local machine, staging, production, …), Spring profiles are very well suited for this task.
In this article, we’ll only look at the features of Spring profiles that we need to configure different logging behavior. If you want to learn more about profiles, have a look at our guide to Spring Boot profiles.
Example Application
To start, we create a new Spring Boot application using start.spring.io. This application is pre-configured with everything we need.
We add a class to the code so that we’ll see some log output once the app starts:
@Component
public class StartupLogger implements ApplicationListener<ApplicationReadyEvent> {

  private static final Logger logger = LoggerFactory.getLogger(StartupLogger.class);

  @Override
  public void onApplicationEvent(ApplicationReadyEvent applicationReadyEvent) {
    logger.debug("This is a debug message");
    logger.info("This is an info message");
    logger.warn("This is a warn message");
    logger.error("This is an error message");
  }
}
This just generates some test log events once Spring Boot sends the ApplicationReadyEvent.
Configuring Logback
By default, Spring Boot uses Logback as the logging library. Spring Boot configures Logback with reasonable defaults, but if we want to log to different destinations depending on the environment, we need to override that default configuration.
We could just add a logback.xml file like we did in the plain Java application and use the LOG_TARGET environment variable to define where the application should send the logs. Spring Boot would then back off and use this configuration instead.
However, Spring Boot makes configuring Logback even more convenient. Instead of creating a logback.xml file, we create a file named logback-spring.xml in the src/main/resources folder. This file is parsed by Spring Boot before it configures Logback and provides some extra XML elements that we can use for more dynamic logging configuration:
<?xml version="1.0" encoding="UTF-8"?>
<configuration>

  <springProperty name="logzioToken" source="logzio.token"/>

  <shutdownHook class="ch.qos.logback.core.hook.DelayingShutdownHook"/>

  <appender name="LOGZIO" class="io.logz.logback.LogzioLogbackAppender">
    <token>${logzioToken}</token>
    <logzioUrl>https://listener.logz.io:8071</logzioUrl>
    <logzioType>spring-boot-example-application</logzioType>
  </appender>

  <appender name="CONSOLE" class="ch.qos.logback.core.ConsoleAppender">
    <layout class="ch.qos.logback.classic.PatternLayout">
      <Pattern>
        %cyan(%d{ISO8601}) %highlight(%-5level) [%blue(%-30t)] %yellow(%C{1.}): %msg%n%throwable
      </Pattern>
    </layout>
  </appender>

  <springProfile name="local">
    <root level="WARN">
      <appender-ref ref="CONSOLE"/>
    </root>
    <logger name="io.reflectoring" level="DEBUG"/>
  </springProfile>

  <springProfile name="staging">
    <root level="WARN">
      <appender-ref ref="CONSOLE"/>
      <appender-ref ref="LOGZIO"/>
    </root>
    <logger name="io.reflectoring" level="DEBUG"/>
  </springProfile>

  <springProfile name="production">
    <root level="WARN">
      <appender-ref ref="LOGZIO"/>
    </root>
    <logger name="io.reflectoring" level="WARN"/>
  </springProfile>

</configuration>
The logback-spring.xml file looks very similar to the static logback.xml file that we created for the plain Java application.
The main difference is that we’re now using the <springProfile> element to configure the logging for the local, staging, and production profiles. Whatever is in the <springProfile> element is only valid for a certain profile. This way, we’re sending logs to the CONSOLE appender in the local environment, to the CONSOLE and the LOGZIO appender in the staging environment, and only to the LOGZIO appender in the production profile.
This lets us configure each environment fully independent of the other environments, without managing an environment variable like LOG_TARGET, as we did with the plain logback.xml file above.
Another change is that we use the <springProperty> element to load the logzio.token from Spring Boot’s environment configuration and map it to the ${logzioToken} variable that we’re using to configure the LOGZIO appender. The property logzio.token comes from the application.yml file:
logzio:
  token: ${LOGZIO_TOKEN}
Here, we’re declaring the logzio.token configuration property to be set to the value of the environment variable LOGZIO_TOKEN. We could have used the environment variable directly in the logback-spring.xml file, but it’s good practice to declare all configuration properties that a Spring Boot application needs in the application.yml file so that the properties are easier to find and modify.
More details about the Spring Boot logging features in the Spring Boot docs.
Starting the Application in a Specific Profile
Now, all we need to do is to start the Spring Boot application in a certain profile and it will configure Logback accordingly.
To start the app locally, we can use the Maven Spring Boot plugin:
LOGZIO_TOKEN=<YOUR_LOGZIO_TOKEN> ./mvnw spring-boot:run -Dspring-boot.run.profiles=staging
This will start the application in the staging profile, which would send the logs to logz.io and the console. If you’re interested in other ways of activating Spring Boot profiles, check out the guide to Spring Boot profiles.
Querying Logs in the Logz.io GUI
If you went along and created a logz.io account to play with the example applications, you can now query the logs via the “Kibana” view on logz.io:
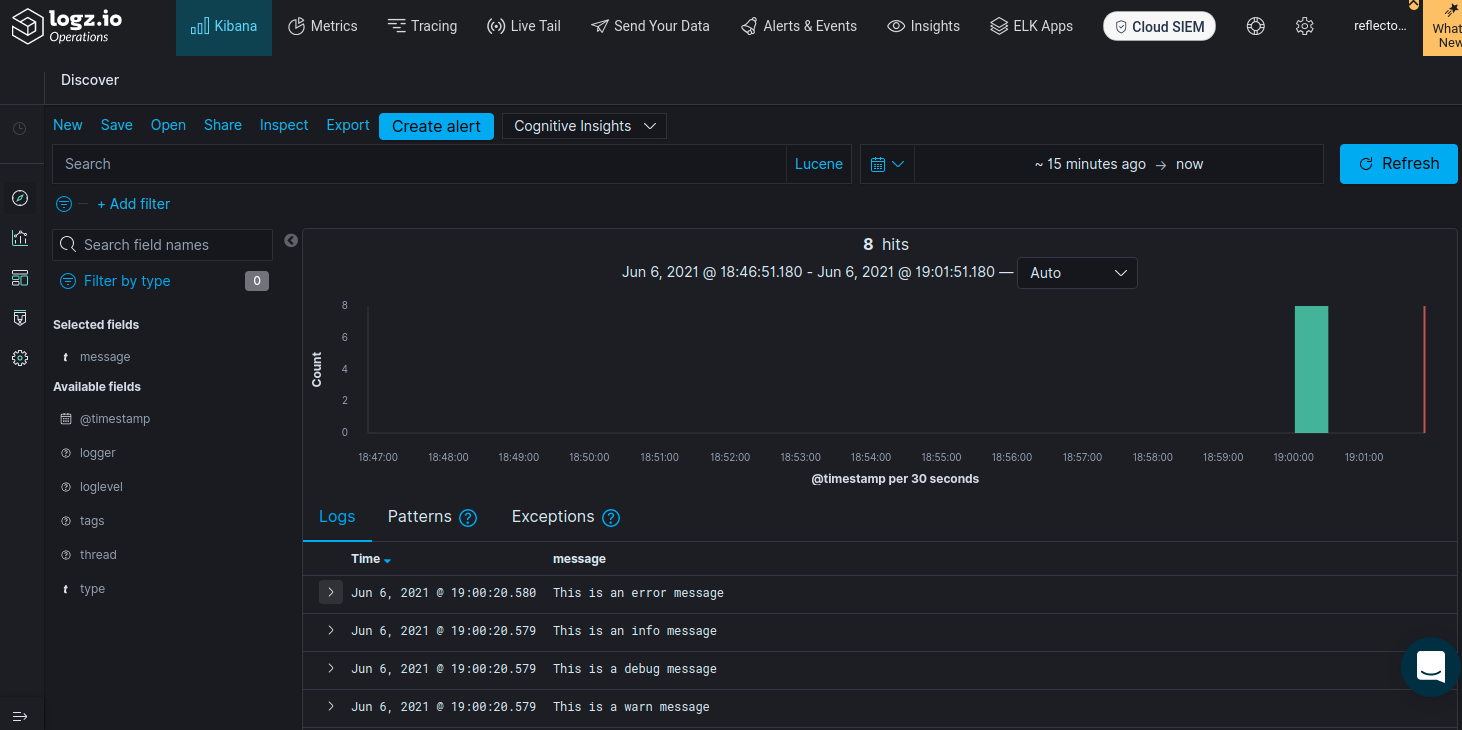
If you configured your token correctly and then started one of the plain Java applications with the environment variable LOG_TARGET set to LOGZIO, or the Spring Boot application in the staging or production profile, you should see the logs in your dashboard.
Conclusion
In any investigation of an incident, logs are an invaluable resource. No matter what other observability tools you use, you will always look at the logs.
This means you should put some thought into your logging configuration.
This tutorial has shown how you can configure a Java application to send logs to the places you want them to be.
You can check out the fully functional examples applications for Log4J, Logback, and Spring Boot on GitHub.


