Cross-Origin Resource Sharing (CORS) is an HTTP-header-based mechanism that allows servers to explicitly allowlist certain origins and helps bypass the same-origin policy.
This is required since browsers by default apply the same-origin policy for security. By implementing CORS in a web application, a webpage could request additional resources and load into the browser from other domains.
This article will focus on the various ways in which CORS can be implemented in a Spring-based application. To understand how CORS works in detail, please refer to this excellent introductory article.
Example Code
This article is accompanied by a working code example on GitHub.Overview of CORS-Specific HTTP Response Headers
The CORS specification defines a set of response headers returned by the server that will be the focus of the subsequent sections.
| Response Headers | Description |
|---|---|
Access-Control-Allow-Origin |
Comma-separated list of whitelisted origins or “*”. |
Access-Control-Allow-Methods |
Comma-separated list of HTTP methods the web server allows for cross-origin requests. |
Access-Control-Allow-Headers |
Comma-separated list of HTTP headers the web server allows for cross-origin requests. |
Access-Control-Expose-Headers |
Comma-separated list of HTTP headers that the client script can consider safe to display. |
Access-Control-Allow-Credentials |
If the browser makes a request to the server by passing credentials (in the form of cookies or authorization headers), its value is set to true. |
Access-Control-Max-Age |
Indicates how long the results of a preflight request can be cached. |
Setting up a Sample Client Application
We will use a simple angular application that will call the REST endpoints that we can inspect using browser developer tools. You can check out the source code on GitHub.
ng serve --open
We should be able to start the client application successfully.

Setting up a Sample Server Application
We will use a sample Spring-based application with GET and POST requests that the client application can call.
Note that you will find two separate applications: one that uses Spring MVC (REST) and the other that uses the Spring Reactive stack.
For simplicity, the CORS configuration across both applications is the same and the same endpoints have been defined. Both servers start at different ports 8091 and 8092.
The Maven Wrapper bundled with the application will be used to start the service. You can check out the Spring REST source code and the Spring Reactive source code.
    mvnw clean verify spring-boot:run (for Windows)
    ./mvnw clean verify spring-boot:run (for Linux)
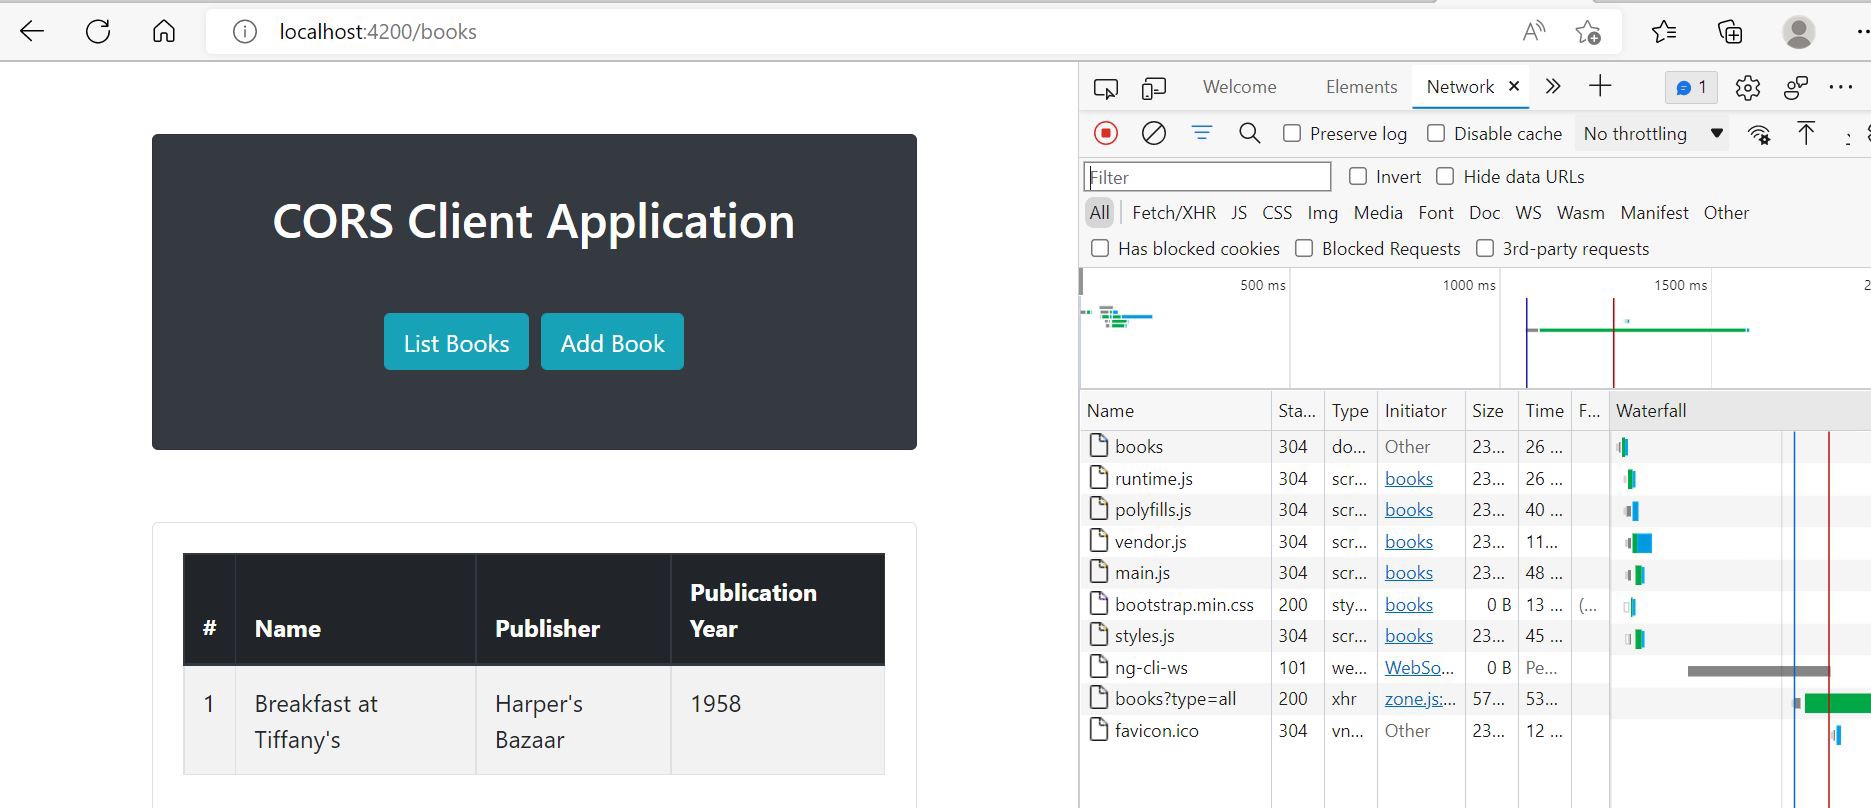
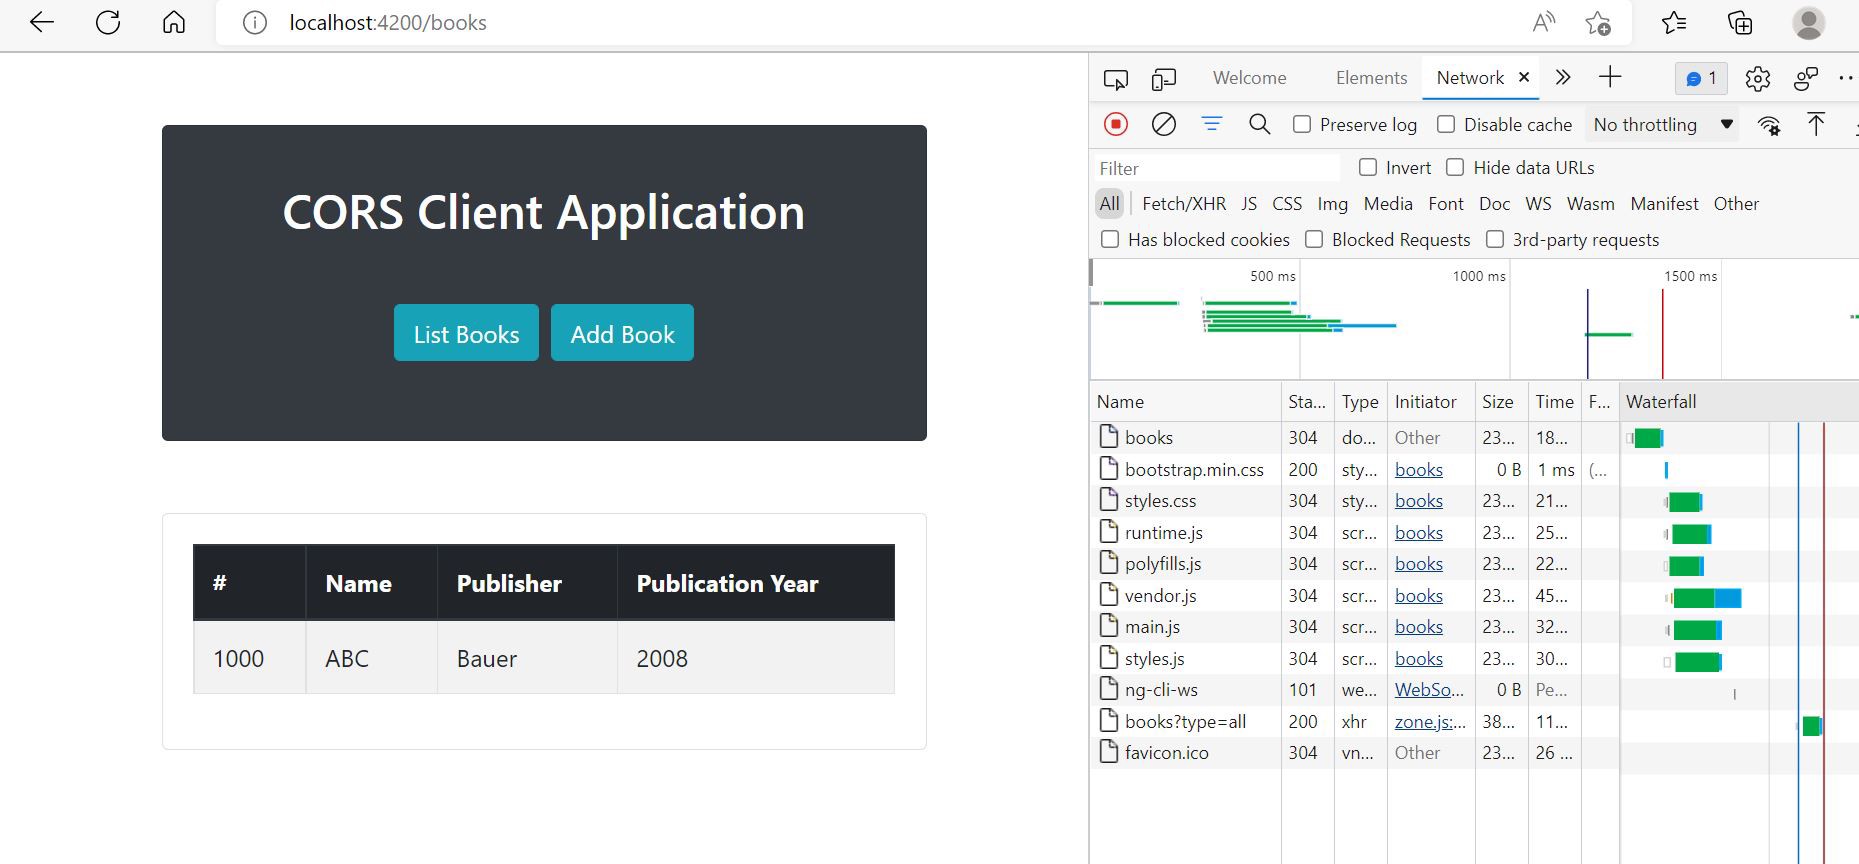
Once the Spring application successfully starts, the client application should be able to successfully load data from the server.
Call to the Spring REST server:

Call to the Spring Reactive server:

Understanding @CrossOrigin Attributes
In the Spring Boot app, we’re using the @CrossOrigin annotation to enable cross-origin calls. Let’s first understand the attributes that @CrossOrigin supports.
| Attributes | Description |
|---|---|
origins |
Allows you to specify a list of allowed origins. By default, it allows all origins. The attribute value will be set in the Access-Control-Allow-Origin header of both the preflight response and the actual response. Example Usage: @CrossOrigin(origins = "http://localhost:8080") @CrossOrigin(origins = {"http://localhost:8080", "http://testserver:8087"}) |
allowedHeaders |
Allows you to specify a list of headers that will be accepted when the browser makes the request. By default, any headers will be allowed. The value specified in this attribute is used in Access-Control-Allow-Headers in the preflight response. Example Usage: @CrossOrigin(allowedHeaders = {"Authorization", "Origin"}) |
exposedHeaders |
List of headers that are set in the actual response header. If not specified, only the safelisted headers will be considered safe to be exposed by the client script. Example Usage: @CrossOrigin(exposedHeaders = {"Access-Control-Allow-Origin","Access-Control-Allow-Credentials"}) |
allowCredentials |
When credentials are required to invoke the API, set Access-Control-Allow-Credentials header value to true. In case no credentials are required, omit the header. Example Usage: @CrossOrigin(allowCredentials = true) |
maxAge |
Default maxAge is set to 1800 seconds (30 minutes). Indicates how long the preflight responses can be cached. Example Usage: @CrossOrigin(maxAge = 300) |
What If We Do Not Configure CORS?
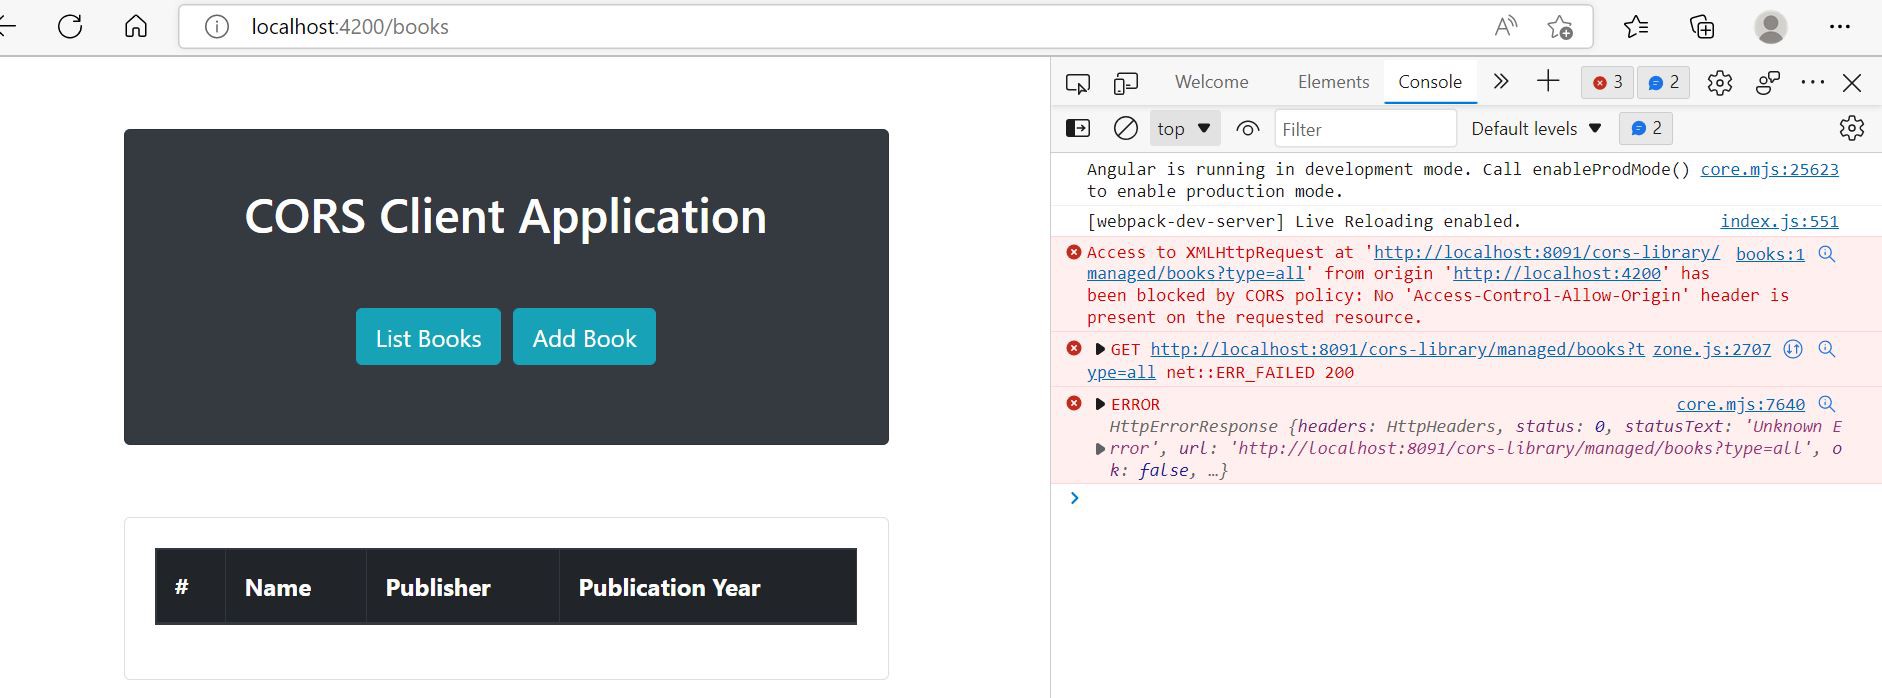
Consider our Spring Boot Application has not been configured for CORS support. If we try to hit our angular application running on port 4200, we see this error on the developer console:
Access to XMLHttpRequest at http://localhost:8091
from origin http://localhost:4200 has been blocked by CORS policy:
No 'Access-Control-Allow-Origin` header is present on the requested
resource

This is because even though both applications are served from localhost, they are not considered the same origin because the port is different.
Configuring CORS in a Spring Web MVC Application
The initial setup created with a Spring Initializr holds all the required CORS dependencies. No external dependencies need to be added. Refer to this sample Spring Web Application project.
Defining @CrossOrigin at the Class Level
@CrossOrigin(maxAge = 3600)
@RestController
@RequestMapping("cors-library/managed/books")
public class LibraryController {}
Here since we have defined @CrossOrigin:
- All
@RequestMappingmethods (and methods using the shorthand annotations@GetMapping,@PostMapping, etc.) in the controller will accept cross-origin requests. - Since
maxAge = 3600, all pre-flight responses will be cached for 60 mins.
Defining @CrossOrigin at the Method Level
@CrossOrigin(origins = "http://localhost:4200", allowedHeaders = "Requestor-Type", exposedHeaders = "X-Get-Header")
@GetMapping
public ResponseEntity<List<BookDto>> getBooks(@RequestParam String type) {
    HttpHeaders headers = new HttpHeaders();
    headers.set("X-Get-Header", "ExampleHeader");
    return ResponseEntity.ok().headers(headers).body(libraryService.getAllBooks(type));
}
This will have the following effects:
- Only requests coming from origin
http://localhost:4200will be accepted. - If we expect only certain headers to be accepted, we can specify those headers in the
allowedHeadersattribute. If theRequestor-Typeheader is not sent by the browser, the request will not be processed. - If we set certain response headers, for the client application to be able to use them, we need to explicitly set the list of response headers to be exposed using the
exposedHeadersattribute.
Combination of @CrossOrigin at Class and Method Levels
@CrossOrigin(maxAge = 3600)
@RestController
@RequestMapping("cors-library/managed/books")
public class LibraryController {

    private static final Logger log = LoggerFactory.getLogger(LibraryController.class);

    private final LibraryService libraryService;

    public LibraryController(LibraryService libraryService) {
        this.libraryService = libraryService;
    }

    @CrossOrigin(origins = "http://localhost:4200", allowedHeaders = "Requestor-Type")
    @GetMapping
    public ResponseEntity<List<BookDto>> getBooks(@RequestParam String type) {
        HttpHeaders headers = new HttpHeaders();
        headers.set("X-Get-Header", "ExampleHeader");
        return ResponseEntity.ok().headers(headers).body(libraryService.getAllBooks(type));
    }
}
- By defining the annotation at both class and method levels its combined attributes will be applied to the methods i.e (
origins,allowedHeaders, ``) - In all the above cases we can define both global CORS cmaxAgeonfiguration and local configuration using
@CrossOrigin. For attributes that accept multiple values, a combination of global and local values will apply (i.e. they are merged). For attributes that accept only a single value, the local value will take precedence over the global one.
Enabling CORS Globally
Instead of adding CORS to each of the resources separately, we could define a common CORS configuration that would apply to all resources defined.
Here, we will use a WebMvcConfigurer which is a part of the Spring Web MVC library
By overriding the addCorsMapping() method we will configure CORS to all URLs that are handled by Spring Web MVC.
To define the same configuration (as explained in the previous sections) globally, we will use the configuration parameters
defined in application.yml to create a bean as defined below.
The properties defined in application.yml (allowed-origins, allowed-methods, max-age, allowed-headers, exposed-headers)
are custom properties that map to the self-defined class Cors
via @ConfigurationProperties(prefix = "web")
web:
  cors:
    allowed-origins: "http://localhost:4200"
    allowed-methods: GET, POST, PATCH, PUT, DELETE, OPTIONS, HEAD
    max-age: 3600
    allowed-headers: "Requestor-Type"
    exposed-headers: "X-Get-Header"
@Bean
public WebMvcConfigurer corsMappingConfigurer() {
   return new WebMvcConfigurer() {
       @Override
       public void addCorsMappings(CorsRegistry registry) {
           WebConfigProperties.Cors cors = webConfigProperties.getCors();
           registry.addMapping("/**")
             .allowedOrigins(cors.getAllowedOrigins())
             .allowedMethods(cors.getAllowedMethods())
             .maxAge(cors.getMaxAge())
             .allowedHeaders(cors.getAllowedHeaders())
             .exposedHeaders(cors.getExposedHeaders());
       }
   };
}
CorsConfiguration defaults
addMapping() returns a CorsRegistration object which applies a default CorsConfiguration if
one or more methods (allowedOrigins, allowedMethods, maxAge, allowedHeaders, exposedHeaders) are not explicitly defined.
Refer to the Spring library method CorsConfiguration.applyPermitDefaultValues() to understand the defaults applied.
Configuring CORS in a Spring Webflux application
The initial setup is created with a Spring Initializr and uses Spring Webflux, Spring Data R2DBC, and H2 Database. No external dependencies need to be added. Refer to this sample Spring Webflux project.
CORS Configuration for Spring Webflux using @CrossOrigin
Similar to Spring MVC, in Spring Webflux we can define @CrossOrigin at the class level or the method level.
The same @CrossOrigin attributes described in the previous sections will apply. Also, when the annotation is defined at both class and method,
its combined attributes will apply to the methods.
@CrossOrigin(origins = "http://localhost:4200", allowedHeaders = "Requestor-Type", exposedHeaders = "X-Get-Header")
@GetMapping
public ResponseEntity<Mono<List<BookDto>>> getBooks(@RequestParam String type) {
    HttpHeaders headers = new HttpHeaders();
    headers.set("X-Get-Header", "ExampleHeader");
    return ResponseEntity.ok().headers(headers).body(libraryService.getAllBooks(type));
}
Enabling CORS Configuration Globally in Spring Webflux
To define CORS globally in a Spring Webflux application, we use the WebfluxConfigurer and override the addCorsMappings().
Similar to Spring MVC, it uses a CorsConfiguration with defaults that can be overridden as required.
@Bean
public WebFluxConfigurer corsMappingConfigurer() {
    return new WebFluxConfigurer() {
        @Override
        public void addCorsMappings(CorsRegistry registry) {
            WebConfigProperties.Cors cors = webConfigProperties.getCors();
            registry.addMapping("/**")
              .allowedOrigins(cors.getAllowedOrigins())
              .allowedMethods(cors.getAllowedMethods())
              .maxAge(cors.getMaxAge())
              .allowedHeaders(cors.getAllowedHeaders())
              .exposedHeaders(cors.getExposedHeaders());
        }
    };
}
Enabling CORS Using WebFilter
The Webflux framework allows CORS configuration to be set globally via CorsWebFilter. We can use the CorsConfiguration object to set
the required configuration and register CorsConfigurationSource to be used with the filter.
However, by default, the CorsConfiguration in case of filters
does not assign default configuration to the endpoints! Only the specified configuration can be applied.
Another option is to call CorsConfiguration.applyPermitDefaultValues() explicitly.
@Bean
public CorsWebFilter corsWebFilter() {
    CorsConfiguration corsConfig = new CorsConfiguration();
    corsConfig.setAllowedOrigins(Arrays.asList("http://localhost:4200"));
    corsConfig.setMaxAge(3600L);
    corsConfig.addAllowedMethod("*");
    corsConfig.addAllowedHeader("Requestor-Type");
    corsConfig.addExposedHeader("X-Get-Header");

    UrlBasedCorsConfigurationSource source =
        new UrlBasedCorsConfigurationSource();
    source.registerCorsConfiguration("/**", corsConfig);

    return new CorsWebFilter(source);
}
Enabling CORS with Spring Security
If Spring Security is applied to a Spring application, CORS must be processed before Spring Security comes into action since preflight requests will not contain cookies and Spring Security will reject the request as it will determine that the user is not authenticated. Here the examples shown will demonstrate basic authentication.
To apply Spring security we will add the below dependency Maven:
<dependency>
  <groupId>org.springframework.boot</groupId>
  <artifactId>spring-boot-starter-security</artifactId>
</dependency>
Gradle:
implementation 'org.springframework.boot:spring-boot-starter-security'
Spring Security Applied to Spring Web MVC
Spring security by default protects every endpoint. However, this would cause CORS errors since a browser’s OPTIONS preflight requests would be blocked. To make Spring Security bypass preflight requests we need to add http.cors() to the HTTPSecurity object as shown:
@Configuration
@EnableConfigurationProperties(BasicAuthConfigProperties.class)
@EnableWebSecurity
public class SecurityConfiguration extends WebSecurityConfigurerAdapter {

    private final BasicAuthConfigProperties basicAuth;

    public SecurityConfiguration(BasicAuthConfigProperties basicAuth) {
        this.basicAuth = basicAuth;
    }

    protected void configure(HttpSecurity http) throws Exception {
        http.cors();
    }
}
To set up additional CORS configuration with Spring Security after bypassing pre-flight requests, we can
configure CORS using the @CrossOrigin annotation:
@CrossOrigin(maxAge = 3600, allowCredentials = "true")
@RestController
@RequestMapping("cors-library/managed/books")
public class LibraryController {

    private static final Logger log = LoggerFactory.getLogger(LibraryController.class);

    private final LibraryService libraryService;

    public LibraryController(LibraryService libraryService) {
        this.libraryService = libraryService;
    }

    @CrossOrigin(origins = "http://localhost:4200", allowedHeaders = {"Requestor-Type", "Authorization"}, exposedHeaders = "X-Get-Header")
    @GetMapping
    public ResponseEntity<List<BookDto>> getBooks(@RequestParam String type) {
        HttpHeaders headers = new HttpHeaders();
        headers.set("X-Get-Header", "ExampleHeader");
        return ResponseEntity.ok().headers(headers).body(libraryService.getAllBooks(type));
    }
}
Or, we can create a CorsConfigurationSource bean:
@Bean
CorsConfigurationSource corsConfigurationSource() {
  CorsConfiguration configuration = new CorsConfiguration();
  configuration.setAllowedOrigins(Arrays.asList("http://localhost:4200"));
  configuration.setAllowedMethods(Arrays.asList("GET","POST","PATCH", "PUT", "DELETE", "OPTIONS", "HEAD"));
  configuration.setAllowCredentials(true);
  configuration.setAllowedHeaders(Arrays.asList("Authorization", "Requestor-Type"));
  configuration.setExposedHeaders(Arrays.asList("X-Get-Header"));
  configuration.setMaxAge(3600L);
  UrlBasedCorsConfigurationSource source = new UrlBasedCorsConfigurationSource();
  source.registerCorsConfiguration("/**", configuration);
  return source;
}
Spring Security Applied to Spring Webflux
In case of Webflux, despite using Spring Security the most preferred way of applying CORS configuration to oncoming requests
is to use the CorsWebFilter. We can disable the CORS integration with Spring security and instead integrate with CorsWebFilter by providing a CorsConfigurationSource:
@Configuration
@EnableWebFluxSecurity
@EnableConfigurationProperties(BasicAuthConfigProperties.class)
public class SecurityConfiguration {

    private final BasicAuthConfigProperties basicAuth;

    public SecurityConfiguration(BasicAuthConfigProperties basicAuth) {
        this.basicAuth = basicAuth;
    }

    @Bean
    public SecurityWebFilterChain securityWebFilterChain(ServerHttpSecurity http) {
        http.cors(cors -> cors.disable())
                .securityMatcher(new PathPatternParserServerWebExchangeMatcher("/**"))
                .authorizeExchange()
                .anyExchange().authenticated().and()
                .httpBasic();
        return http.build();
    }

    @Bean
    public MapReactiveUserDetailsService userDetailsService() {
        UserDetails user = User.withDefaultPasswordEncoder()
                .username(basicAuth.getUsername())
                .password(basicAuth.getPassword())
                .roles("USER")
                .build();
        return new MapReactiveUserDetailsService(user);
    }

    @Bean
    public CorsConfigurationSource corsConfiguration() {
        CorsConfiguration corsConfig = new CorsConfiguration();
        corsConfig.applyPermitDefaultValues();
        corsConfig.setAllowCredentials(true);
        corsConfig.addAllowedMethod("GET");
        corsConfig.addAllowedMethod("PATCH");
        corsConfig.addAllowedMethod("POST");
        corsConfig.addAllowedMethod("OPTIONS");
        corsConfig.setAllowedOrigins(Arrays.asList("http://localhost:4200"));
        corsConfig.setAllowedHeaders(Arrays.asList("Authorization", "Requestor-Type"));
        corsConfig.setExposedHeaders(Arrays.asList("X-Get-Header"));
        UrlBasedCorsConfigurationSource source =
                new UrlBasedCorsConfigurationSource();
        source.registerCorsConfiguration("/**", corsConfig);
        return source;
    }

    @Bean
    public CorsWebFilter corsWebFilter() {
        return new CorsWebFilter(corsConfiguration());
    }
}
Conclusion
In short, the CORS configuration depends on multiple factors:
- Spring Web / Spring Webflux
- Local / Global CORS config
- Spring Security or not
Depending on the framework we can decide which method works best and is the easiest to implement so that we can avoid CORS errors. You can play around with the sample application on GitHub.


