When following a “code first” approach in API development, we first start with writing code, and then we generate the API specification from the code, which then becomes the documentation.
“Code first” is not the only way to develop an API. “API first” is another option where we do exactly the opposite. First, we write the specification, and then we generate code from that specification and implement against it.
Let’s discuss the benefits of using this approach and how to implement it with Springdoc and Spring Boot.
Example Code
This article is accompanied by a working code example on GitHub.When to Choose the “Code First” Approach
When we need to go to production fast, or create a prototype something, “code first” may be a good approach. Then we can generate our documentation from the API we have already programmed.
Another benefit of code first is the fact that the documentation will be generated from the actual code, which means that we don’t have to manually keep the documentation in sync with our code. The documentation is more likely to match the behavior of the code and is always up-to-date.
Example Application
In this article, we’ll be using Spring Boot together with springdoc-openapi.
All the annotations that we will be using are from Swagger. Springdoc wraps Swagger and offers us a single dependency which we can use to create our API documentation.
Getting Started
To get started we only need to add the Springdoc dependency (Gradle notation):
implementation 'org.springdoc:springdoc-openapi-ui:1.3.3'
First, let’s define the path of our documentation. We define it in the application.yml of our Spring Boot project:
springdoc:
  api-docs:
    path: /reflectoring-openapi
Springdoc will now add the endpoint /reflectoring-openapi to our application where it will beautifully display our endpoints. For more configuration properties please check the official documentation.
Defining General API Information
Next, let’s define some information about our API:
@OpenAPIDefinition(
  info = @Info(
  title = "Code-First Approach (reflectoring.io)",
  description = "" +
    "Lorem ipsum dolor ...",
  contact = @Contact(
    name = "Reflectoring",
    url = "https://reflectoring.io",
    email = "petros.stergioulas94@gmail.com"
  ),
  license = @License(
    name = "MIT Licence",
    url = "https://github.com/thombergs/code-examples/blob/master/LICENSE")),
  servers = @Server(url = "http://localhost:8080")
)
class OpenAPIConfiguration {
}
Note that we don’t need to define the class above as a Spring bean. Springdoc will just use reflection to obtain the information it needs.
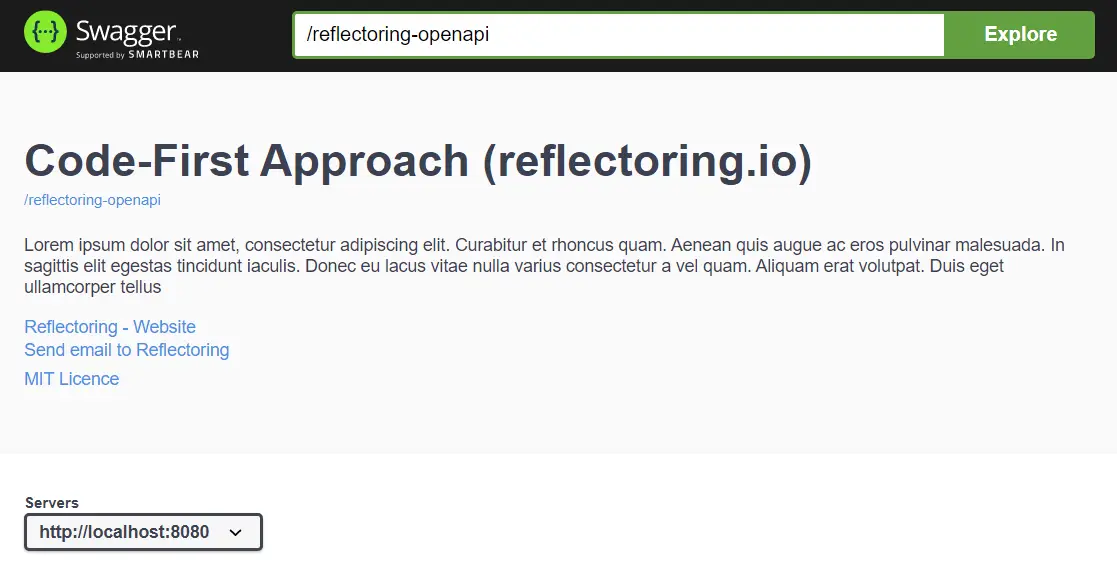
Now, if we start the Spring Boot application and navigate to http://localhost:8080/swagger-ui/index.html?configUrl=/reflectoring-openapi/swagger-config, we should see the information we defined above:
Defining the REST API
Next, let’s add some REST endpoints. We’ll be building a TODO API with CRUD operations.
@RequestMapping("/api/todos")
@Tag(name = "Todo API", description = "euismod in pellentesque ...")
interface TodoApi {

  @GetMapping
  @ResponseStatus(code = HttpStatus.OK)
  List<Todo> findAll();

  @GetMapping("/{id}")
  @ResponseStatus(code = HttpStatus.OK)
  Todo findById(@PathVariable String id);

  @PostMapping
  @ResponseStatus(code = HttpStatus.CREATED)
  Todo save(@RequestBody Todo todo);

  @PutMapping("/{id}")
  @ResponseStatus(code = HttpStatus.OK)
  Todo update(@PathVariable String id, @RequestBody Todo todo);

  @DeleteMapping("/{id}")
  @ResponseStatus(code = HttpStatus.NO_CONTENT)
  void delete(@PathVariable String id);
}
With the @Tag annotation, we add some additional information to the API.
Now, we have to implement this interface and annotate our controller with
@RestController. This will let Springdoc know that this is a controller and that it should produce a documentation for it:
@RestController
class TodoController implements TodoApi {
  // method implementations
}
Let’s start the application again and take a look at the Swagger UI. It should look something like this:
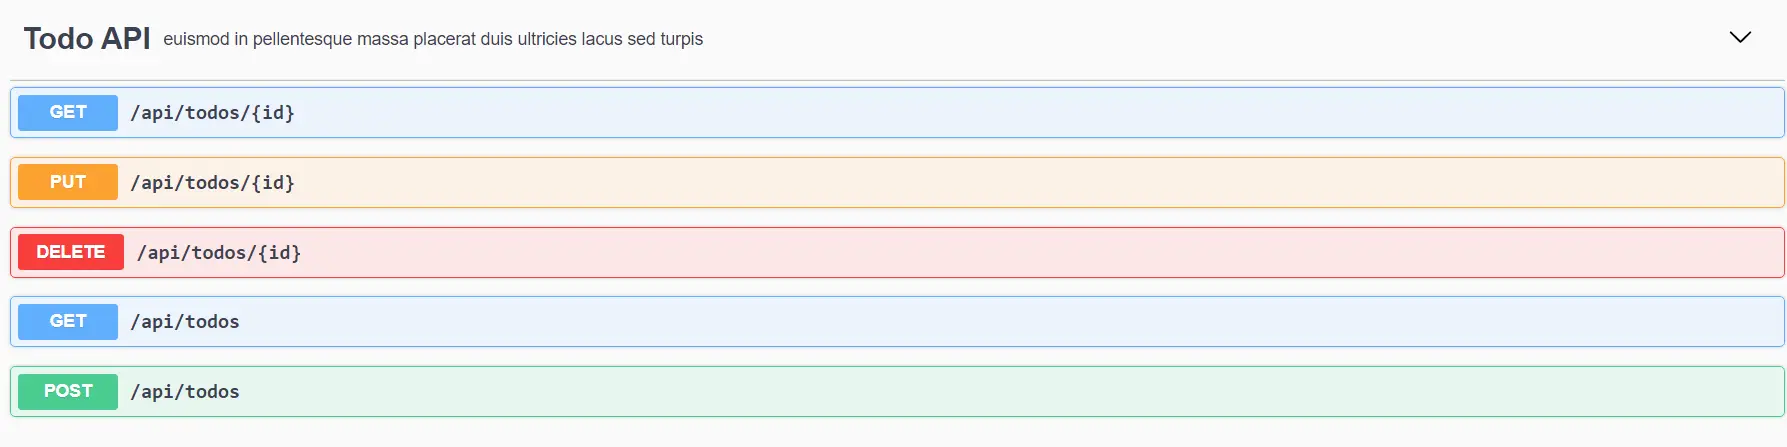
Springdoc did its magic and created a documentation for our API!
Let’s dive a little more into Springdoc by defining a security scheme.
Defining a Security Scheme
To define a security scheme for our application we just need to add the @SecurityScheme annotation in one of our classes:
// other annotations omitted
@SecurityScheme(
  name = "api",
  scheme = "basic",
  type = SecuritySchemeType.HTTP,
  in = SecuritySchemeIn.HEADER)
class OpenAPIConfiguration {
}
The above @SecurityScheme will be referred to as api and will do a basic authentication via HTTP. We add this annotation in the OpenAPIConfiguration class.
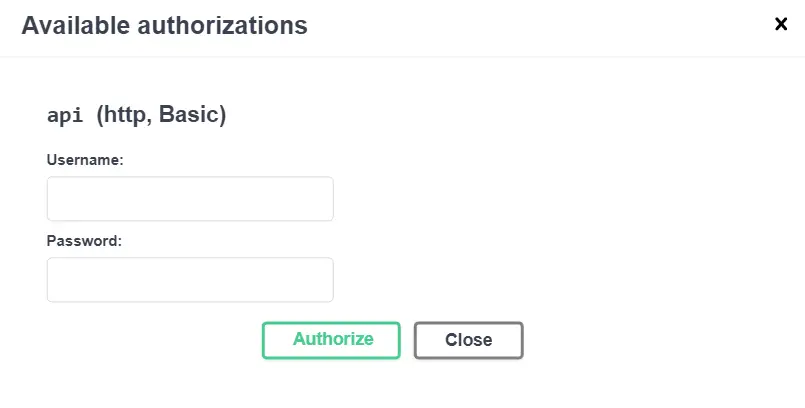
Let’s see what this annotation produced for us:
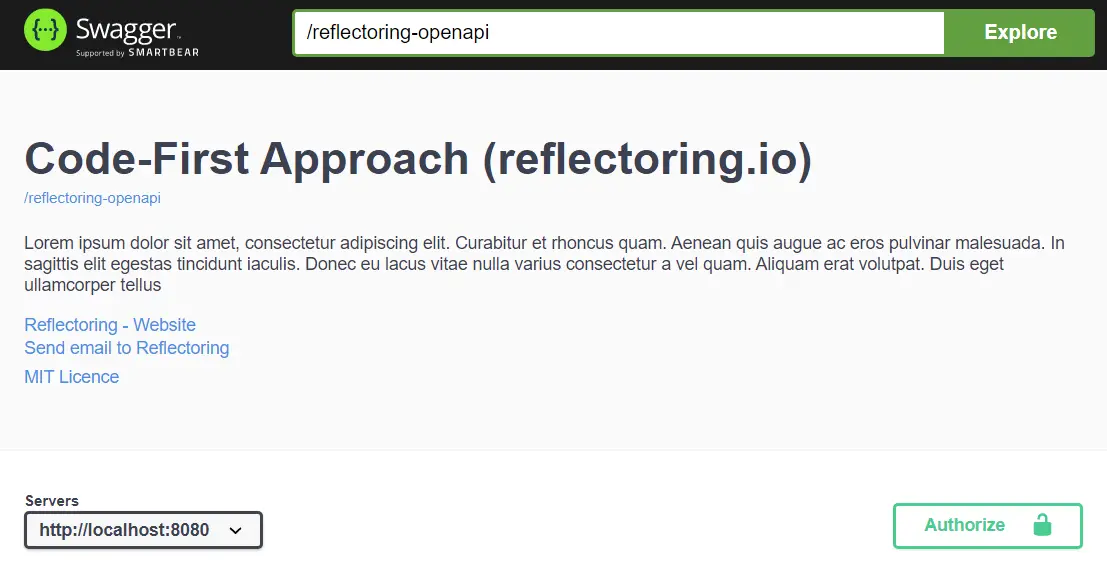
Our documentation has now also an “Authorize” Button! If we press this button we will get a dialog where we can authenticate:
To define that an API endpoint uses the above security scheme we have to annotate it with the @SecurityRequirement annotation.
Now, the TodoApi looks like this:
@RequestMapping("/api/todos")
@Tag(name = "Todo API", description = "euismod in pellentesque ...")
@SecurityRequirement(name = "api")
interface TodoApi {
    // other methods omitted
}
Now, the Swagger UI will show a lock on each of our endpoints to mark them as “secured”:
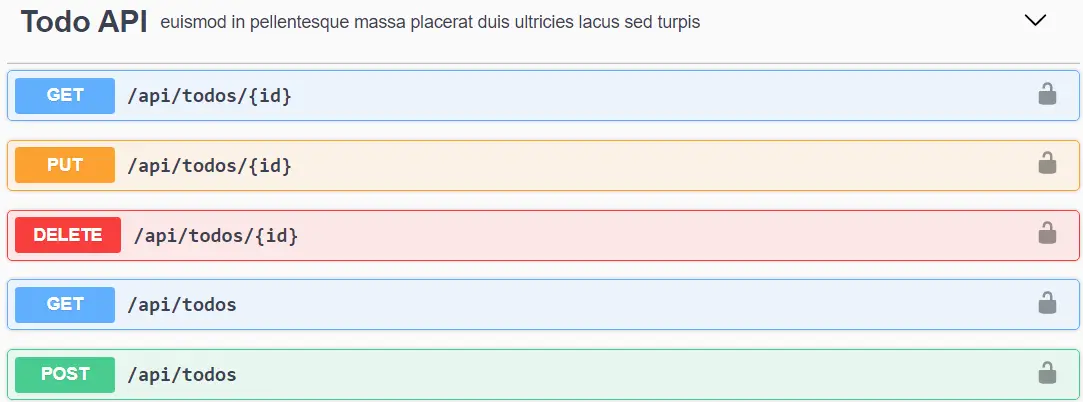
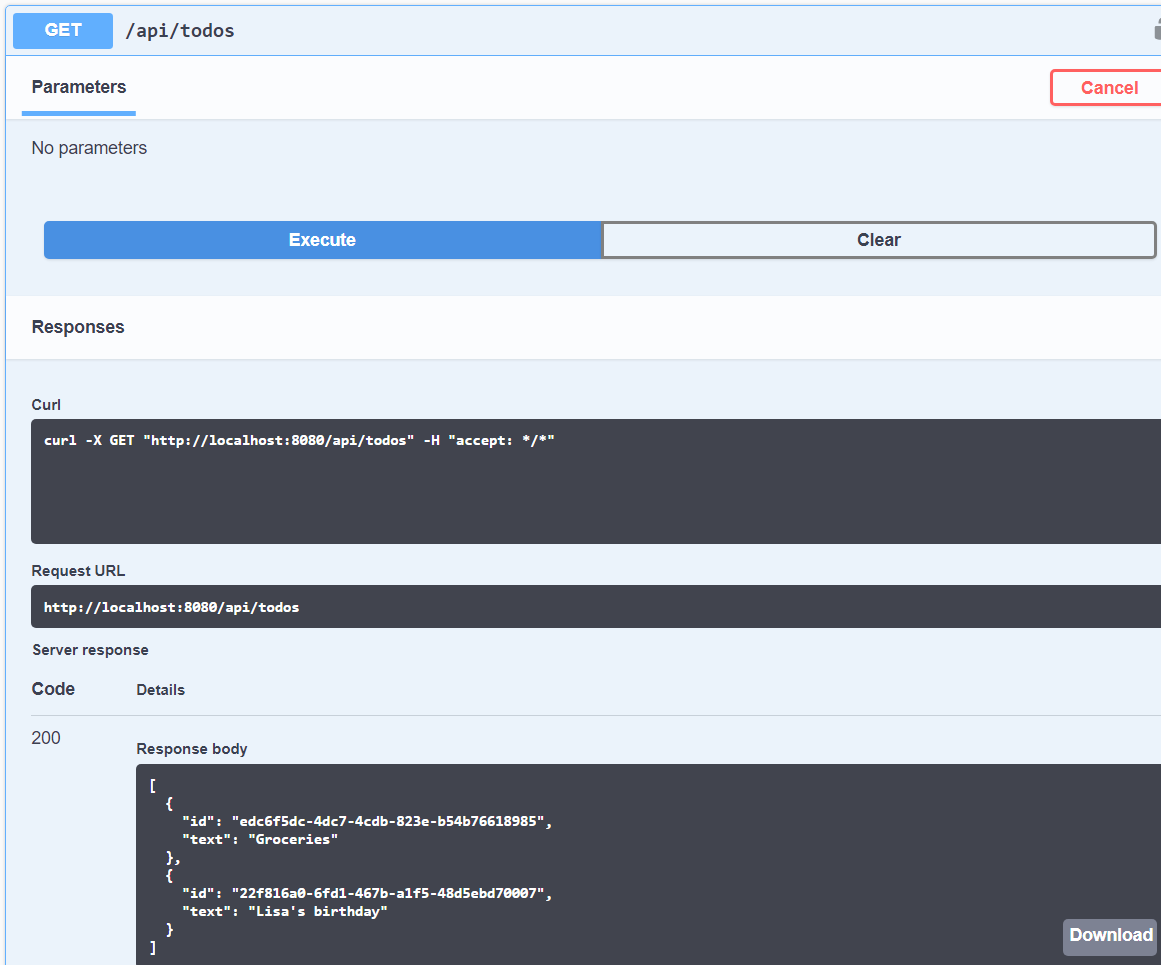
Actually, the endpoints are not secured, yet. If we try to request the /api/todos resource, for example, we will still be able to receive the data without authentication:
We have to implement the actual security ourselves. See the code in the repository for the full implementation with Spring Security.
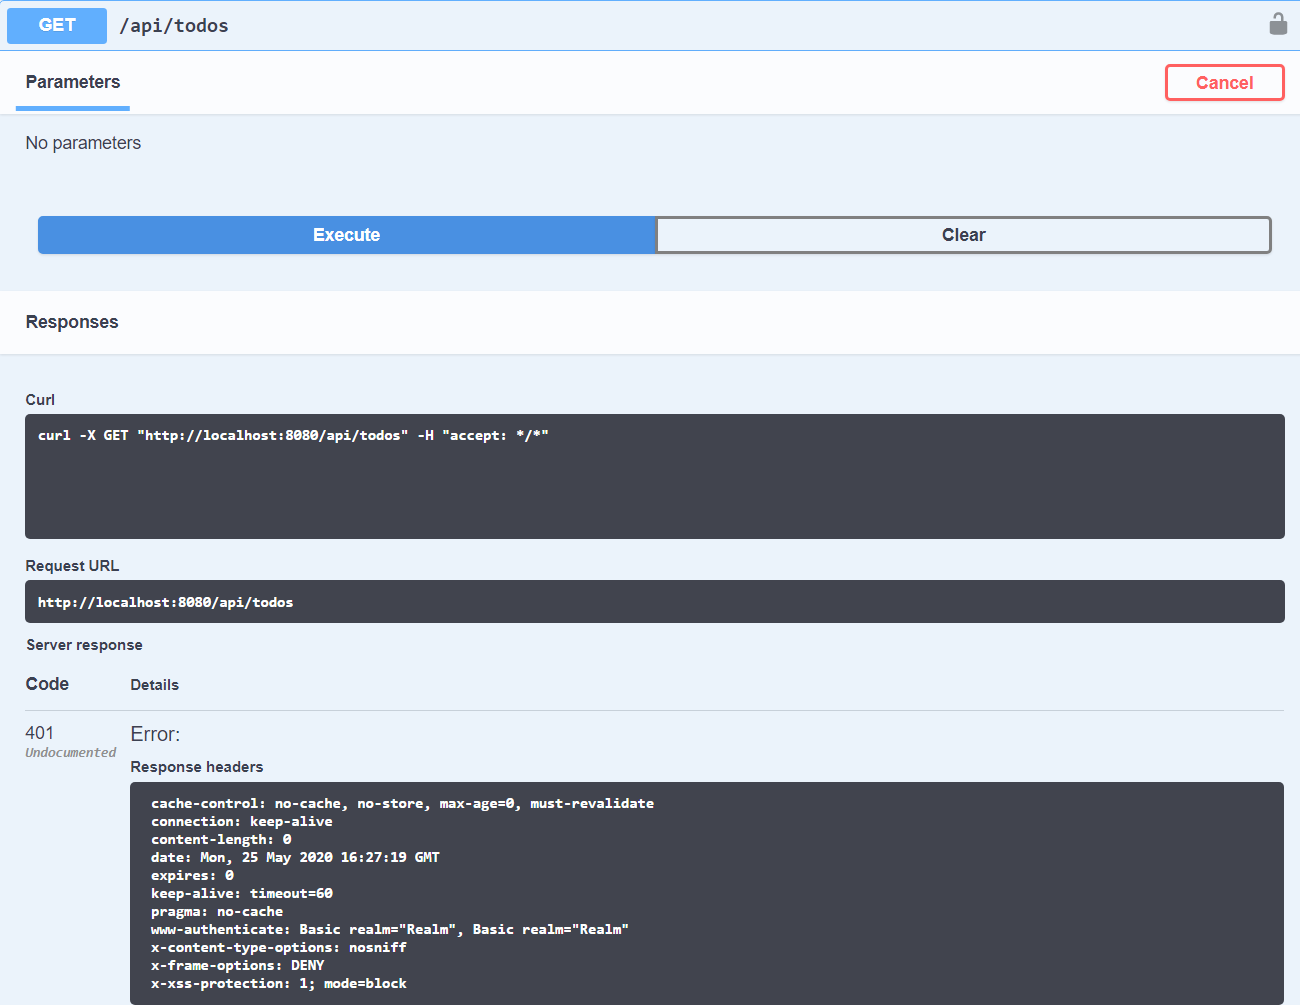
After securing the application we can now see that we receive a 401 status code if we try to access any resource under /api/todos.
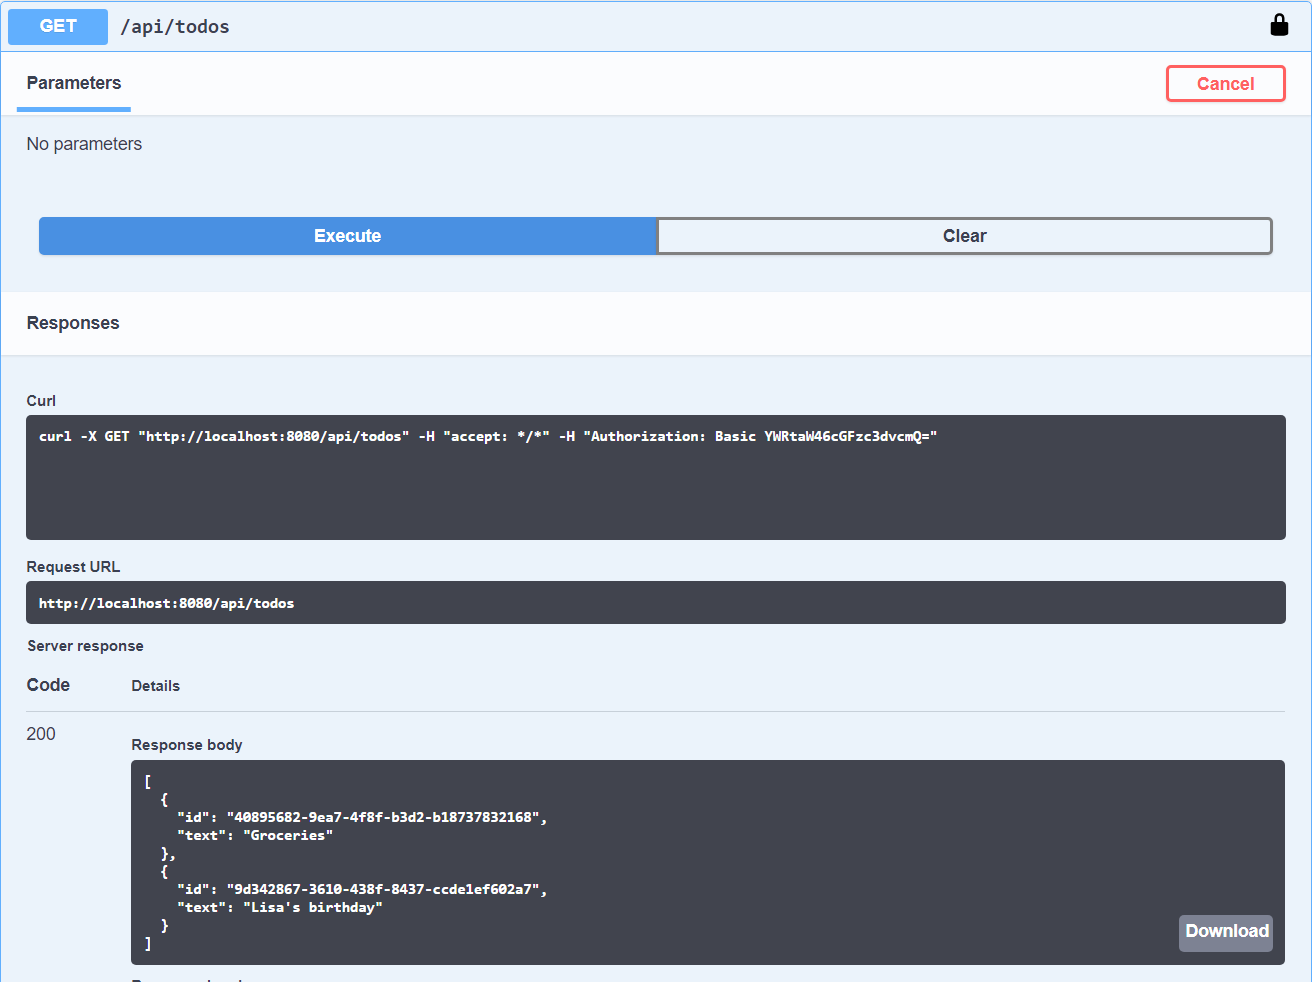
After authenticating we can again access the resource:
Caveats When Using Code First
The Code First approach is really easy to use and can get you pretty fast to a well documented REST API.
Sometimes, however, it might give us the sense that our documentation is up-to date when it is actually not. That’s because annotations can be added or removed accidentally. Unlike code, they’re not executed during unit tests, so the documentation behaves more like Javadoc than code in terms of outdatedness.
A solution to that problem is Spring REST docs, which creates documentation based on tests.
If a test fails, it means that the documentation won’t be created. That way, our REST API documentation becomes part of the actual code and its lifecycle.
Conclusion
As we saw in this article, the “code first” approach with Springdoc is all about speed. First, we build our API in code, then we generate the specification/documentation via annotations. Springdoc elevates Swagger and helps us create our OpenAPI Specification.
If you want to have a deeper look, browse the code on GitHub.