Developers use HTTP Clients to communicate with other applications over the network. Over the years, multiple HTTP Clients have been developed to suit various application needs.
In this article, we will focus on Retrofit, one of the most popular type-safe Http clients for Java and Android.
Example Code
This article is accompanied by a working code example on GitHub.What is OkHttp?
OkHttp is an efficient HTTP client developed by Square. Some of its key advantages are:
- HTTP/2 support
- Connection pooling (helps reduce request latency)
- GZIP compression (saves bandwidth and speeds up interaction)
- Response Caching
- Silent recovery from connection problems
- Support for synchronous and asynchronous calls
What is Retrofit?
Retrofit is a high-level REST abstraction built on top of OkHttp. When used to call REST applications, it greatly simplifies API interactions by parsing requests and responses into POJOs.
In the further sections, we will work on creating a Retrofit client and look at how to incorporate the various features that OkHttp provides.
Setting up a REST Server
We will use a sample REST-based Library Application that can fetch, create, update and delete books and authors. You can check out the source code on GitHub and run the application yourself if you want.
This library application is a Spring Boot service that uses Maven for building and HSQLDB as the underlying database. The Maven Wrapper bundled with the application will be used to start the service:
mvnw clean verify spring-boot:run (for Windows)
./mvnw clean verify spring-boot:run (for Linux)
Now, the application should successfully start:
[ main] com.reflectoring.library.Application : Started application in 6.94 seconds (JVM running for 7.611)
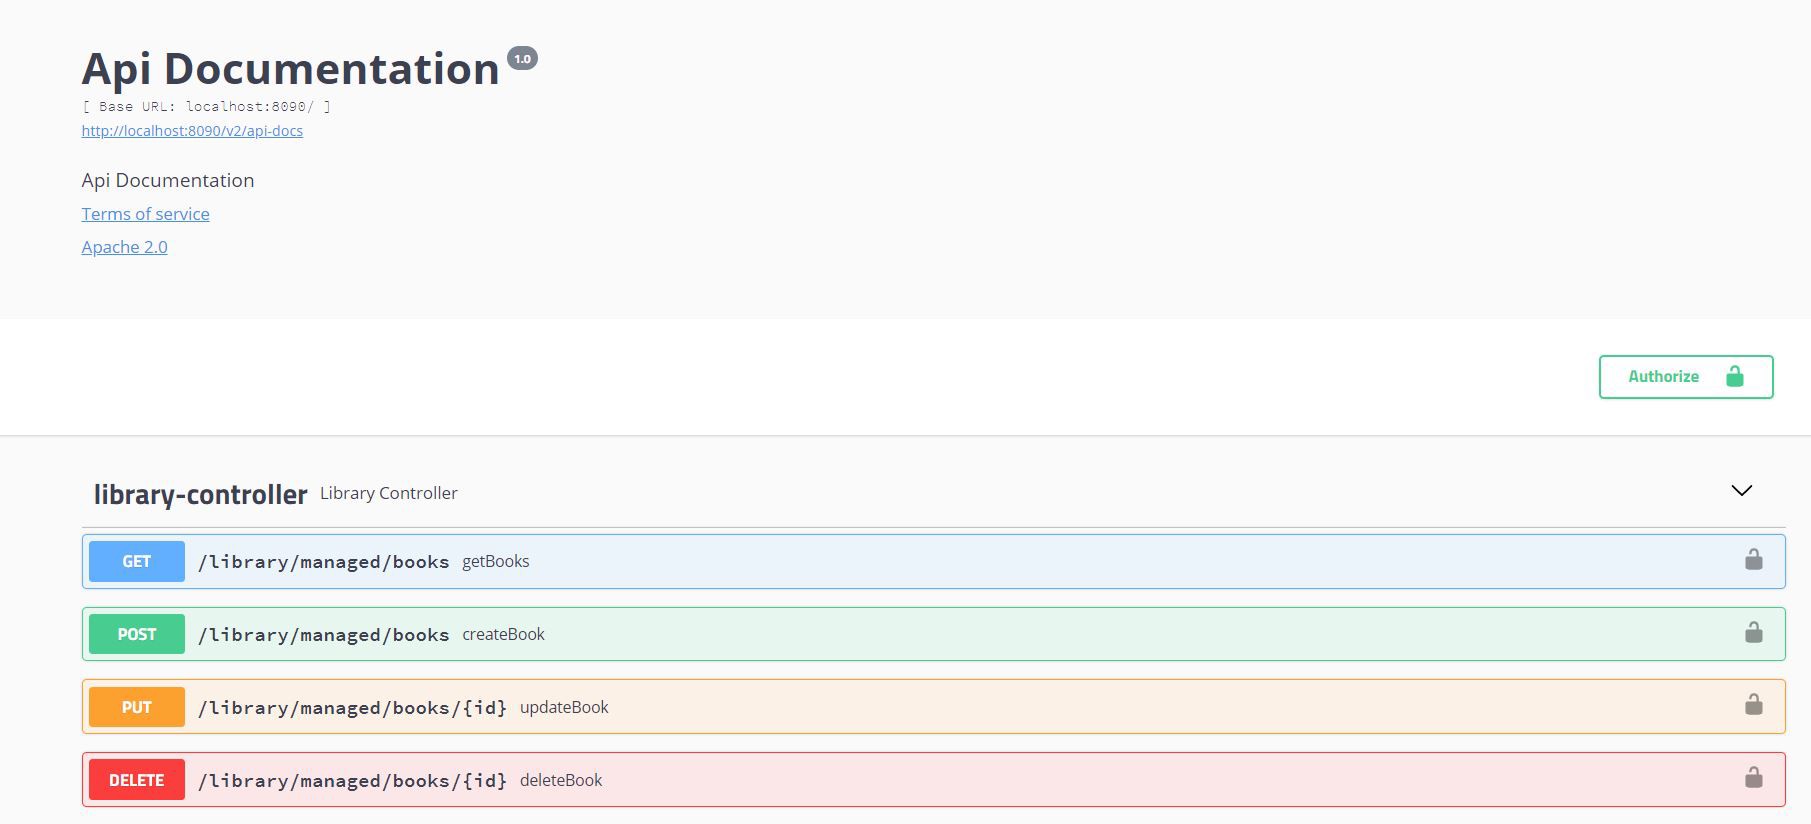
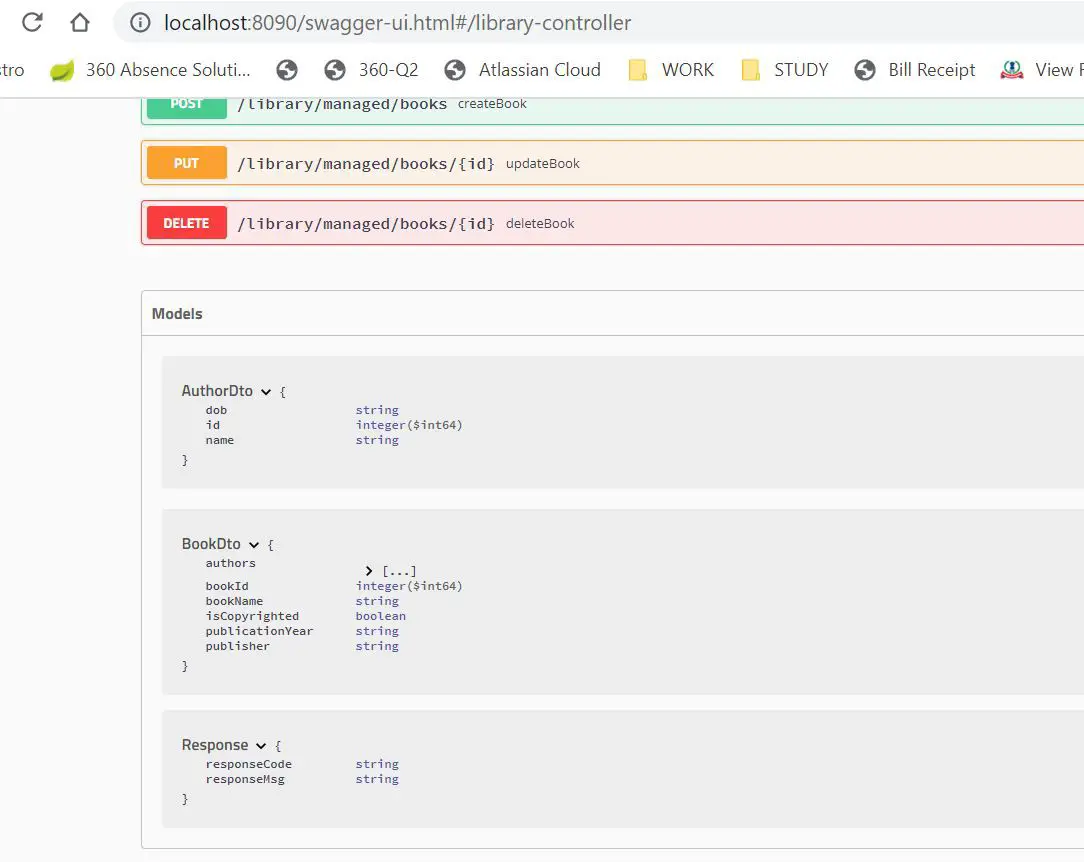
Swagger is a set of tools that describes an API structure by creating user-friendly documentation and helps develop and describe RESTful APIs. This application uses the Swagger documentation that can be viewed at http://localhost:8090/swagger-ui.html
The documentation should look like this:
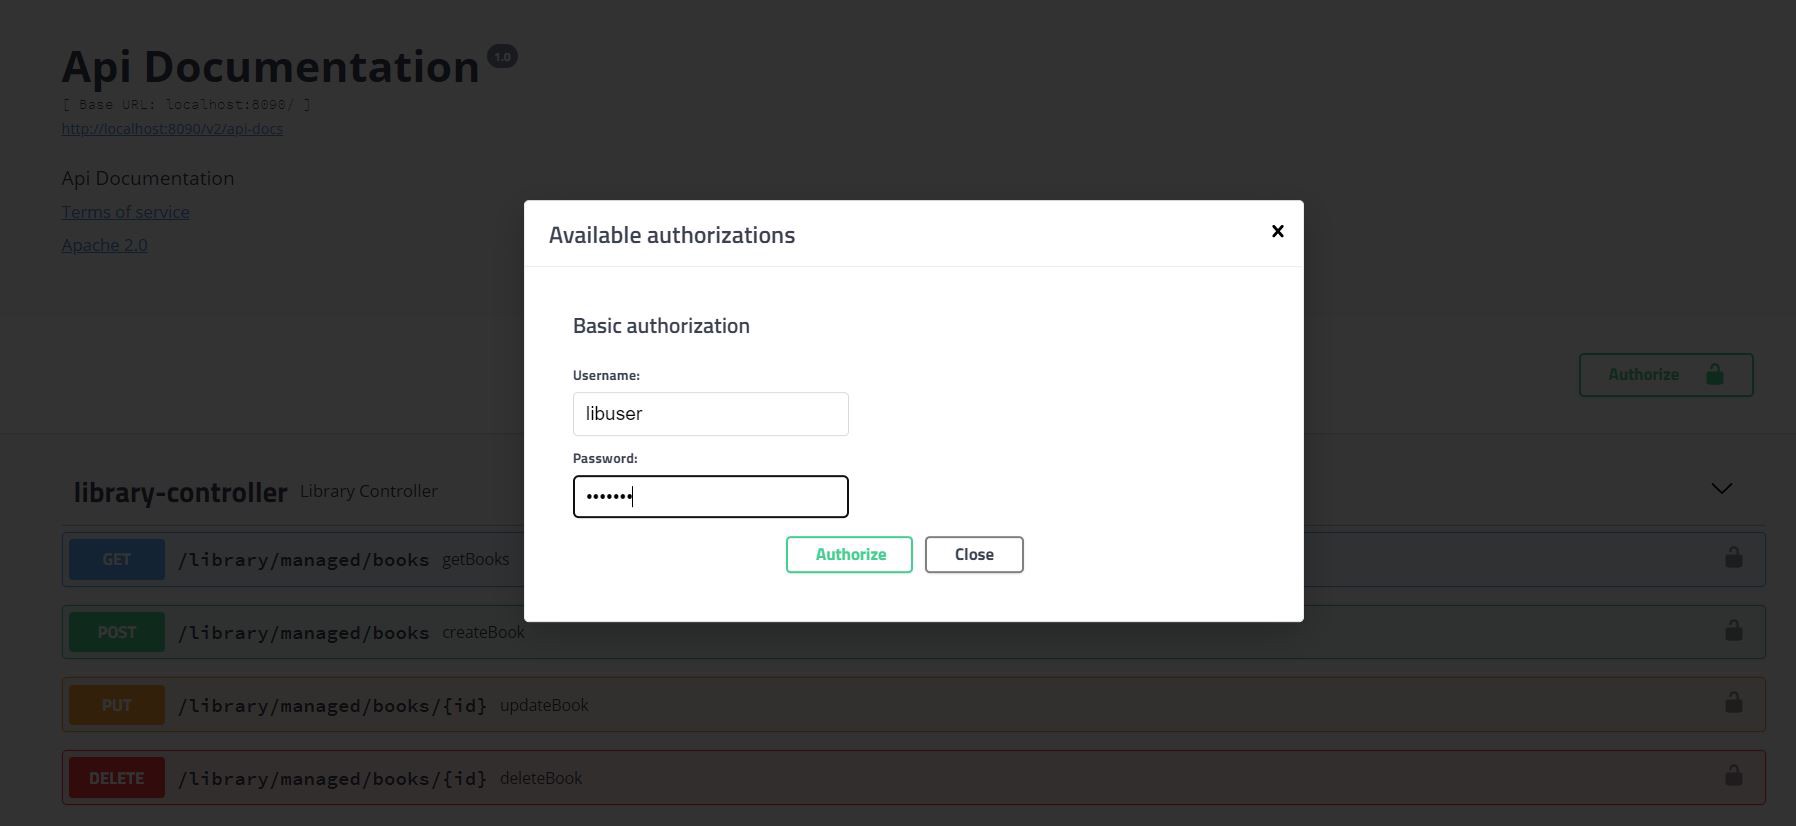
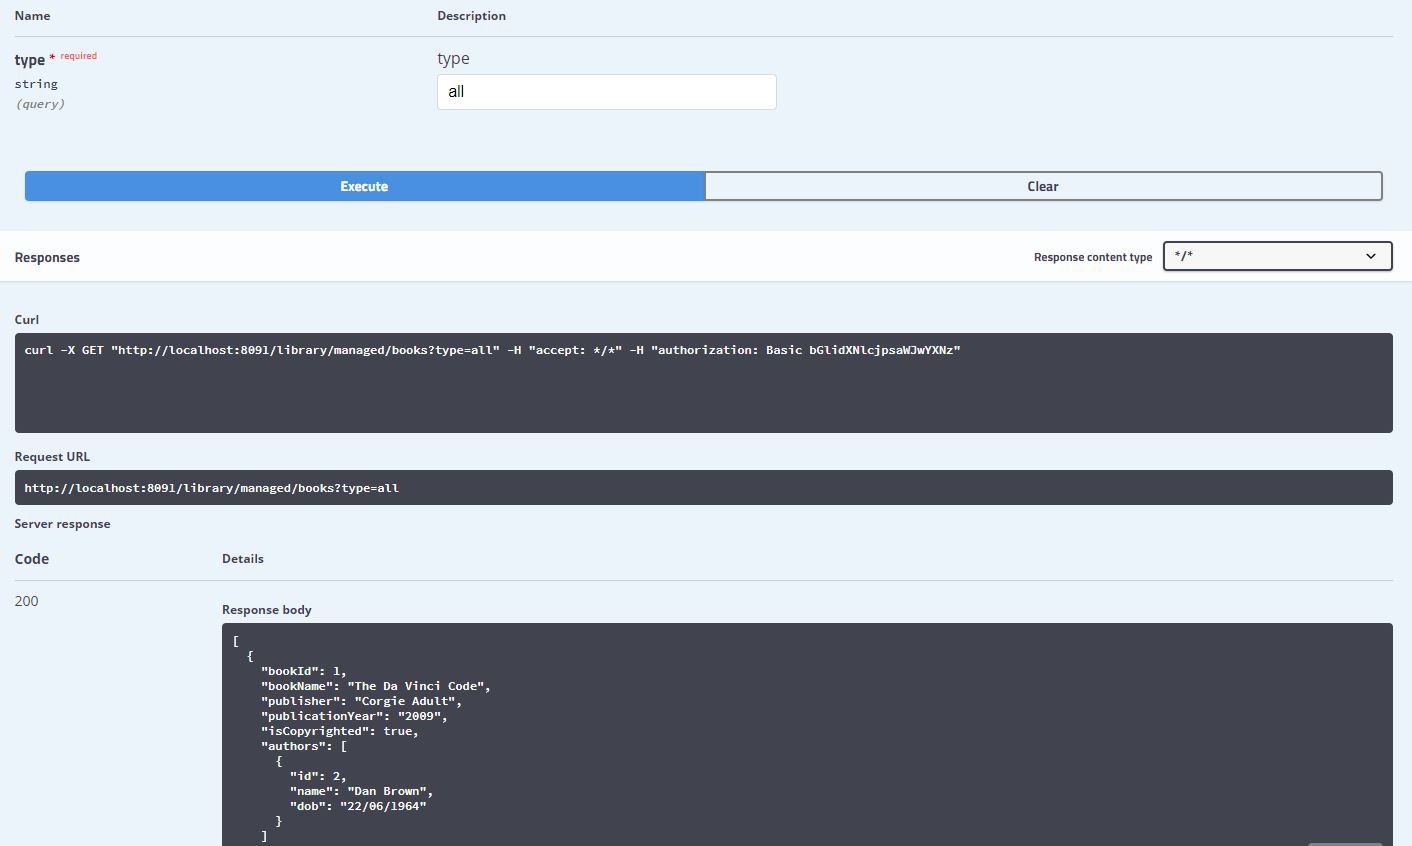
Swagger also allows us to make calls to the REST endpoints. Before we can do this, we need to add basic authentication credentials as configured in application.yaml:
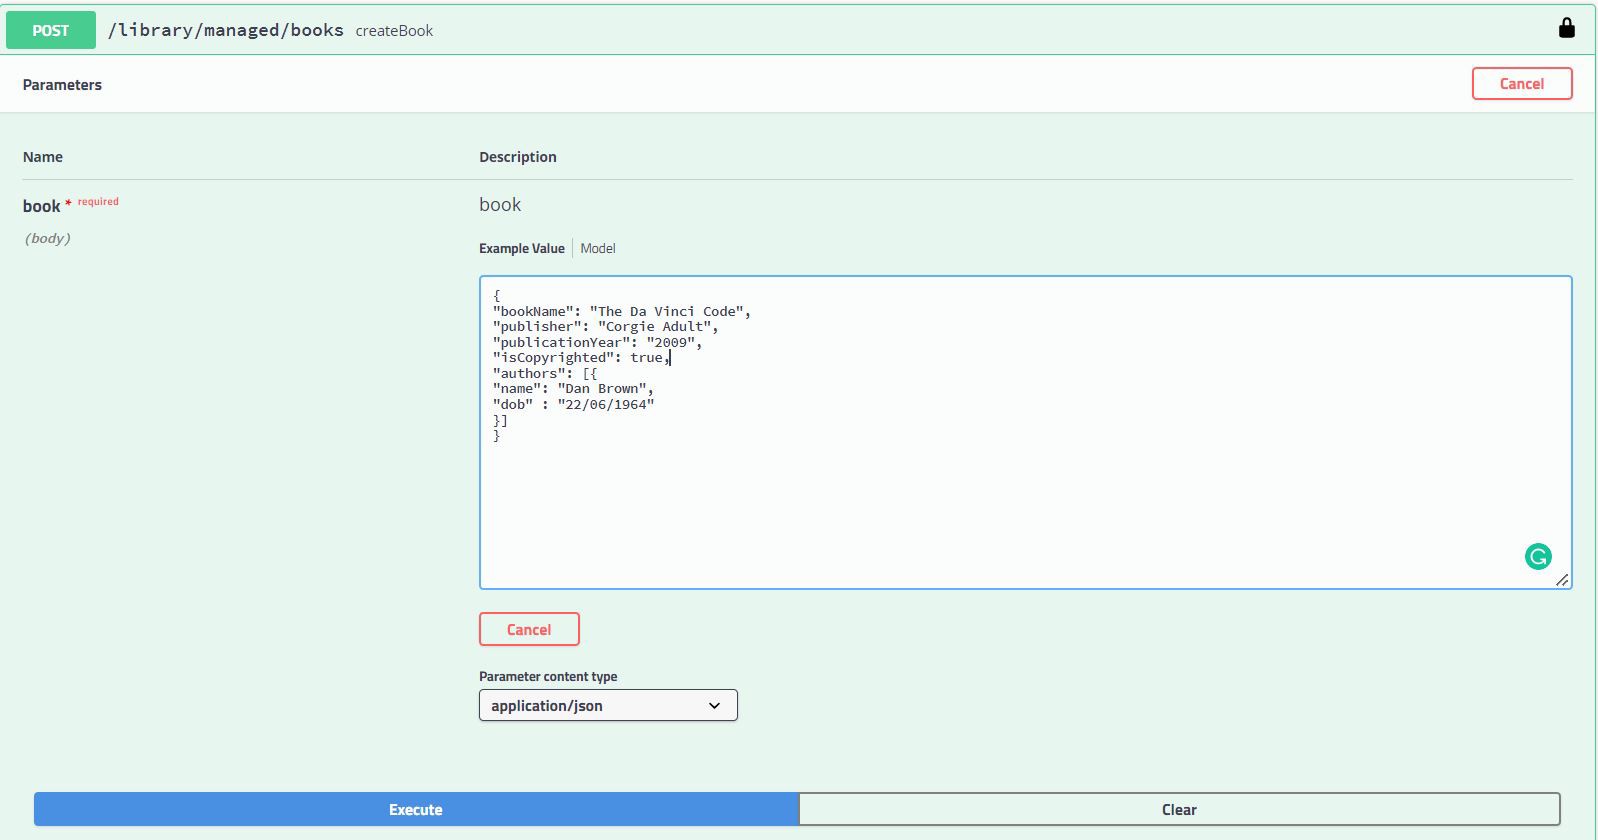
Now, we can hit the REST endpoints successfully. Sample JSON requests are available in README.md file in the application codebase.
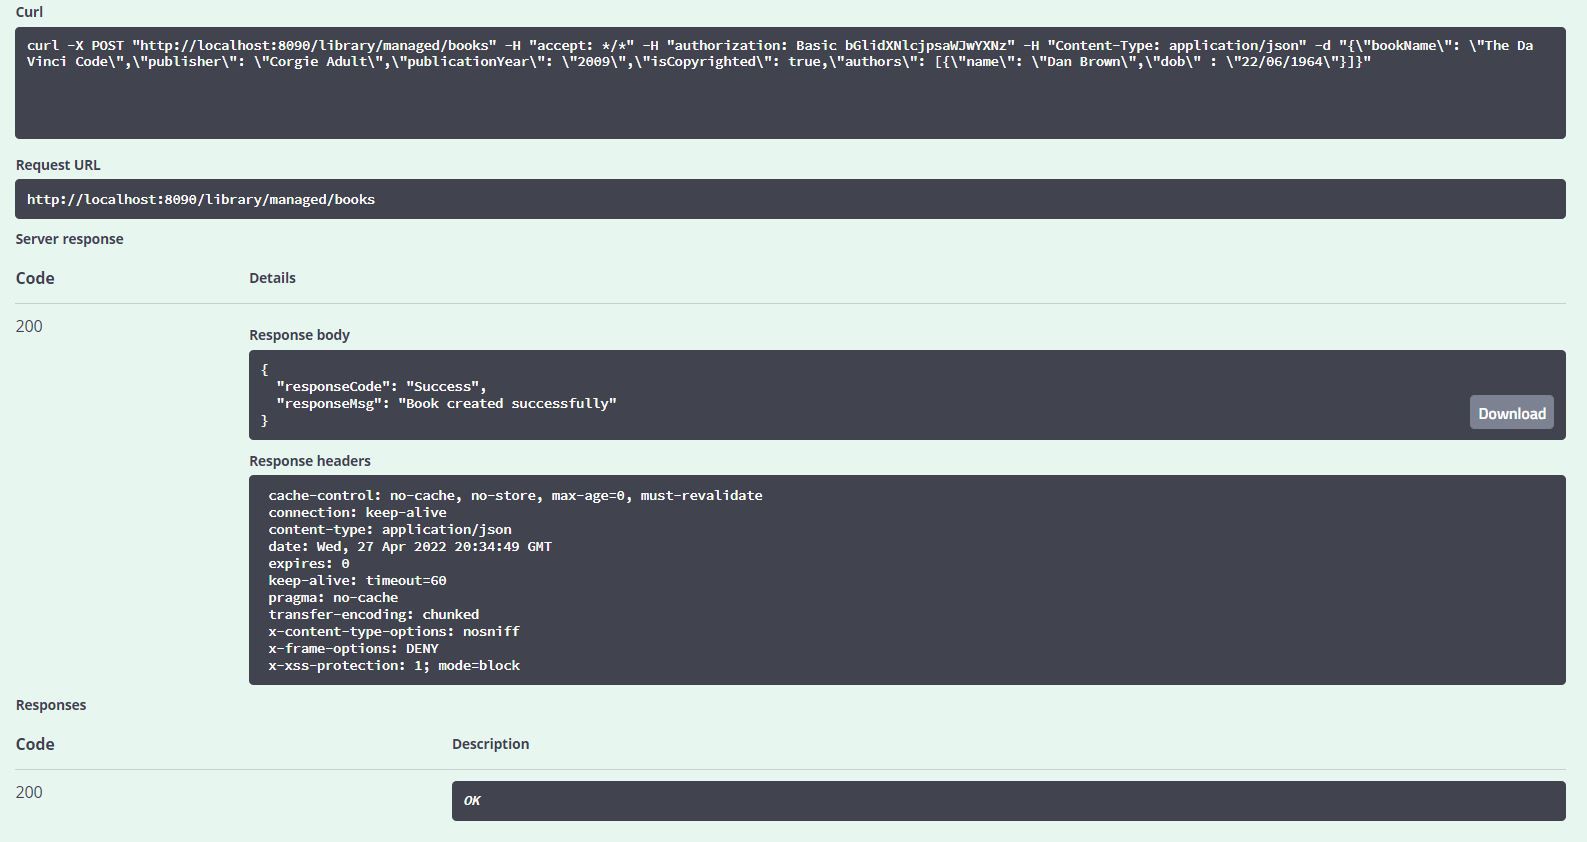
Once the POST request to add a book to the library is successful, we should be able to make a GET call to confirm this addition.
Now that our REST service works as expected, we will move on to introduce another application that will act as a REST client making calls to this service. In the process, we will learn about Retrofit and its various features.
Building a REST Client with Retrofit
The REST Client application will be a Library Audit application that exposes REST endpoints and uses Retrofit to call our previously set up Library application. The result is then audited in an in-memory database for tracking purposes.
Adding Retrofit dependencies
With Maven:
<dependency>
	<groupId>com.squareup.retrofit2</groupId>
	<artifactId>retrofit</artifactId>
	<version>2.5.0</version>
</dependency>
<dependency>
	<groupId>com.squareup.retrofit2</groupId>
	<artifactId>converter-jackson</artifactId>
	<version>2.5.0</version>
</dependency>
With Gradle:
dependencies {
    implementation 'com.squareup.retrofit2:retrofit:2.5.0'
    implementation 'com.squareup.retrofit2:converter-jackson:2.5.0'
}
Quick Guide to Setting up a Retrofit Client
Every Retrofit client needs to follow the three steps listed below:
Creating the Model Objects for Retrofit
We will take the help of the Swagger documentation in our REST service to create model objects for our Retrofit client.
We will now create corresponding model objects in our client application:
@Getter
@Setter
@NoArgsConstructor
public class AuthorDto {

    @JsonProperty("id")
    private long id;

    @JsonProperty("name")
    private String name;

    @JsonProperty("dob")
    private String dob;

}
@Getter
@Setter
@NoArgsConstructor
public class BookDto {
    @JsonProperty("bookId")
    private long id;

    @JsonProperty("bookName")
    private String name;

    @JsonProperty("publisher")
    private String publisher;

    @JsonProperty("publicationYear")
    private String publicationYear;

    @JsonProperty("isCopyrighted")
    private boolean copyrightIssued;

    @JsonProperty("authors")
    private Set<AuthorDto> authors;
}
@Getter
@Setter
@AllArgsConstructor
@NoArgsConstructor
public class LibResponse {
    private String responseCode;

    private String responseMsg;
}
We take advantage of Lombok to generate getters, setters, and constructors for us (@Getter, @Setter, @AllArgsConstructor, @NoArgsConstructor). You can read more about Lombok in our article.
Creating the Client Interface
To create the retrofit interface, we will map every service call with a corresponding interface method as shown in the screenshot below.

public interface LibraryClient {

    @GET("/library/managed/books")
    Call<List<BookDto>> getAllBooks(@Query("type") String type);

    @POST("/library/managed/books")
    Call<LibResponse> createNewBook(@Body BookDto book);

    @PUT("/library/managed/books/{id}")
    Call<LibResponse> updateBook(@Path("id") Long id, @Body BookDto book);

    @DELETE("/library/managed/books/{id}")
    Call<LibResponse> deleteBook(@Path("id") Long id);
}
Creating a Retrofit Client
We will use the Retrofit Builder API to create an instance of the Retrofit client for us:
@Configuration
@EnableConfigurationProperties(ClientConfigProperties.class)
public class RestClientConfiguration {

    @Bean
    public LibraryClient libraryClient(ClientConfigProperties props) {
        OkHttpClient.Builder httpClientBuilder = new OkHttpClient.Builder()
                .addInterceptor(new BasicAuthInterceptor(props.getUsername(), props.getPassword()))
                .connectTimeout(props.getConnectionTimeout(), TimeUnit.SECONDS)
                .readTimeout(props.getReadWriteTimeout(), TimeUnit.SECONDS);

        return new Retrofit.Builder().client(httpClientBuilder.build())
                .baseUrl(props.getEndpoint())
                .addConverterFactory(JacksonConverterFactory.create(new ObjectMapper()))
                .build().create(LibraryClient.class);

    }

}
Here, we have created a Spring Boot configuration that uses the Retrofit Builder to create a Spring bean that we can then use in other classes.
We will deep-dive into each of the three steps listed above in the next section.
Using Retrofit in Detail
This section will focus on the annotations, Retrofit classes, and features that will help us create a flexible and easy-to-configure REST client.
Building a Client Interface
In this section, we will look at how to build the client interface. Retrofit supports annotations @GET, @POST, @PUT, @DELETE, @PATCH, @OPTIONS, @HEAD which we use to annotate our client methods as shown below:
Path Parameters
Along with the mentioned annotations, we specify the relative path of the REST service endpoint. To make this relative URL more dynamic we use parameter replacement blocks as shown below:
@PUT("/library/managed/books/{id}")
Call<LibResponse> updateBook(@Path("id") Long id, @Body BookDto book);
To pass the actual value of id, we annotate a method parameter with the @Path annotation so that the call execution will replace {id} with its corresponding value.
Query Parameters
We can specify the query parameters in the URL directly or add a @Query-annotated param to the method:
 @GET("/library/managed/books?type=all")
// OR
 @GET("/library/managed/books")
 Call<List<BookDto>> getAllBooks(@Query("type") String type);
Multiple Query Parameters
If the request needs to have multiple query parameters, we can use @QueryMap:
@GET("/library/managed/books")
Call<List<BookDto>> getAllBooks(@QueryMap Map<String, String> options);
Request Body
To specify an object as HTTP request body, we use the @Body annotation:
@POST("/library/managed/books")
Call<LibResponse> createNewBook(@Body BookDto book);
Headers
To the Retrofit interface methods, we can specify static or dynamic header parameters.
For static headers, we can use the @Headers annotation:
@Headers("Accept: application/json")
@GET("/library/managed/books")
Call<List<BookDto>> getAllBooks(@Query("type") String type);
We could also define multiple static headers inline:
@Headers({
    "Accept: application/json",
    "Cache-Control: max-age=640000"})
@GET("/library/managed/books")
Call<List<BookDto>> getAllBooks(@Query("type") String type);
To pass dynamic headers, we specify them as method parameters annotated with the @Header annotation:
@GET("/library/managed/books/{requestId}")
Call<BookDto> getAllBooksWithHeaders(@Header("requestId") String requestId);
For multiple dynamic headers, we use @HeaderMap.
All Retrofit responses are wrapped in a Call object. It supports both blocking and non-blocking requests.
Using the Retrofit Builder API
The Builder API on Retrofit allows for customization of our HTTP client. Let’s take a closer look at some configuration options.
Configuring Timeout Settings
We can set timeouts on the underlying HTTP client. However, setting up these values is optional. If we do not specify the timeouts, default settings apply.
- Connection timeout: 10 sec
- Read timeout: 10 sec
- Write timeout: 10 sec
To override these defaults, we need to set up OkHttpClient as shown below:
OkHttpClient.Builder httpClientBuilder = new OkHttpClient.Builder()
        .connectTimeout(props.getConnectionTimeout(), TimeUnit.SECONDS)
        .readTimeout(props.getReadWriteTimeout(), TimeUnit.SECONDS);

return new Retrofit.Builder().client(httpClientBuilder.build())
        .baseUrl(props.getEndpoint())
        .addConverterFactory(JacksonConverterFactory.create(new ObjectMapper()))
        .build().create(LibraryClient.class);
Here, the timeout values are as specified in application.yaml.
Using Converters
By default, Retrofit can only deserialize HTTP bodies into OkHttp’s ResponseBody type and its RequestBody type for @Body.
With converters, the requests and responses can be wrapped into Java objects.
Commonly used convertors are:
- Gson: com.squareup.retrofit2:converter-gson
- Jackson: com.squareup.retrofit2:converter-jackson
To make use of these converters, we need to make sure their corresponding build dependencies are included. Then we can add them to the respective converter factory.
In the following example, we have used Jackson’s ObjectMapper() to map requests and responses to and from JSON:
new Retrofit.Builder().client(httpClientBuilder.build())
        .baseUrl(props.getEndpoint())
        .addConverterFactory(JacksonConverterFactory.create(new ObjectMapper()))
        .build().create(LibraryClient.class);
Adding Interceptors
Interceptors are a part of the OkHttp library that intercepts requests and responses. They help add, remove or modify metadata. OkHttp interceptors are of two types:
- Application Interceptors - Configured to handle application requests and responses
- Network Interceptors - Configured to handle network focused scenarios
Let’s take a look at some use-cases where interceptors are used:
Basic Authentication
Basic Authentication is one of the commonly used means to secure endpoints. In our example, the REST service is secured. For the Retrofit client to make authenticated REST calls, we will create an Interceptor class as shown:
public class BasicAuthInterceptor implements Interceptor {

    private final String credentials;

    public BasicAuthInterceptor(String user, String password) {
        this.credentials = Credentials.basic(user, password);
    }

    @Override
    public Response intercept(Chain chain) throws IOException {
        Request request = chain.request();
        Request authenticatedRequest = request.newBuilder()
                .header("Authorization", credentials).build();
        return chain.proceed(authenticatedRequest);
    }

}
Next, we will add this interceptor to the Retrofit configuration client.
OkHttpClient.Builder httpClientBuilder = new OkHttpClient.Builder()
        .addInterceptor(new BasicAuthInterceptor(
                props.getUsername(),
                props.getPassword()));
The username and password configured in the application.yaml will be securely passed to the REST service in the Authorization header.
Adding this interceptor ensures that the Authorization header is attached to every request triggered.
Logging
Logging interceptors print requests, responses, header data and additional information.
OkHttp provides a logging library that serves this purpose.
To enable this, we need to add com.squareup.okhttp3:logging-interceptor as a dependency.
Further, we need to add this interceptor to our Retrofit configuration client:
HttpLoggingInterceptor loggingInterceptor = new HttpLoggingInterceptor();
loggingInterceptor.setLevel(HttpLoggingInterceptor.Level.BODY);
OkHttpClient.Builder httpClientBuilder = new OkHttpClient.Builder()
        .addInterceptor(loggingInterceptor)
With these additions, when we trigger requests, the logs will look like this:
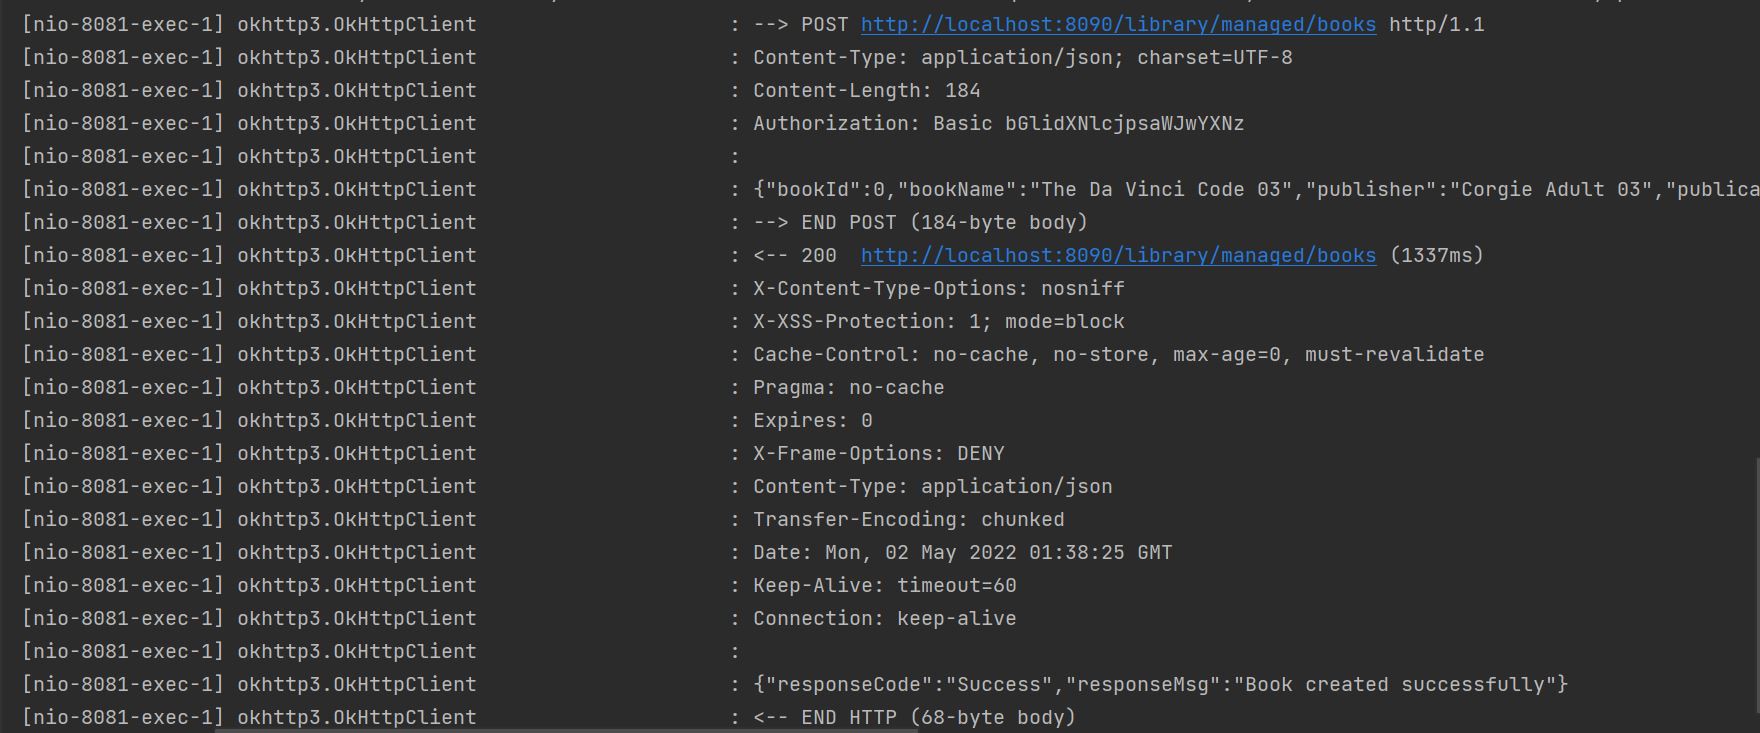
Various levels of logging are available such as BODY, BASIC, HEADERS. We can customize them to the level we need.
Header
In the previous sections, we have seen how to add headers to the client interface. Another way to add headers to requests and responses is via interceptors. We should consider adding interceptors for headers if we need the same common headers to be passed to every request or response:
OkHttpClient.Builder httpClient = new OkHttpClient.Builder();
httpClient.addInterceptor(new Interceptor() {
    @Override
    public Response intercept(Interceptor.Chain chain) throws IOException {
        Request request = chain.request();

        // Request customization: add request headers
        Request.Builder requestBuilder = request.newBuilder()
                .header("Cache-Control", "no-store");

        return chain.proceed(requestBuilder.build());
    }
});
Note that if the request already creates the Cache-Control header, .header() will replace the existing header.
There is also a .addHeader() method available that allows us to add multiple values to the same header.
For instance:
OkHttpClient.Builder httpClient = new OkHttpClient.Builder();
httpClient.addInterceptor(new Interceptor() {
    @Override
    public Response intercept(Interceptor.Chain chain) throws IOException {
        Request request = chain.request();

        // Request customization: add request headers
        Request.Builder requestBuilder = request.newBuilder()
                .addHeader("Cache-Control", "no-store");
                .addHeader("Cache-Control", "no-cache");

        return chain.proceed(requestBuilder.build());
    }
});
With the above code, the header added will be
Cache-Control: no-store, no-cache
Caching
For applications, caching can help speed up response times. With the combination of caching and network interceptor configuration, we can retrieve cached responses
when there is a network connectivity issue.
To configure this, we first implement an Interceptor:
public class CacheInterceptor implements Interceptor {
    @Override
    public Response intercept(Chain chain) throws IOException {
        Response response = chain.proceed(chain.request());

        CacheControl cacheControl = new CacheControl.Builder()
                .maxAge(1, TimeUnit.MINUTES) // 1 minutes cache
                .build();

        return response.newBuilder()
                .removeHeader("Pragma")
                .removeHeader("Cache-Control")
                .header("Cache-Control", cacheControl.toString())
                .build();
    }
}
Here the Cache-Control header is telling the client to cache responses for the configured maxAge.
Next, we add this interceptor as a network interceptor and define an OkHttp cache in the client configuration.
Cache cache = new Cache(new File("cache"), 10 * 1024 * 1024);
OkHttpClient.Builder httpClientBuilder = new OkHttpClient.Builder()
        .addInterceptor(new BasicAuthInterceptor(props.getUsername(), props.getPassword()))
        .cache(cache)
        .addNetworkInterceptor(new CacheInterceptor())
        .addInterceptor(interceptor)
        .connectTimeout(props.getConnectionTimeout(), TimeUnit.SECONDS)
        .readTimeout(props.getReadWriteTimeout(), TimeUnit.SECONDS);
Note: Caching in general applies to GET requests only. With this configuration, the GET requests will be cached for 1 minute. The cached responses will be served during the 1 minute timeframe even if the network connectivity is down.
Custom Interceptors
As explained in the previous sections, BasicAuthInterceptor, CachingInterceptor are all examples of custom interceptors created to serve a specific purpose.
Custom interceptors implement the OkHttp Interceptor interface and implement the method intercept().
Next, we configure the interceptor (either as an Application interceptor or Network interceptor). This will make sure the interceptors are chained and called before the end-to-end request is processed.
Note: If multiple interceptors are defined, they are called in sequence. For instance, a Logging interceptor must always be defined as the last interceptor to be called in the chain, so that we do not miss any critical logging during execution.
Using the REST Client to Make Synchronous or Asynchronous Calls
The REST client we configured above can call the service endpoints in two ways:
Synchronous calls
To make a synchronous call, the Call interface provides the execute() method.
Since execute() method runs on the main thread, the UI is blocked till the execution completes.
Response<BookDto> allBooksResponse = libraryClient.getAllBooksWithHeaders(bookRequest).execute();
if (allBooksResponse.isSuccessful()) {
    books = allBooksResponse.body();
    log.info("Get All Books : {}", books);
    audit = auditMapper.populateAuditLogForGetBook(books);
} else {
    log.error("Error calling library client: {}", allBooksResponse.errorBody());
    if (Objects.nonNull(allBooksResponse.errorBody())) {
        audit = auditMapper.populateAuditLogForException(
                null, HttpMethod.GET, allBooksResponse.errorBody().string());
    }
}
The methods that help us further process the response are:
isSuccessful(): Helps determine if the response HTTP status code is 2xx.body(): On success, returns the response body. In the example above, the response gets mapped to aBookDtoobject.errorBody(): When the service returns a failure response, this method gives us the corresponding error object. To further extract the error message, we use theerrorBody().string().
Asynchronous Calls
To make an asynchronous call, the Call interface provides the enqueue() method.
The request is triggered on a separate thread and it does not block the main thread processing.
public void getBooksAsync(String bookRequest) {
    Call<BookDto> bookDtoCall = libraryClient.getAllBooksWithHeaders(bookRequest);
    bookDtoCall.enqueue(new Callback<>() {
        @Override
        public void onResponse(Call<BookDto> call, Response<BookDto> response) {
            if (response.isSuccessful()) {
                log.info("Success response : {}", response.body());
            } else {
                log.info("Error response : {}", response.errorBody());
            }
        }

        @Override
        public void onFailure(Call<BookDto> call, Throwable throwable) {
            log.error("Network error occured : {}", throwable.getLocalizedMessage());
        }
    });
}
We provide implementations to the methods of the Callback interface. The onResponse() handles valid HTTP responses (both success and error) and
onFailure() handles network connectivity issues.
We have now covered all the basic components that will help us create a working Retrofit client in a Spring Boot application. In the next section, we will look at mocking the endpoints defined in the Retrofit client.
Mocking an OkHttp REST Client
For writing Unit tests, we will use the Spring Boot Test framework in combination with Mockito and Retrofit Mock. We will include the Retrofit Mock dependency with Maven:
<dependency>
  <groupId>com.squareup.retrofit2</groupId>
  <artifactId>retrofit-mock</artifactId>
  <version>2.5.0</version>
  <scope>test</scope>
</dependency>
Gradle:
testImplementation group: 'com.squareup.retrofit2', name: 'retrofit-mock', version: '2.5.0'
Next, we will test the service methods. Here we will focus on mocking the Retrofit client calls.
First we will use Mockito to mock libraryClient.
@Mock
private LibraryClient libraryClient;
Now, we will mock the client methods and return a static object. Further we will use retrofit-mock to wrap the response into a Call object using Calls.response.
Code snippet is as shown below:
String booksResponse = getBooksResponse("/response/getAllBooks.json");
List<BookDto> bookDtoList =
  new ObjectMapper().readValue(booksResponse, new TypeReference<>(){});
when(libraryClient.getAllBooks("all"))
        .thenReturn(Calls.response(bookDtoList));
Calls.response automatically wraps the Call response as successful. To test error scenarios, we need to explicitly define okhttp3.ResponseBody with the error code and error body:
LibResponse response = new LibResponse(Status.ERROR.toString(), "Could not delete book for id : 1000");
ResponseBody respBody = ResponseBody.create(MediaType.parse("application/json"),
        new ObjectMapper().writeValueAsString(response));
Response<LibResponse> respLib = Response.error(500, respBody);
when(libraryClient.deleteBook(Long.valueOf("1000")))
        .thenReturn(Calls.response(respLib));
Conclusion
In this article, we introduced a Spring Boot REST client and REST server and looked at various capabilities of the Retrofit library. We took a closer look at the various components that need to be addressed to define a Retrofit client. Finally, we learned to mock the Retrofit client for unit tests. In conclusion, Retrofit along with OkHttp is an ideal library that works well with Spring and simplifies calls to a REST server.