A lot has changed in Java from its beginnings in 1995 until today. Java 8 was a revolutionary release that put Java back on the pedestal of the best programming languages.
We will go through most of the changes in the Java language that happened from Java 8 in 2014 until today. We will try to be as brief as possible on every feature. The intention is to have a reference for all features between Java 8 and Java 17 inclusively.
Example Code
This article is accompanied by a working code example on GitHub.Java 8
The main changes of the Java 8 release were these:
- Lambda Expression and Stream API
- Method Reference
- Default Methods
- Type Annotations
- Repeating Annotations
- Method Parameter Reflection
Lambda Expressions and Stream API
Java was always known for having a lot of boilerplate code. With the release of Java 8, this statement became a little less valid. The stream API and lambda expressions are the new features that move us closer to functional programming.
In our examples, we will see how we use lambdas and streams in the different scenarios.
The World Before Lambda Expressions
We own a car dealership business. To discard all the paperwork, we want to create a piece of software that finds all currently available cars that have run less than 50,000 km.
Let us take a look at how we would implement a function for something like this in a naive way:
public class LambdaExpressions {
    public static List<Car> findCarsOldWay(List<Car> cars) {
        List<Car> selectedCars = new ArrayList<>();
        for (Car car : cars) {
            if (car.kilometers < 50000) {
                selectedCars.add(car);
            }
        }
        return selectedCars;
    }
}
To implement this, we are creating a static function that accepts a List of cars. It should return a filtered list according to a specified condition.
Using a Stream and a Lambda Expression
We have the same problem as in the previous example.
Our client wants to find all cars with the same criteria.
Let us see a solution where we used the stream API and lambda expression:
public class LambdaExpressions {
    public static List<Car> findCarsUsingLambda(List<Car> cars) {
        return cars.stream().filter(car -> car.kilometers < 50000)
                .collect(Collectors.toList());
    }
}
We need to transfer the list of cars into a stream by calling the stream() method. Inside the filter() method we are setting our condition. We are evaluating every entry against the desired condition. We are keeping only those entries that have less than 50,000 kilometers. The last thing that we need to do is to wrap it up into a list.
More about lambda expressions can be found in the docs.
Method Reference
Without Method Reference
We still own a car dealership shop, and we want to print out all the cars in the shop. For that, we will use a method reference.
A method reference allows us to call functions in classes using a special kind of syntax ::. There are four kinds of method references:
- Reference to a static method
- Reference to an instance method on a object
- Reference to an instance method on a type
- Reference to a constructor
Let us see how to do it using the standard method call:
public class MethodReference {
    List<String> withoutMethodReference =
            cars.stream().map(car -> car.toString())
                    .collect(Collectors.toList());
}
We are using a lambda expression to call the toString() method on each car.
Using a Method Reference
Now, let us see how to use a method reference in the same situation:
public class MethodReference {
    List<String> methodReference = cars.stream().map(Car::toString)
            .collect(Collectors.toList());
}
We are, again, using a lambda expression, but now we call the toString() method by method reference. We can see how it is more concise and easier to read.
To read more about method reference please look at the docs.
Default Methods
Let us imagine that we have a simple method log(String message) that prints log messages on invocation. We realized that we want to provide timestamps to messages so that logs are easily searchable. We don’t want our clients to break after we introduce this change. We will do this using a default method implementation on an interface.
Default method implementation is the feature that allows us to create a fallback implementation of an interface method.
Use Case
Let us see how our contract looks:
public class DefaultMethods {

    public interface Logging {
        void log(String message);
    }

    public class LoggingImplementation implements Logging {
        @Override
        public void log(String message) {
            System.out.println(message);
        }
    }
}
We are creating a simple interface with just one method and implementing it in LoggingImplementation class.
Adding New Method
We will add new method inside the interface. The method accepts the second argument called date that represents timestamp.
public class DefaultMethods {

    public interface Logging {
        void log(String message);

        void log(String message, Date date);
    }
}
We are adding a new method but not implementing it inside all client classes. The compiler will fail with exception:
Class 'LoggingImplementation' must either be declared abstract
or implement abstract method 'log(String, Date)' in 'Logging'`.
Using Default Methods
After adding a new method inside the interface, our compiler threw exceptions. We are going to solve this using default method implementation for the new method.
Let us look at how to create a default method implementation:
public class DefaultMethods {

    public interface Logging {
        void log(String message);

        default void log(String message, Date date) {
            System.out.println(date.toString() + ": " + message);
        }
    }
}
Putting the default keyword allows us to add the implementation of the method inside the interface. Now, our LoggingImplementation class does not fail with a compiler error even though we didn’t implement this new method inside of it.
To read more about default methods please refer to the docs.
Type Annotations
Type annotations are one more feature introduced in Java 8. Even though we had annotations available before, now we can use them wherever we use a type. This means that we can use them on:
- a local variable definition
- constructor calls
- type casting
- generics
- throw clauses and more
Tools like IDEs can then read these annotations and show warnings or errors based on the annotations.
Local Variable Definition
Let us see how to ensure that our local variable doesn’t end up as a null value:
public class TypeAnnotations {

    public static void main(String[] args) {
        @NotNull String userName = args[0];
    }
}
We are using annotation on the local variable definition here. A compile-time annotation processor could now read the @NotNull annotation and throw an error when the string is null.
Constructor Call
We want to make sure that we cannot create an empty ArrayList:
public class TypeAnnotations {

    public static void main(String[] args) {
        List<String> request =
                new @NotEmpty ArrayList<>(Arrays.stream(args).collect(
                        Collectors.toList()));
    }
}
This is the perfect example of how to use type annotations on a constructor. Again, an annotation processor can evaluate the annotation and check if the array list is not empty.
Generic Type
One of our requirements is that each email has to be in a format <name>@<company>.com.
If we use type annotations, we can do it easily:
public class TypeAnnotations {

    public static void main(String[] args) {
        List<@Email String> emails;
    }
}
This is a definition of a list of email addresses. We use @Email annotation that ensures that every record inside this list is in the desired format.
A tool could use reflection to evaluate the annotation and check that each of the elements in the list is a valid email address.
For more information about type annotations please refer to the docs.
Repeating Annotations
Let us imagine we have an application with fully implemented security. It has different levels of authorization. Even though we implemented everything carefully, we want to make sure that we log every unauthorized action. On each unauthorized action, we are sending an email to the owner of the company and our security admin group email. Repeating annotations are our way to go on this example.
Repeating annotations allows us to place multiple annotations on the same class.
Creating a Repeating Annotation
For the example, we are going to create a repeating annotation called @Notify:
public class RepeatingAnnotations {

    @Repeatable(Notifications.class)
    public @interface Notify {
        String email();
    }

    public @interface Notifications {
        Notify[] value();
    }
}
We create @Notify as a regular annotation, but we add the @Repeatable (meta-)annotation to it. Additionally, we have to create a “container” annotation Notifications that contains an array of Notify objects. An annotation processor can now get access to all repeating Notify annotations through the container annotation Noifications.
Please note that this is a mock annotation just for demonstration purposes. This annotation will not send emails without an annotation processor that reads it and then sends emails.
Using Repeating Annotations
We can add a repating annotation multiple times to the same construct:
@Notify(email = "admin@company.com")
@Notify(email = "owner@company.com")
public class UserNotAllowedForThisActionException
        extends RuntimeException {
    final String user;

    public UserNotAllowedForThisActionException(String user) {
        this.user = user;

    }
}
We have our custom exception class that we will throw whenever a user tries to do something that the user is not allowed. Our annotations to this class say that we want to notify two emails when code throws this exception.
To read more about repeating annotations please refer to the docs.
Java 9
Java 9 introduced these main features:
- Java Module System
- Try-with-resources
- Diamond Syntax with Inner Anonymous Classes
- Private Interface Methods
Java Module System
A module is a group of packages, their dependencies, and resources. It provides a broader set of functionalities than packages.
When creating the new module, we need to provide several attributes:
- Name
- Dependencies
- Public Packages - by default, all packages are module private
- Services Offered
- Services Consumed
- Reflection Permissions
Without going into many details, let us create our first module. Inside our example, we will show several options and keywords that one can use when creating a module.
Creating Modules Inside IntelliJ
First, we will go with a simple example. We will build a Hello World application where we print “Hello” from one module, and we call the second module to print “World!”.
Since I am working in the IntelliJ IDEA there is something that we need to understand first. IntelliJ IDEA has the concept of modules. For it to work, each Java module has to correspond to one IntelliJ module.
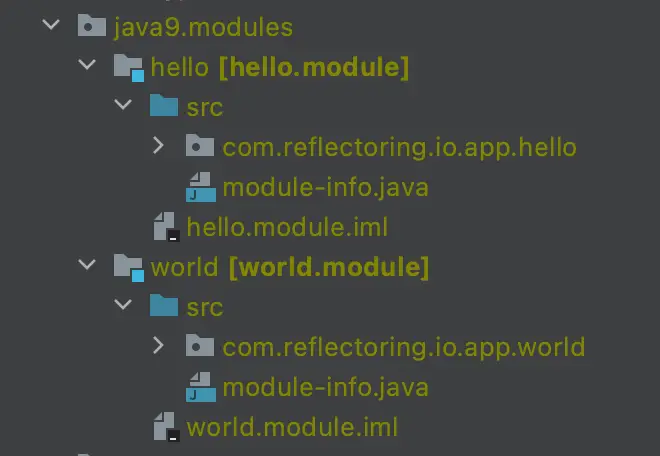
We have two modules: hello.module and world.module. They correspond to hello and world IntelliJ modules, respectively. Inside each of them, we have created the module-info.java file. This file defines our Java module. Inside, we declare which packages we need to export and on which modules we are dependent.
Defining our First Module
We are using the hello module to print the word: “Hello”. Inside, we call the method inside the world module, which will print “World !”. The first thing that we need to do is to declare export of the package containing our World.class inside module-info.java:
module world.module {
    exports com.reflectoring.io.app.world;
}
We use the keyword module with the module name to reference the module.
The next keyword that we use is exports. It tells the module system that we are making our com.reflectoring.io.app.world package visible outside of our module.
There are several other keywords can be used:
- requires
- requires transitive
- exports to
- uses
- provides with
- open
- opens
- opens to
Out of these we will show only requires declaration. Others can be found in the docs.
Defining our Second Module
After we created and exported the world module, we can proceed with creating the hello module:
module hello.module {
    requires world.module;
}
We define dependencies using requires keyword. We are referencing our newly created, hello.module. Packages that are not exported are, by default, module private and cannot be seen from outside of the module.
To read more about the Java module system please refer to the docs
Try-with-resources
Try-with-resources is a feature that enables us to declare new autoclosable resources on a try-catch block. Declaring them inside a try-catch block tells the JVM to release them after the code has run. The only condition is that the declared resource implements an Autoclosable interface.
Closing a Resource Manually
We want to read text using BufferedReader. BufferedReader is a closable resource, so we need to make sure that it is properly closed after use. Before Java 8 we would do it like this:
public class TryWithResources {
    public static void main(String[] args) {
        BufferedReader br = new BufferedReader(
                new StringReader("Hello world example!"));
        try {
            System.out.println(br.readLine());
        } catch (IOException e) {
            e.printStackTrace();
        } finally {
            try {
                br.close();
            } catch (IOException e) {
                e.printStackTrace();
            }
        }
    }
}
In finally block, we would call close(). The finally block ensures that the reader is always properly closed.
Closing a Resource with try-with-resources
Java 8 introduced the try-with-resource feature that enables us to declare our resource inside try definition. This will ensure that our closable is closed without using finally. Let us take a look at some example of using the BufferedReader to read string:
public class TryWithResources {
    public static void main(String[] args) {
        final BufferedReader br3 = new BufferedReader(
                new StringReader("Hello world example3!"));
        try (BufferedReader reader = br3) {
            System.out.println(reader.readLine());
        } catch (IOException e) {
            System.out.println("Error happened!");
        }
    }
}
Inside the try definition, we are assigning our previously created reader to the new variable. Now we know that our reader will get closed every time.
To read more about the try-with-resources feature please refer to the docs.
Diamond Syntax with Inner Anonymous Classes
Before Java 9 we couldn’t use a diamond operator inside the inner anonymous class.
For our example, we will create the abstract class, StringAppender. The class has only one method that appends two strings with - between them.
We will use the anonymous class for providing the implementation for the append() method:
public class DiamondOperator {

    StringAppender<String> appending = new StringAppender<>() {
        @Override
        public String append(String a, String b) {
            return new StringBuilder(a).append("-").append(b).toString();
        }
    };

    public abstract static class StringAppender<T> {
        public abstract T append(String a, String b);
    }
}
We use the diamond operator to omit type on the constructor call new StringAppender<>().
Since we are using Java 8, in this example we will get a compiler error:
java: cannot infer type arguments for
com.reflectoring.io.java9.DiamondOperator.StringAppender<T>

reason: '<>' with anonymous inner classes is not supported in -source 8
    (use -source 9 or higher to enable '<>' with anonymous inner classes)
In Java 9, this compiler error is no longer happening.
Private Interface Methods
We already mentioned how we use default methods in interfaces.
How do we split the implementation into several methods? When working with classes, we can achieve it using private methods. Could that be the solution in our case?
As of Java 9, yes. We can create private methods inside our interfaces.
Usage of Private Interface Methods
For our example, we want to print out a set of names.
Interface containing this functionality had default method defined. We decided that we should if the client doesn’t provide the implementation, provide a set of predefined names that we read from the resource folder:
public class PrivateInterfaceMethods {

    public static void main(String[] args) {
        TestingNames names = new TestingNames();
        System.out.println(names.fetchInitialData());
    }

    public static class TestingNames implements NamesInterface {
        public TestingNames() {
        }
    }

    public interface NamesInterface {
        default List<String> fetchInitialData() {
            try (BufferedReader br = new BufferedReader(
                    new InputStreamReader(this.getClass()
                            .getResourceAsStream("/names.txt")))) {
                return readNames(br);
            } catch (IOException e) {
                e.printStackTrace();
                return null;
            }
        }

        private List<String> readNames(BufferedReader br)
                throws IOException {
            ArrayList<String> names = new ArrayList<>();
            String name;
            while ((name = br.readLine()) != null) {
                names.add(name);
            }
            return names;
        }
    }
}
We are using BufferedReader to read the file containing default names that we share with the client.
To encapsulate our code and, possibly, make it reusable in other methods, we decided to move code for reading and saving names into a List to the separate method.
This method is private and, now, we can use it anywhere inside our interface.
As mentioned, the main benefit of this feature inside Java 9 is better encapsulation and reusability of the code.
Java 10
Local Variable Type Inference
Java always needed explicit types on local variables.
When writing and reading code, we always know which type we expect. On the other hand, a lot of the code is just types with no usability.
The var type allows us to omit type from the left-hand side of our statements.
Old Way
Let us look into the example here. We want to create small a set of people, put everything in one list and then go through that list in the for loop to print out their name and last name:
public class LocalTypeVar {

    public void explicitTypes() {
        Person Roland = new Person("Roland", "Deschain");
        Person Susan = new Person("Susan", "Delgado");
        Person Eddie = new Person("Eddie", "Dean");
        Person Detta = new Person("Detta", "Walker");
        Person Jake = new Person("Jake", "Chambers");

        List<Person> persons =
                List.of(Roland, Susan, Eddie, Detta, Jake);

        for (Person person : persons) {
            System.out.println(person.name + " - " + person.lastname);
        }
    }
}
This is the type of code that we can see in most cases in Java. We use explicit types to make sure that we know what the method expects.
Implicit Typing with var
Now, we will look into the same example, but using the var keyword that Java 10 introduced. We still want to create several person objects and put them in a list. After that, we will go through that list and print out the name of each person:
public class LocalTypeVar {

    public void varTypes() {
        var Roland = new Person("Roland", "Deschain");
        var Susan = new Person("Susan", "Delgado");
        var Eddie = new Person("Eddie", "Dean");
        var Detta = new Person("Detta", "Walker");
        var Jake = new Person("Jake", "Chambers");

        var persons = List.of(Roland, Susan, Eddie, Detta, Jake);

        for (var person : persons) {
            System.out.println(person.name + " - " + person.lastname);
        }
    }
}
We can see some of the most typical examples of using var type on local variables. First, we use them for defining local variables. It can be a standalone object or even a list with the diamond operator.
For more details about local type inference please visit the docs.
Java 11
Local Variable Type in Lambda Expressions
Java 11 introduced an improvement to the previously mentioned local type inference. This allows us to use var inside lambda expressions.
We will, again, create several persons, collect them into the list and filter out entries that don’t have an ‘a’ inside their name:
public class LocalTypeVarLambda {

    public void explicitTypes() {
        var Roland = new Person("Roland", "Deschain");
        var Susan = new Person("Susan", "Delgado");
        var Eddie = new Person("Eddie", "Dean");
        var Detta = new Person("Detta", "Walker");
        var Jake = new Person("Jake", "Chambers");

        var filteredPersons =
                List.of(Roland, Susan, Eddie, Detta, Jake)
                        .stream()
                        .filter((var x) -> x.name.contains("a"))
                        .collect(Collectors.toList());
        System.out.println(filteredPersons);
    }
}
Inside the filter() method we are using var to infer the type instead of explicitly mentioning the type.
Please note that it doesn’t make a difference if we use var or type inference without it. It will work the same for both.
Java 14
Switch Expressions
Switch expressions allowed us to omit break calls inside every case block. It helps with the readability of the code and better understanding.
In this section, we will see several ways of how to use switch expressions.
Old Way of Switch Statements
We have a method where a client provides the desired month, and we return the number of days inside that month.
The first thing that comes to our mind is to build it with switch-case statements:
public class SwitchExpression {

    public static void main(String[] args) {
        int days = 0;
        Month month = Month.APRIL;

        switch (month) {
            case JANUARY, MARCH, MAY, JULY, AUGUST, OCTOBER, DECEMBER :
                days = 31;
                break;
            case FEBRUARY :
                days = 28;
                break;
            case APRIL, JUNE, SEPTEMBER, NOVEMBER :
                days = 30;
                break;
            default:
                throw new IllegalStateException();
        }
    }
}
We need to make sure that we put a break statement inside our case code block. Failing it will result in checking on other conditions after we match the first one.
Using Switch Expressions
We will look into the same method as before. The user wants to send the month and get the number of days in that month:
public class SwitchExpression {

    public static void main(String[] args) {
        int days = 0;
        Month month = Month.APRIL;

        days = switch (month) {
            case JANUARY, MARCH, MAY, JULY, AUGUST, OCTOBER, DECEMBER -> 31;
            case FEBRUARY -> 28;
            case APRIL, JUNE, SEPTEMBER, NOVEMBER -> 30;
            default -> throw new IllegalStateException();
        };
    }
}
We are using a bit different notation in the case block. We are using -> instead of the colon. Even though we are not invoking the break statement, we will still jump out of the switch statement on the first valid condition.
This will do the same thing as the code shown in the previous example.
The yield Keyword
The logic inside the case block can be a bit more complicated than just returning a value. For example, we want to log which month the user sent us:
public class SwitchExpression {

    public static void main(String[] args) {
        int days = 0;
        Month month = Month.APRIL;

        days = switch (month) {
            case JANUARY, MARCH, MAY, JULY, AUGUST, OCTOBER, DECEMBER -> {
                System.out.println(month);
                yield 31;
            }
            case FEBRUARY -> {
                System.out.println(month);
                yield 28;
            }
            case APRIL, JUNE, SEPTEMBER, NOVEMBER -> {
                System.out.println(month);
                yield 30;
            }
            default -> throw new IllegalStateException();
        };
    }
}
In a multi-line code block, we have to use the yield keyword to return a value from a case block.
To read more about using switch expressions please refer to the docs.
Java 15
Text Blocks
Text block is an improvement on formatting String variables. From Java 15, we can write a String that spans through several lines as regular text.
Example Without Using Text Blocks
We want to send an HTML document via email. We are storing the email template into a variable:
public class TextBlocks {

    public static void main(String[] args) {
        System.out.println(
        "<!DOCTYPE html>\n" +
                "<html>\n" +
                "     <head>\n" +
                "        <title>Example</title>\n" +
                "    </head>\n" +
                "    <body>\n" +
                "        <p>This is an example of a simple HTML " +
                "page with one paragraph.</p>\n" +
                "    </body>\n" +
                "</html>\n");
    }
}
We are formatting our string like in the example above. We need to take care of new lines and append all the lines to a single string.
Example of Using Text Blocks
Let us look into the same example of an HTML template for email. We want to send an example email with some straightforward HTML formatting. This time we will use a text block:
public class TextBlocks {

    public static void main(String[] args) {
        System.out.println(
        """
                <!DOCTYPE html>
                <html>
                    <head>
                        <title>Example</title>
                    </head>
                    <body>
                        <p>This is an example of a simple HTML
                        page with one paragraph.</p>
                    </body>
                </html>
                """
        );
    }
}
We used special syntax for opening and closing quotes: """. This allows us to treat our string as if we are writing it in a .txt file.
There are some rules that we need to abide by when using a text block. We need to make sure that we put a new line after our opening quotes, or our compiler will throw an error:
Illegal text block start: missing new line after opening quotes.
If we want to end our string with \n we can do it by putting new line before closing """ like in the example above.
To read more about text blocks please refer to the docs.
Java 16
Pattern Matching of instanceof
Pattern matching on the instanceof allows us to cast our variable inline and use it inside the desired if-else block without explicitly casting it.
Example Without Pattern Matching
We have a base class called Vehicle and two classes that extends it: Car and Bicycle.
We omitted the code for this, and you can look it up in the GitHub repo.
Our algorithm for calculating prices is depending on the instance of the vehicle that is sent to it:
public class PatternMatching {
    public static double priceOld(Vehicle v) {
        if (v instanceof Car) {
            Car c = (Car) v;
            return 10000 - c.kilomenters * 0.01 -
                    (Calendar.getInstance().get(Calendar.YEAR) -
                            c.year) * 100;
        } else if (v instanceof Bicycle) {
            Bicycle b = (Bicycle) v;
            return 1000 + b.wheelSize * 10;
        } else throw new IllegalArgumentException();
    }
}
Since we are not using pattern matching, we need to cast the vehicle into the correct type inside each if-else block. As we can see, it is a typical example of boilerplate code for which Java is famous.
Using Pattern Matching
Let’s see how can we can discard the boilerplate part from the example above:
public class PatternMatching {
    public static double price(Vehicle v) {
        if (v instanceof Car c) {
            return 10000 - c.kilomenters * 0.01 -
                    (Calendar.getInstance().get(Calendar.YEAR) -
                            c.year) * 100;
        } else if (v instanceof Bicycle b) {
            return 1000 + b.wheelSize * 10;
        } else throw new IllegalArgumentException();
    }
}
One thing to note is the scope of the casted variable. It’s visible only within the if statement.
For more information about pattern matching in instanceof method please refer to the docs.
Records
How many POJOs (Plain Old Java Objects) have you written?
Well, I can answer for myself: “Too many!”.
Java has had a bad reputation for boilerplate code. Lombok allowed us to stop worrying about getters, setters, etc. Java 16 finally introduced records to remove a lot of boilerplate code.
A record class is nothing more than regular POJO, for which most of the code is generated from the definition.
Plain Old Java Object definition
Let us look into the example of the POJO class before Java 16 introduced records:
public class Vehicle {
    String code;
    String engineType;

    public String getCode() {
        return code;
    }

    public void setCode(String code) {
        this.code = code;
    }

    public String getEngineType() {
        return engineType;
    }

    public void setEngineType(String engineType) {
        this.engineType = engineType;
    }

    public Vehicle(String code, String engineType) {
        this.code = code;
        this.engineType = engineType;
    }

    @Override
    public boolean equals(Object o) ...

    @Override
    public int hashCode() ...

    @Override
    public String toString() ...
}
There are almost 50 lines of code for object that contains only two properties. The IDE generated this code, but still, it is there and has to be maintained.
Record Definition
Definition of a vehicle record, with the same two properties, can be done in just one line:
public record VehicleRecord(String code, String engineType) {}
This one line has all the same getters, setters, constructors, etc. as from the example above. One thing to note is that the record class is, by default, final, and we need to comply with that. That means we cannot extend a record class, but most other things are available for us.
To read more about record classes please refer to the docs.
Java 17
Sealed Classes
The final modifier on a class doesn’t allow anyone to extend it. What about when we want to extend a class but only allow it for some classes?
We are back at our car dealership business. We are so proud of our algorithm for calculating prices that we want to expose it. We don’t want anyone using our Vehicle representation, though. It is valid just for our business. We can see a bit of a problem here. We need to expose class but constrain it also.
This is where Java 17 comes into play with sealed classes. The sealed class allows us to make class effectively final for everyone except explicitly mentioned classes.
public sealed class Vehicle permits Bicycle, Car {...}
We added a sealed modifier to our Vehicle class, and we had to add the permits keyword with a list of classes that we allow to extend it.
After this change, we are still getting errors from the compiler.
There is one more thing that we need to do here.
We need to add final, sealed, or non-sealed modifiers to classes that will extend our class.
public final class Bicycle extends Vehicle {...}
Constraints
Several constraints have to be met for the sealed class to work:
- Permitted subclasses must be accessible by the sealed class at compile time
- Permitted subclasses must directly extend the sealed class
- Permitted subclasses must have one of the following modifiers:
- final
- sealed
- non-sealed
- Permitted subclasses must be in the same Java module
More details about sealed classes can be found in the docs.