Google Cloud Pub/Sub employs a publish-subscribe model, streamlining modern software communication and reshaping how information is shared. Publishers send messages to topics, and subscribers interested in those messages can retrieve them flexibly and asynchronously. This approach redefines the rules of engagement for both microservices and monolith applications.
In this article, we’ll explore the workings of Google Cloud Pub/Sub, delve into common use cases, and demonstrate how to seamlessly integrate Google Pub/Sub with Node.js for real-world scenarios.
Prerequisites
To follow this tutorial, ensure you have the following:
- Basic knowledge of JavaScript and Node.js.
- A Google account
- An API Client (eg: Postman)
- Ngrok installed on your computer.
Example Code
This article is accompanied by a working code example on GitHub.What Is Google Cloud Pub/Sub?
Google Cloud Pub/Sub is a scalable message queuing service that ensures asynchronous and reliable messaging between various applications and services. It offers flexibility, supporting one-to-many, many-to-one, and many-to-many communication patterns. This service is designed to track changes in different applications and communicate these updates to diverse systems in real-time.
How Google Cloud Pub/Sub Works
Consider two servers, server A and server B, requiring communication. Traditionally, server A directly notifies server B of changes using synchronous HTTP calls. However, this method has drawbacks: if server B is busy or slow, server A faces problems with communication.
To tackle these issues, we can switch to asynchronous communication using a Pub/Sub pattern. Pub/Sub allows systems to work independently, solving issues like unavailability and queuing. It also introduces flexibility and scalability to our systems.
Using Pub/Sub, server A (publisher) publishes events related to changes, categorizing them as a topic, and server B (subscriber) subscribes to these events. The publisher-subscription model allows messages to be disseminated to all subscriptions associated with a specific topic.
This approach provides flexibility to subscribers like server B, who can choose to pull messages at their convenience or have messages pushed to a specified endpoint. The push mechanism ensures proactive message delivery, creating a dynamic and adaptable communication framework for diverse application needs.
For a deeper understanding of Pub/Sub, let’s explore some of its key terminology and common use cases.
Google Cloud Pub/Sub Terminology
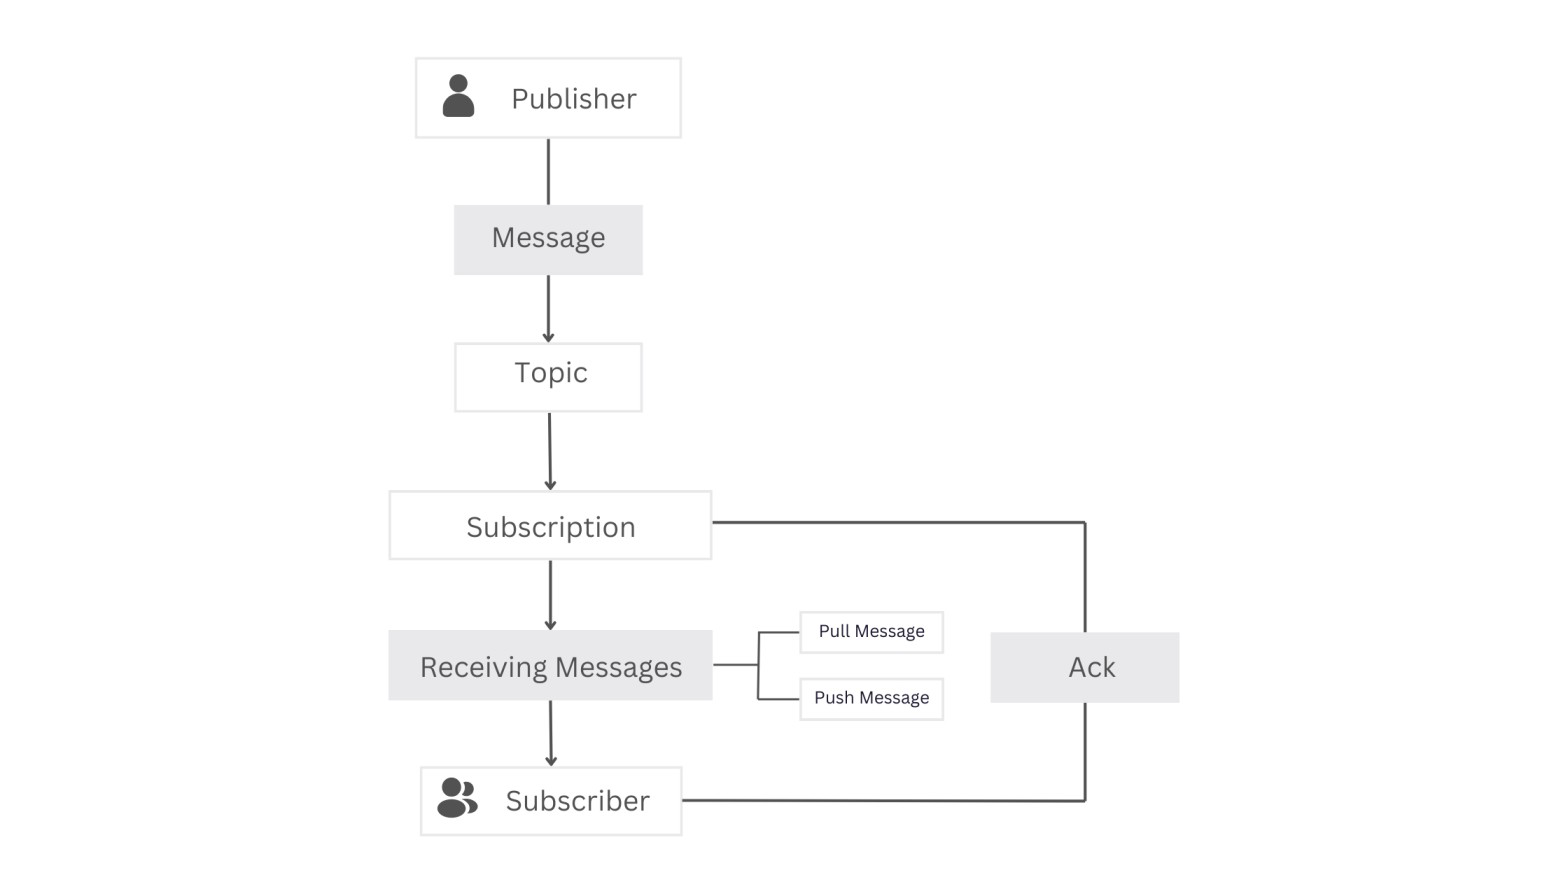
Publisher: These are services that add new messages to a topic. Topics can have a single or multiple publishersMessage: This is the data exchanged between services. It can be stored as a text or byte string, offering flexibility in formatting. Messages usually indicate events, such as data modification or action completion.Topic: This is like a message folder. We can add messages to or read messages from it. We can have multiple topics, and each topic is for a different type of message. Messages are put into specific topics, and we choose which topic we want messages from. This helps specify the messages we get. We can make as many topics as we want.Subscription: This is the act of subscribing to a topic. By subscribing to a topic, we express interest in receiving messages published on that specific topic. Each subscription is associated with a particular topic. Creating a subscription is a key step in the Google Pub/Sub messaging system to establish the link between a subscriber and the messages published on a topic.Receiving Messages:Subscribers receive messages from subscribed topics based on the subscription settings. There are two ways to receive messages:- Pull: Subscribers manually pull the latest messages through a direct request.
- Push: Subscribers request that all new messages be pushed to a provided endpoint URL.
Acknowledgment (Ack):Subscribers play a vital role by acknowledging each received message. This acknowledgment ensures that the same messages won’t be sent (Push) or read (Pull) repeatedly. If a message is not acknowledged, it triggers the assumption that it needs to be resent. Acknowledgment is a vital step in maintaining the efficiency of the messaging system, preventing redundant message delivery.Subscribers: These are services designed to receive messages from one or more topics. Subscribers have the flexibility to subscribe to multiple topics, providing a versatile and comprehensive method for message reception.
Common Pub/Sub Use Cases:
- Real-time Event Processing: Monitor and react in real-time to user interactions, system malfunctions, and business events.
- Parallel Processing: Efficiently distribute and manage numerous tasks concurrently for improved performance.
- Tracking Database Changes: Keep a watchful eye on database changes and respond to them instantly for timely and effective updates.
Next, let’s start the process of setting up our Google Cloud Pub/Sub for integration into a Node.js app.
Setting up a Google Cloud Pub/Sub in Our Node.js Application.
To begin using Google Cloud Pub/Sub, we must first configure and create a Google Cloud Pub/Sub instance. Here are the steps to do this:
- Login To Google Cloud Console
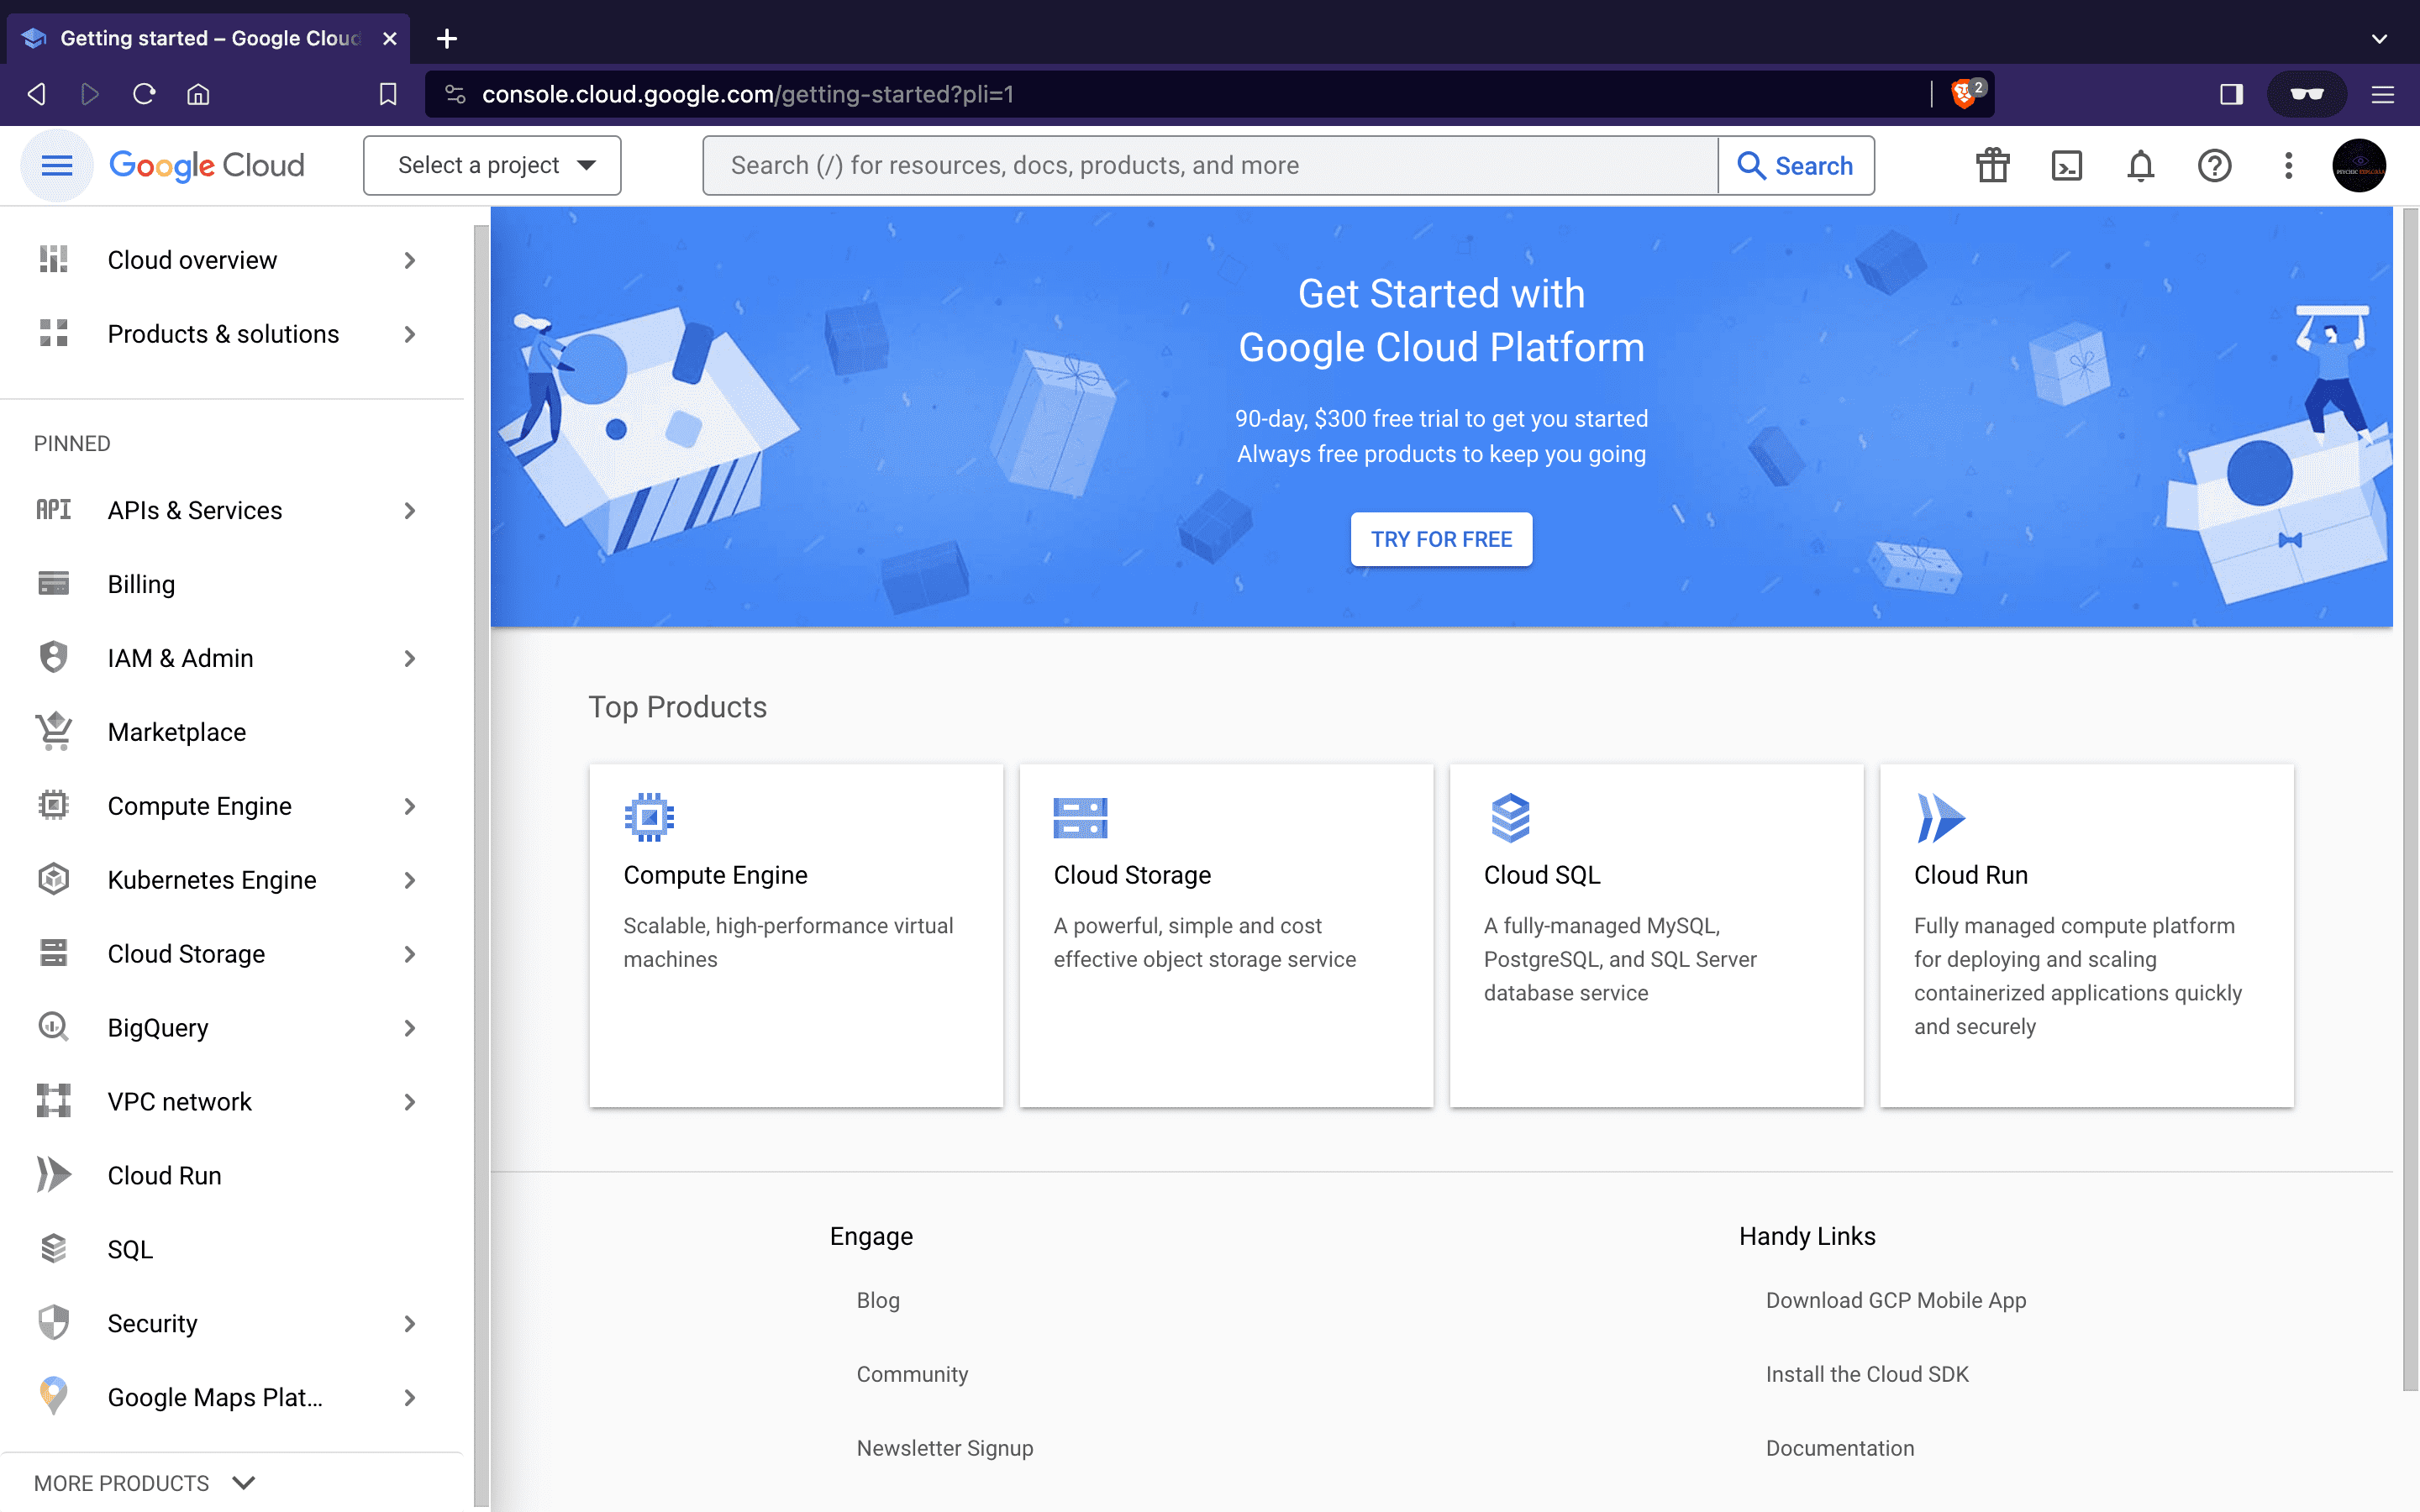
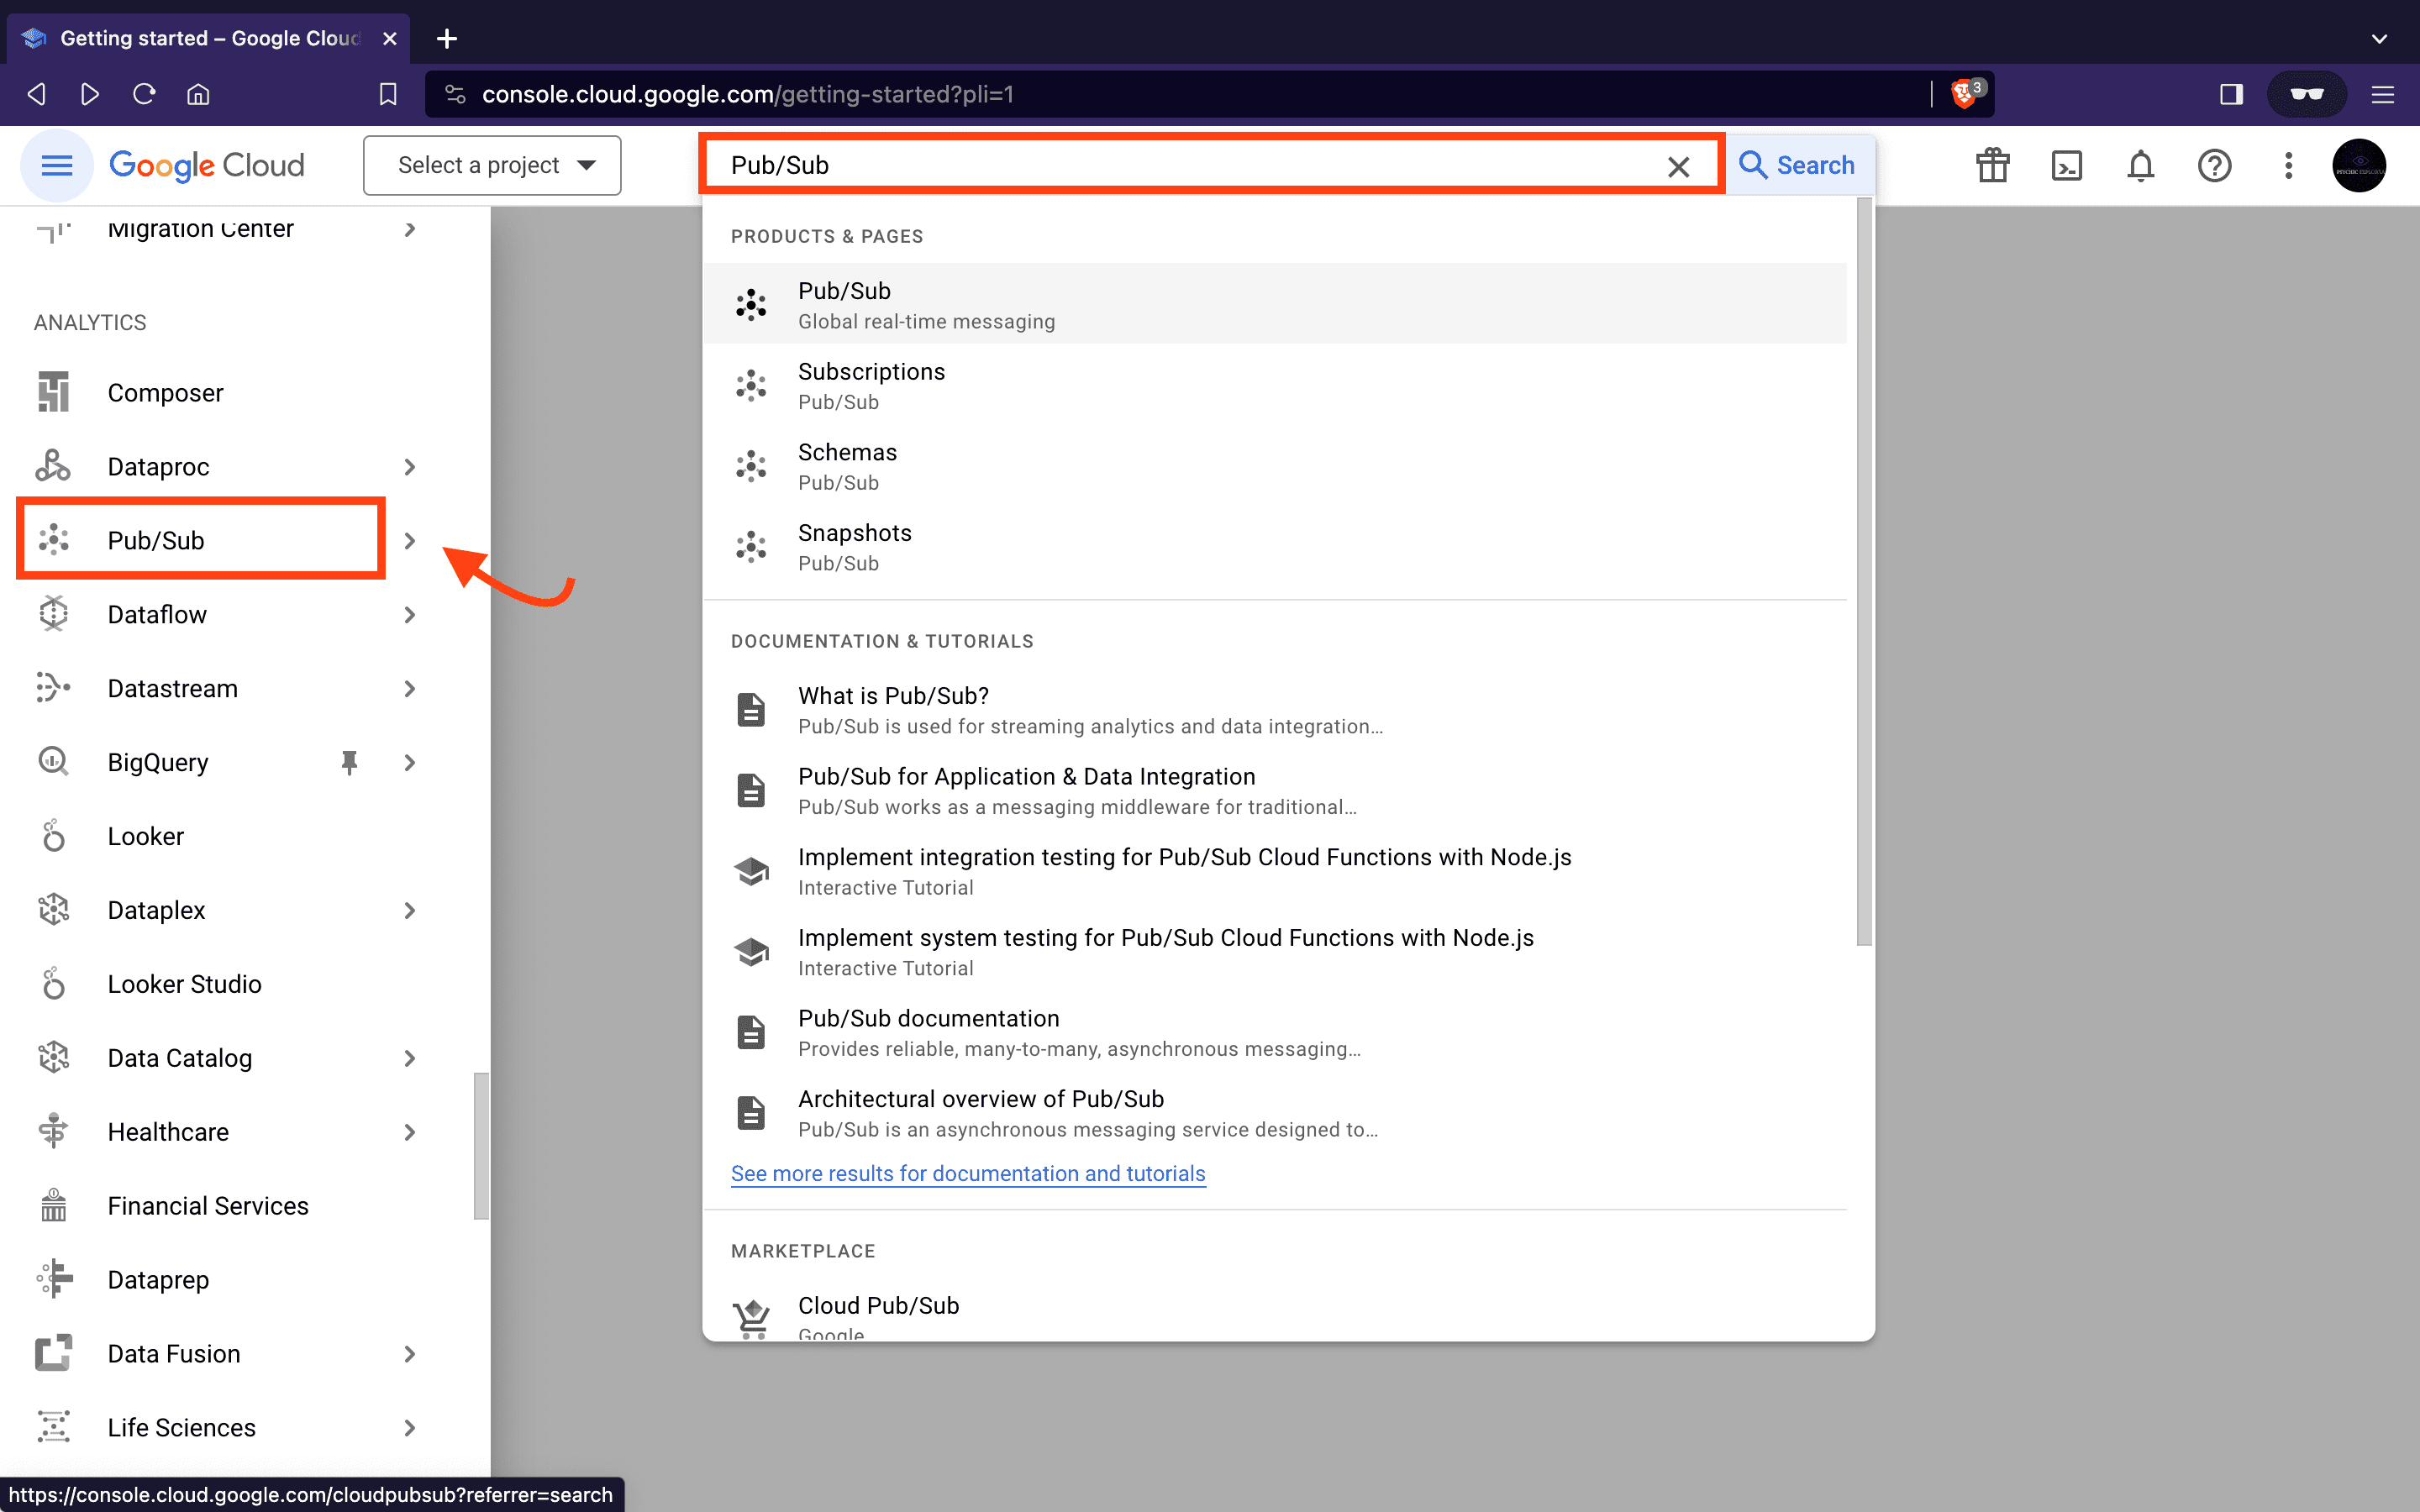
- After logging in, locate the Pub/Sub section in the left-hand menu or use the search bar.
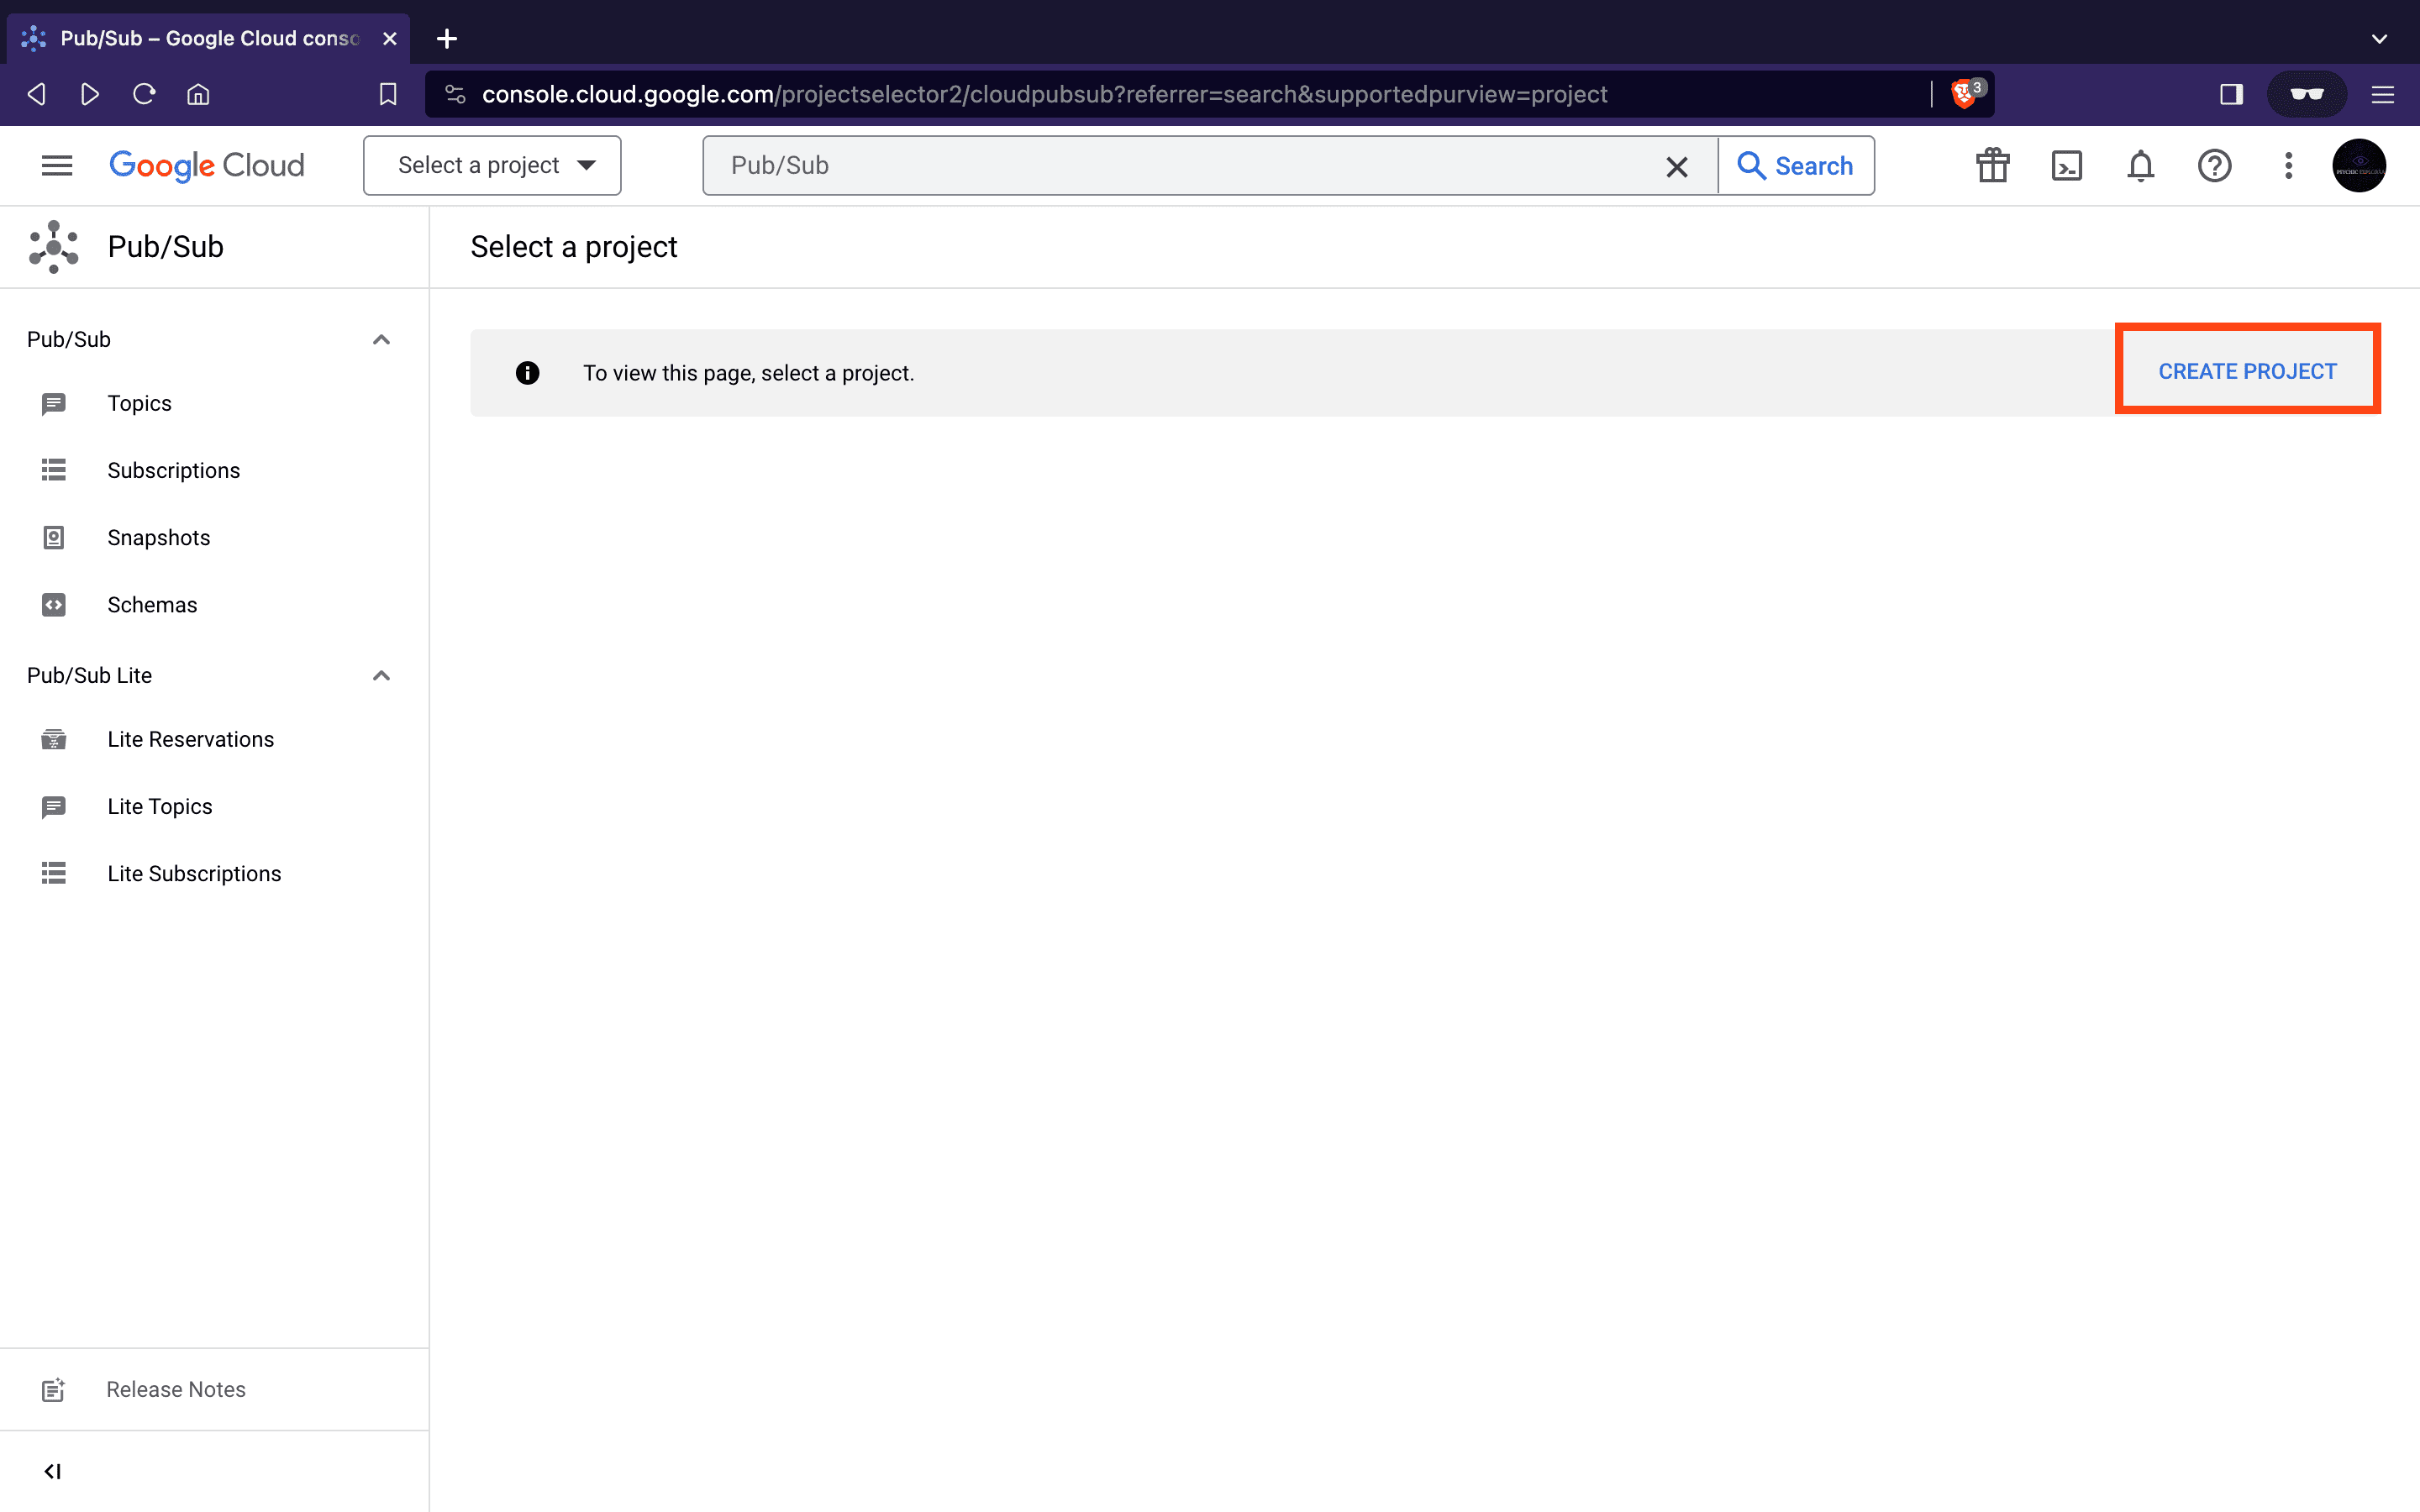
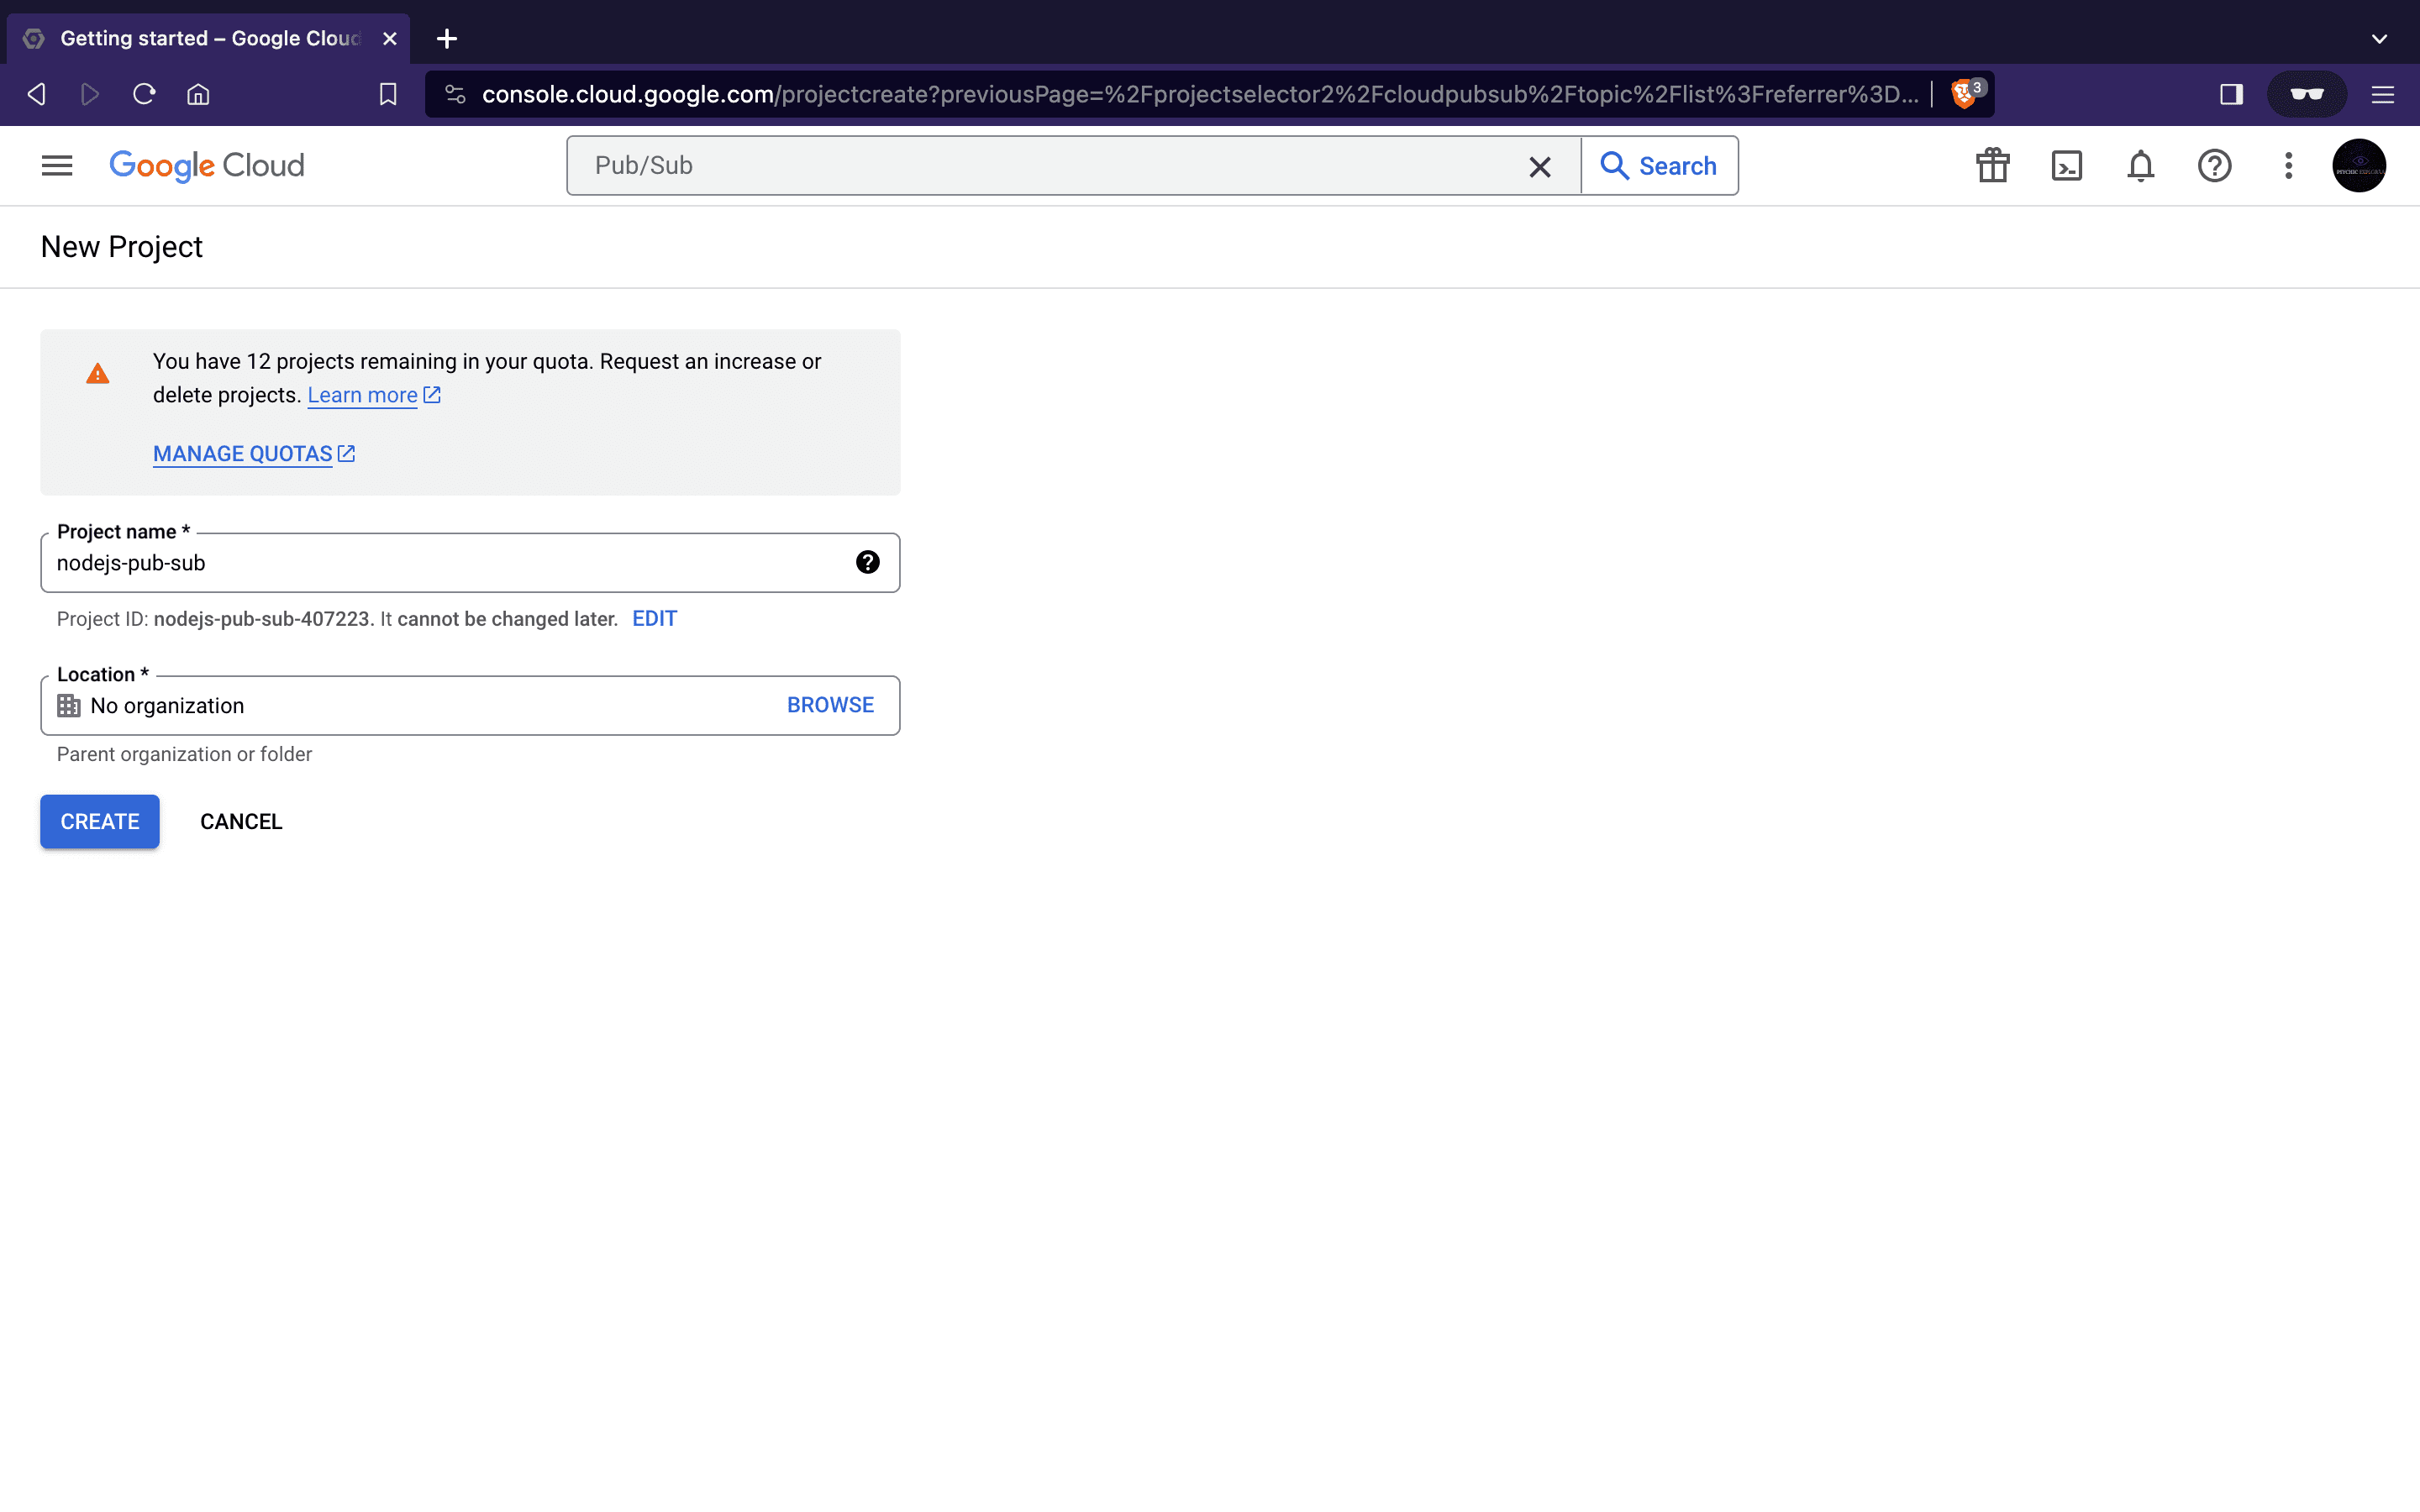
- Next, we will create a new project. A project provides a logical grouping of resources, making it easier to manage and organize Google Cloud resources. Click on the CREATE PROJECT button to create one.
Name the project nodejs-pub-sub and click the CREATE button to create a new project.
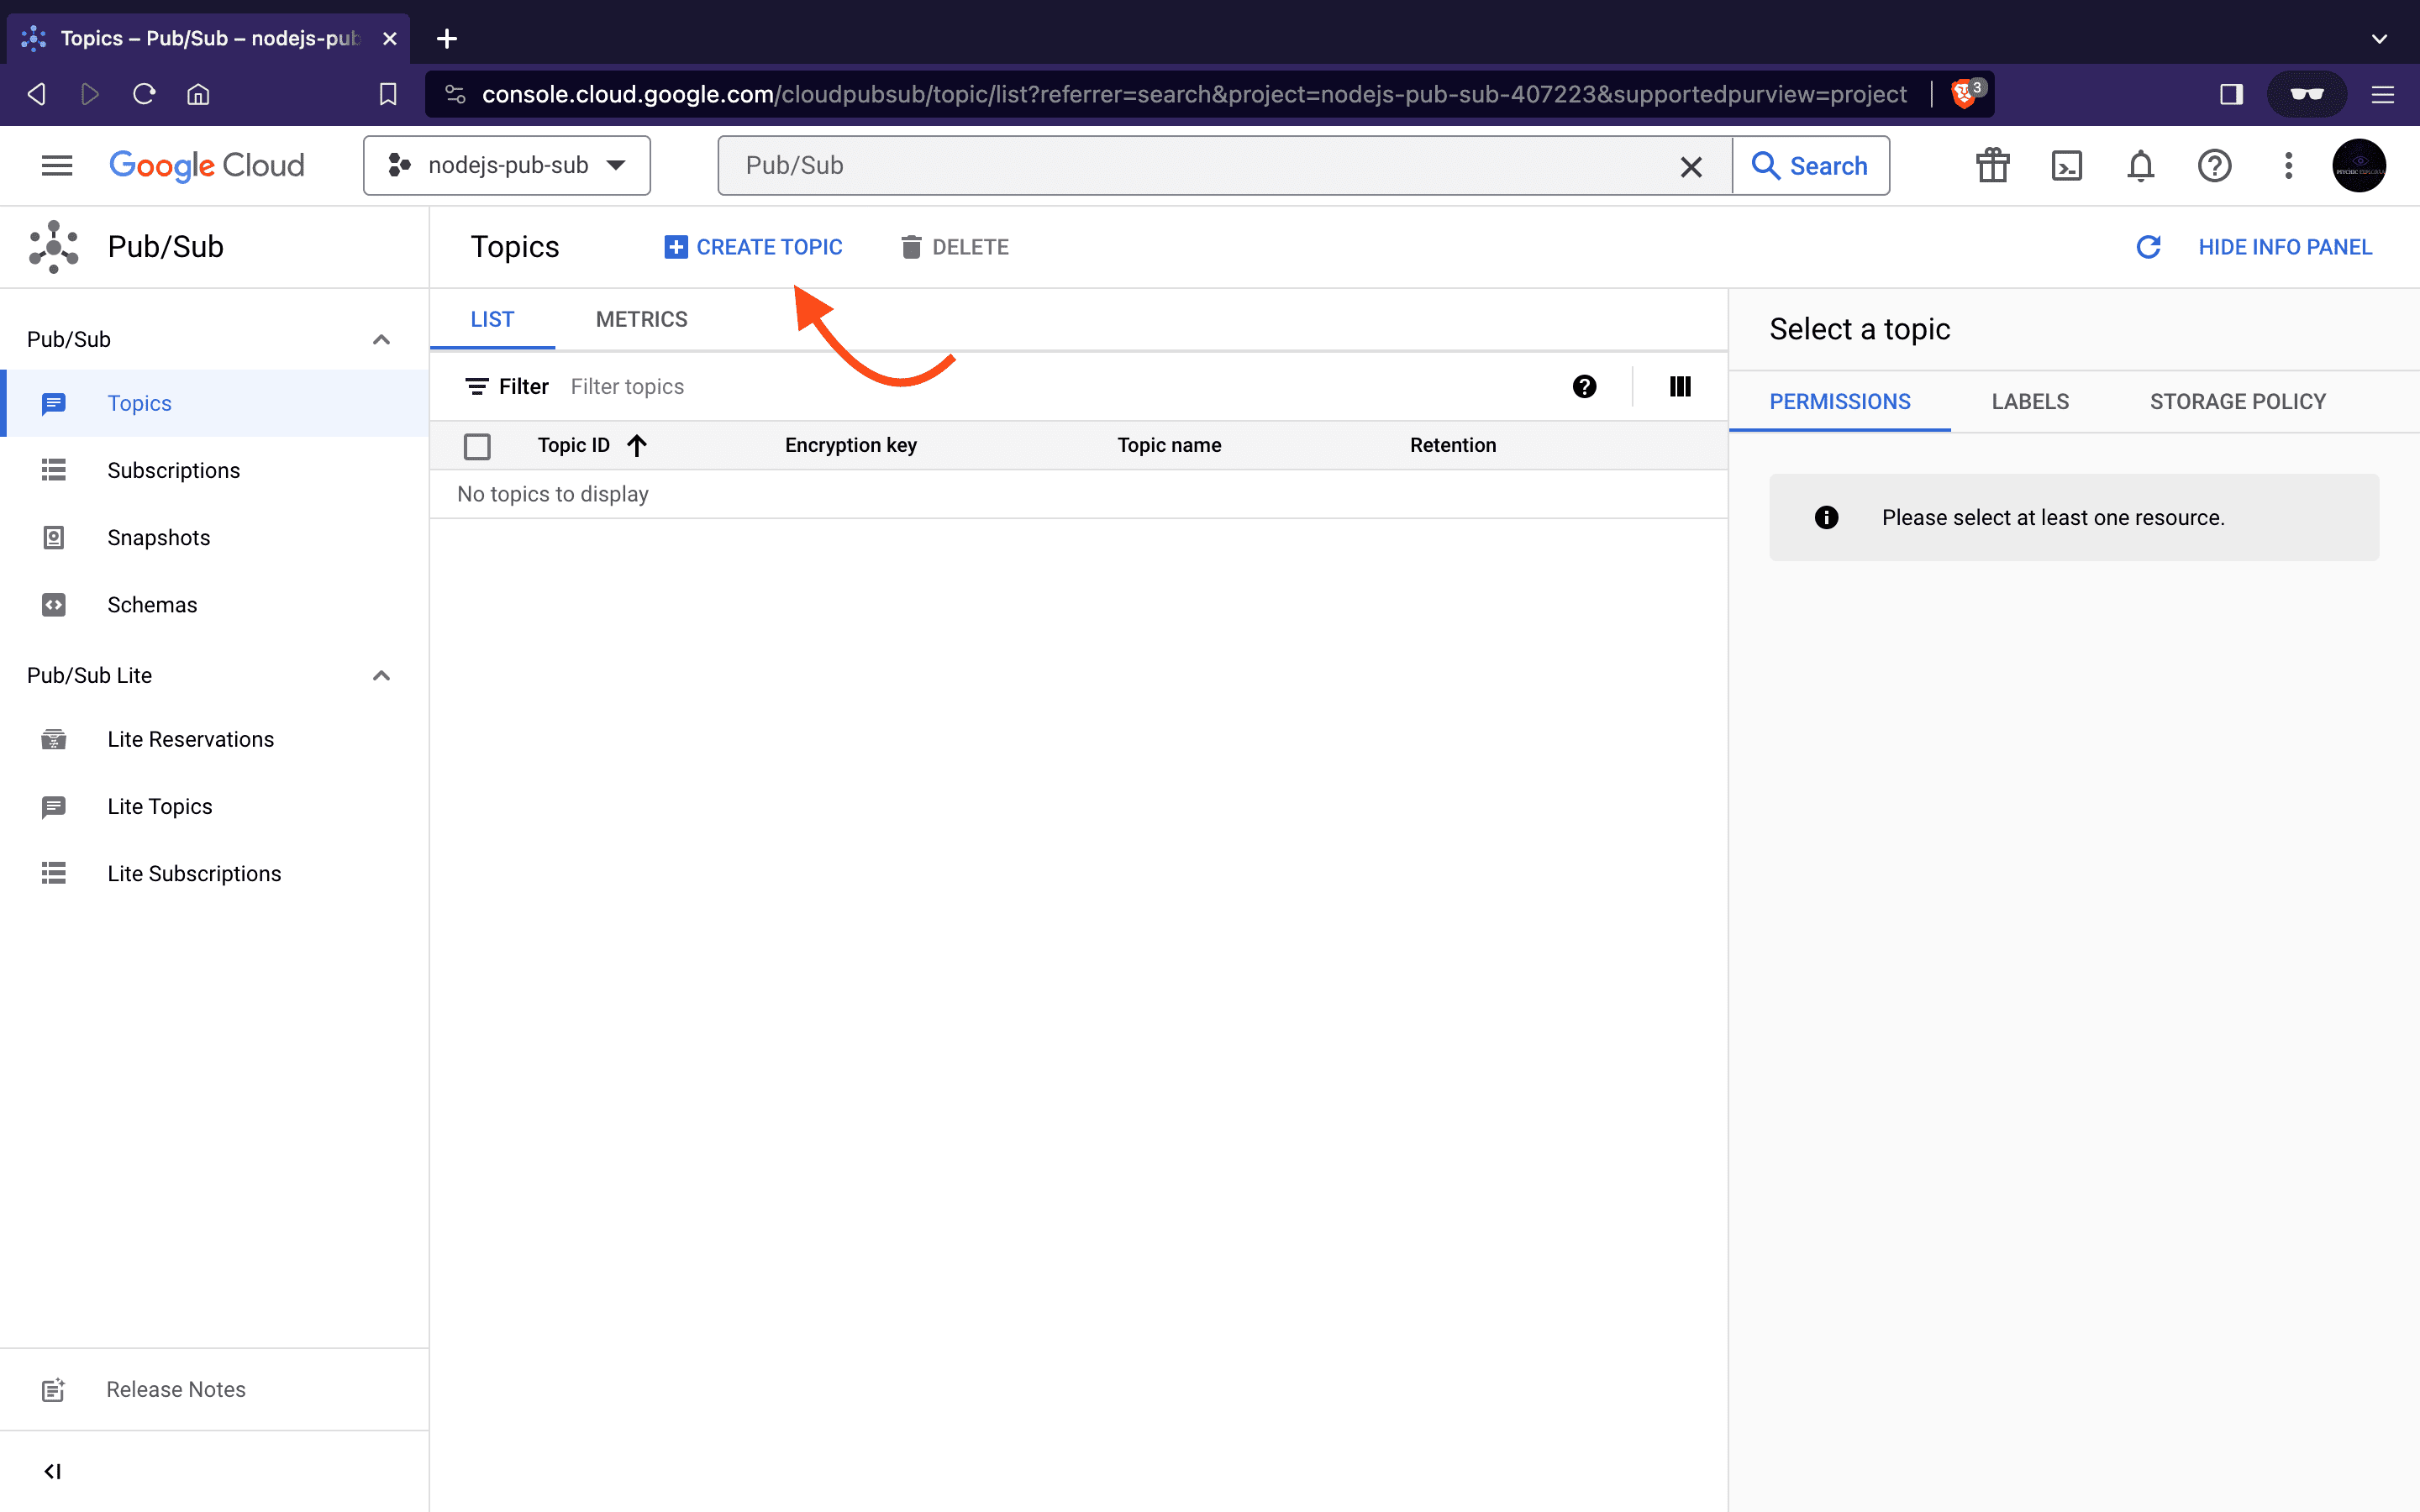
- To establish our channel for publishing and subscribing to messages we will start by creating our topic. Return to the Pub/Sub page, and click on the CREATE TOPIC button. This action prompts a configuration interface where we can define crucial parameters for our topic.
- Input the topic name
user_creationand click the CREATE button.
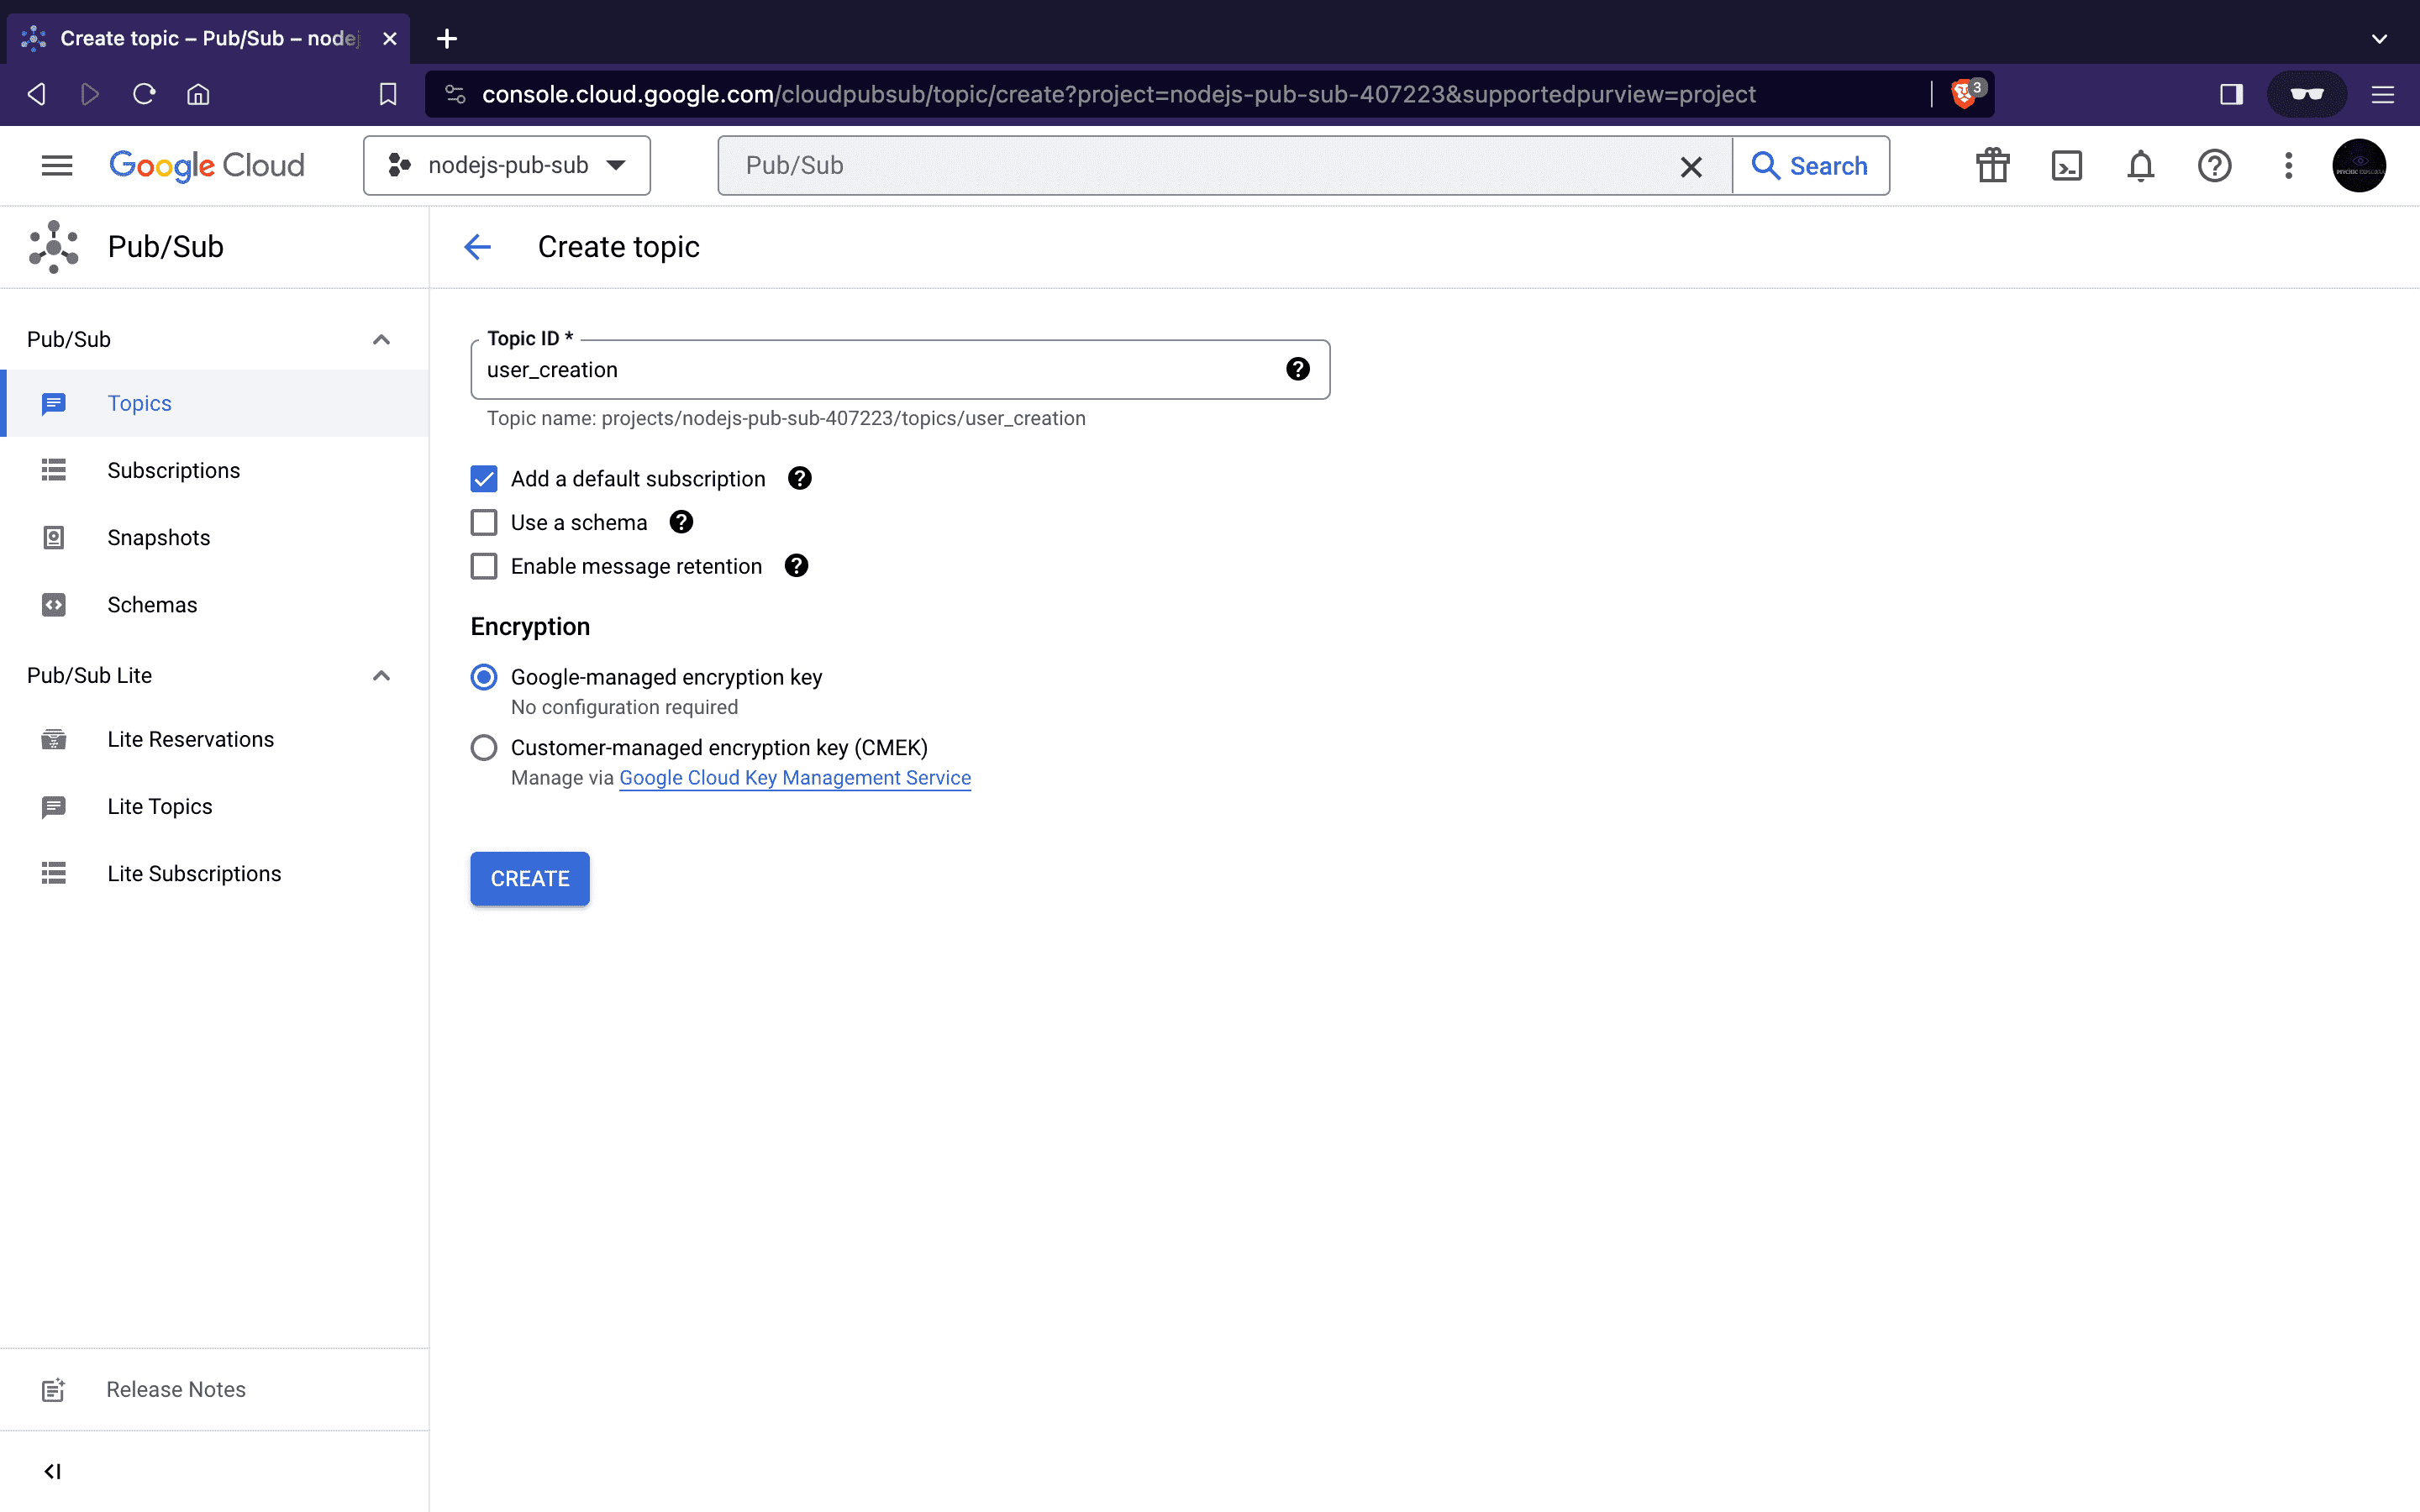
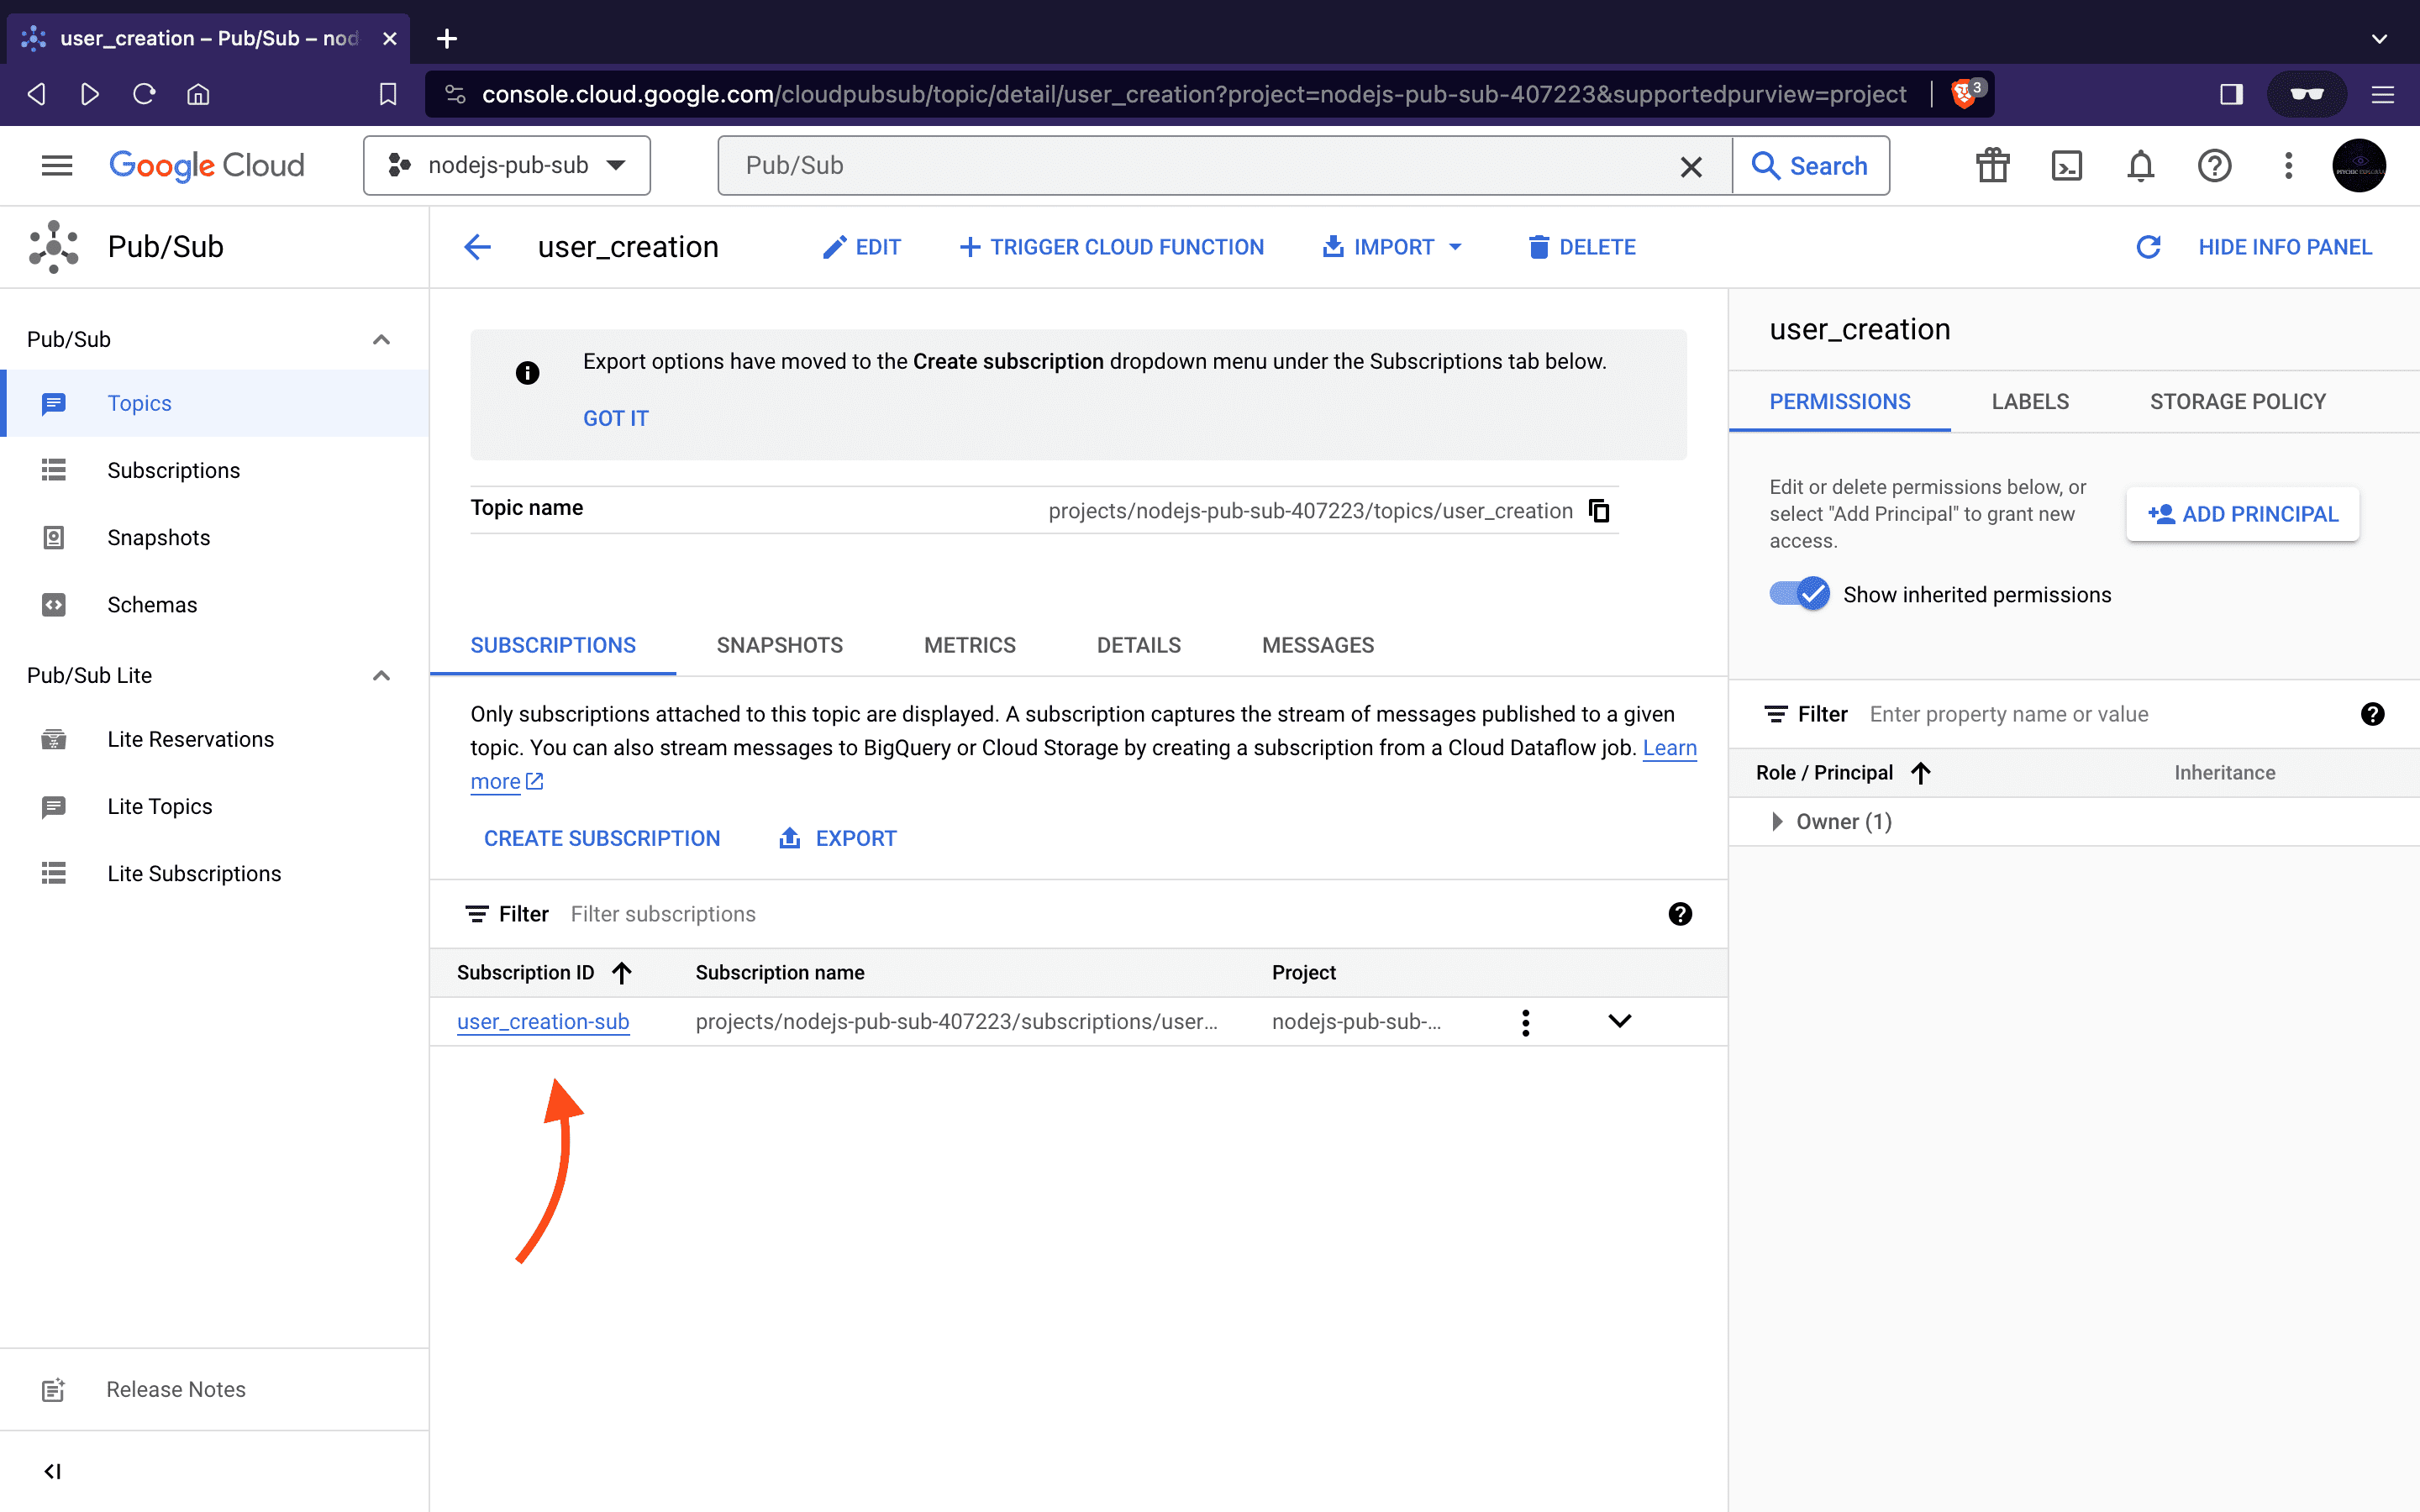
- This action will create our
user_creationtopic and a default subscription nameduser_creation-subwill be automaticallygenerated since we left the Add default subscription box checked.
- Subscriptions define how messages are delivered to subscribers, and specifying the delivery type is crucial for receiving real-time updates. Next, we will create two subscriptions with delivery types
pullandpushfor our subscribers to connect with a topic.
To create this custom subscription, click on CREATE SUBSCRIPTION button and create a pull or push subscriptions following the steps in the upcoming sections.
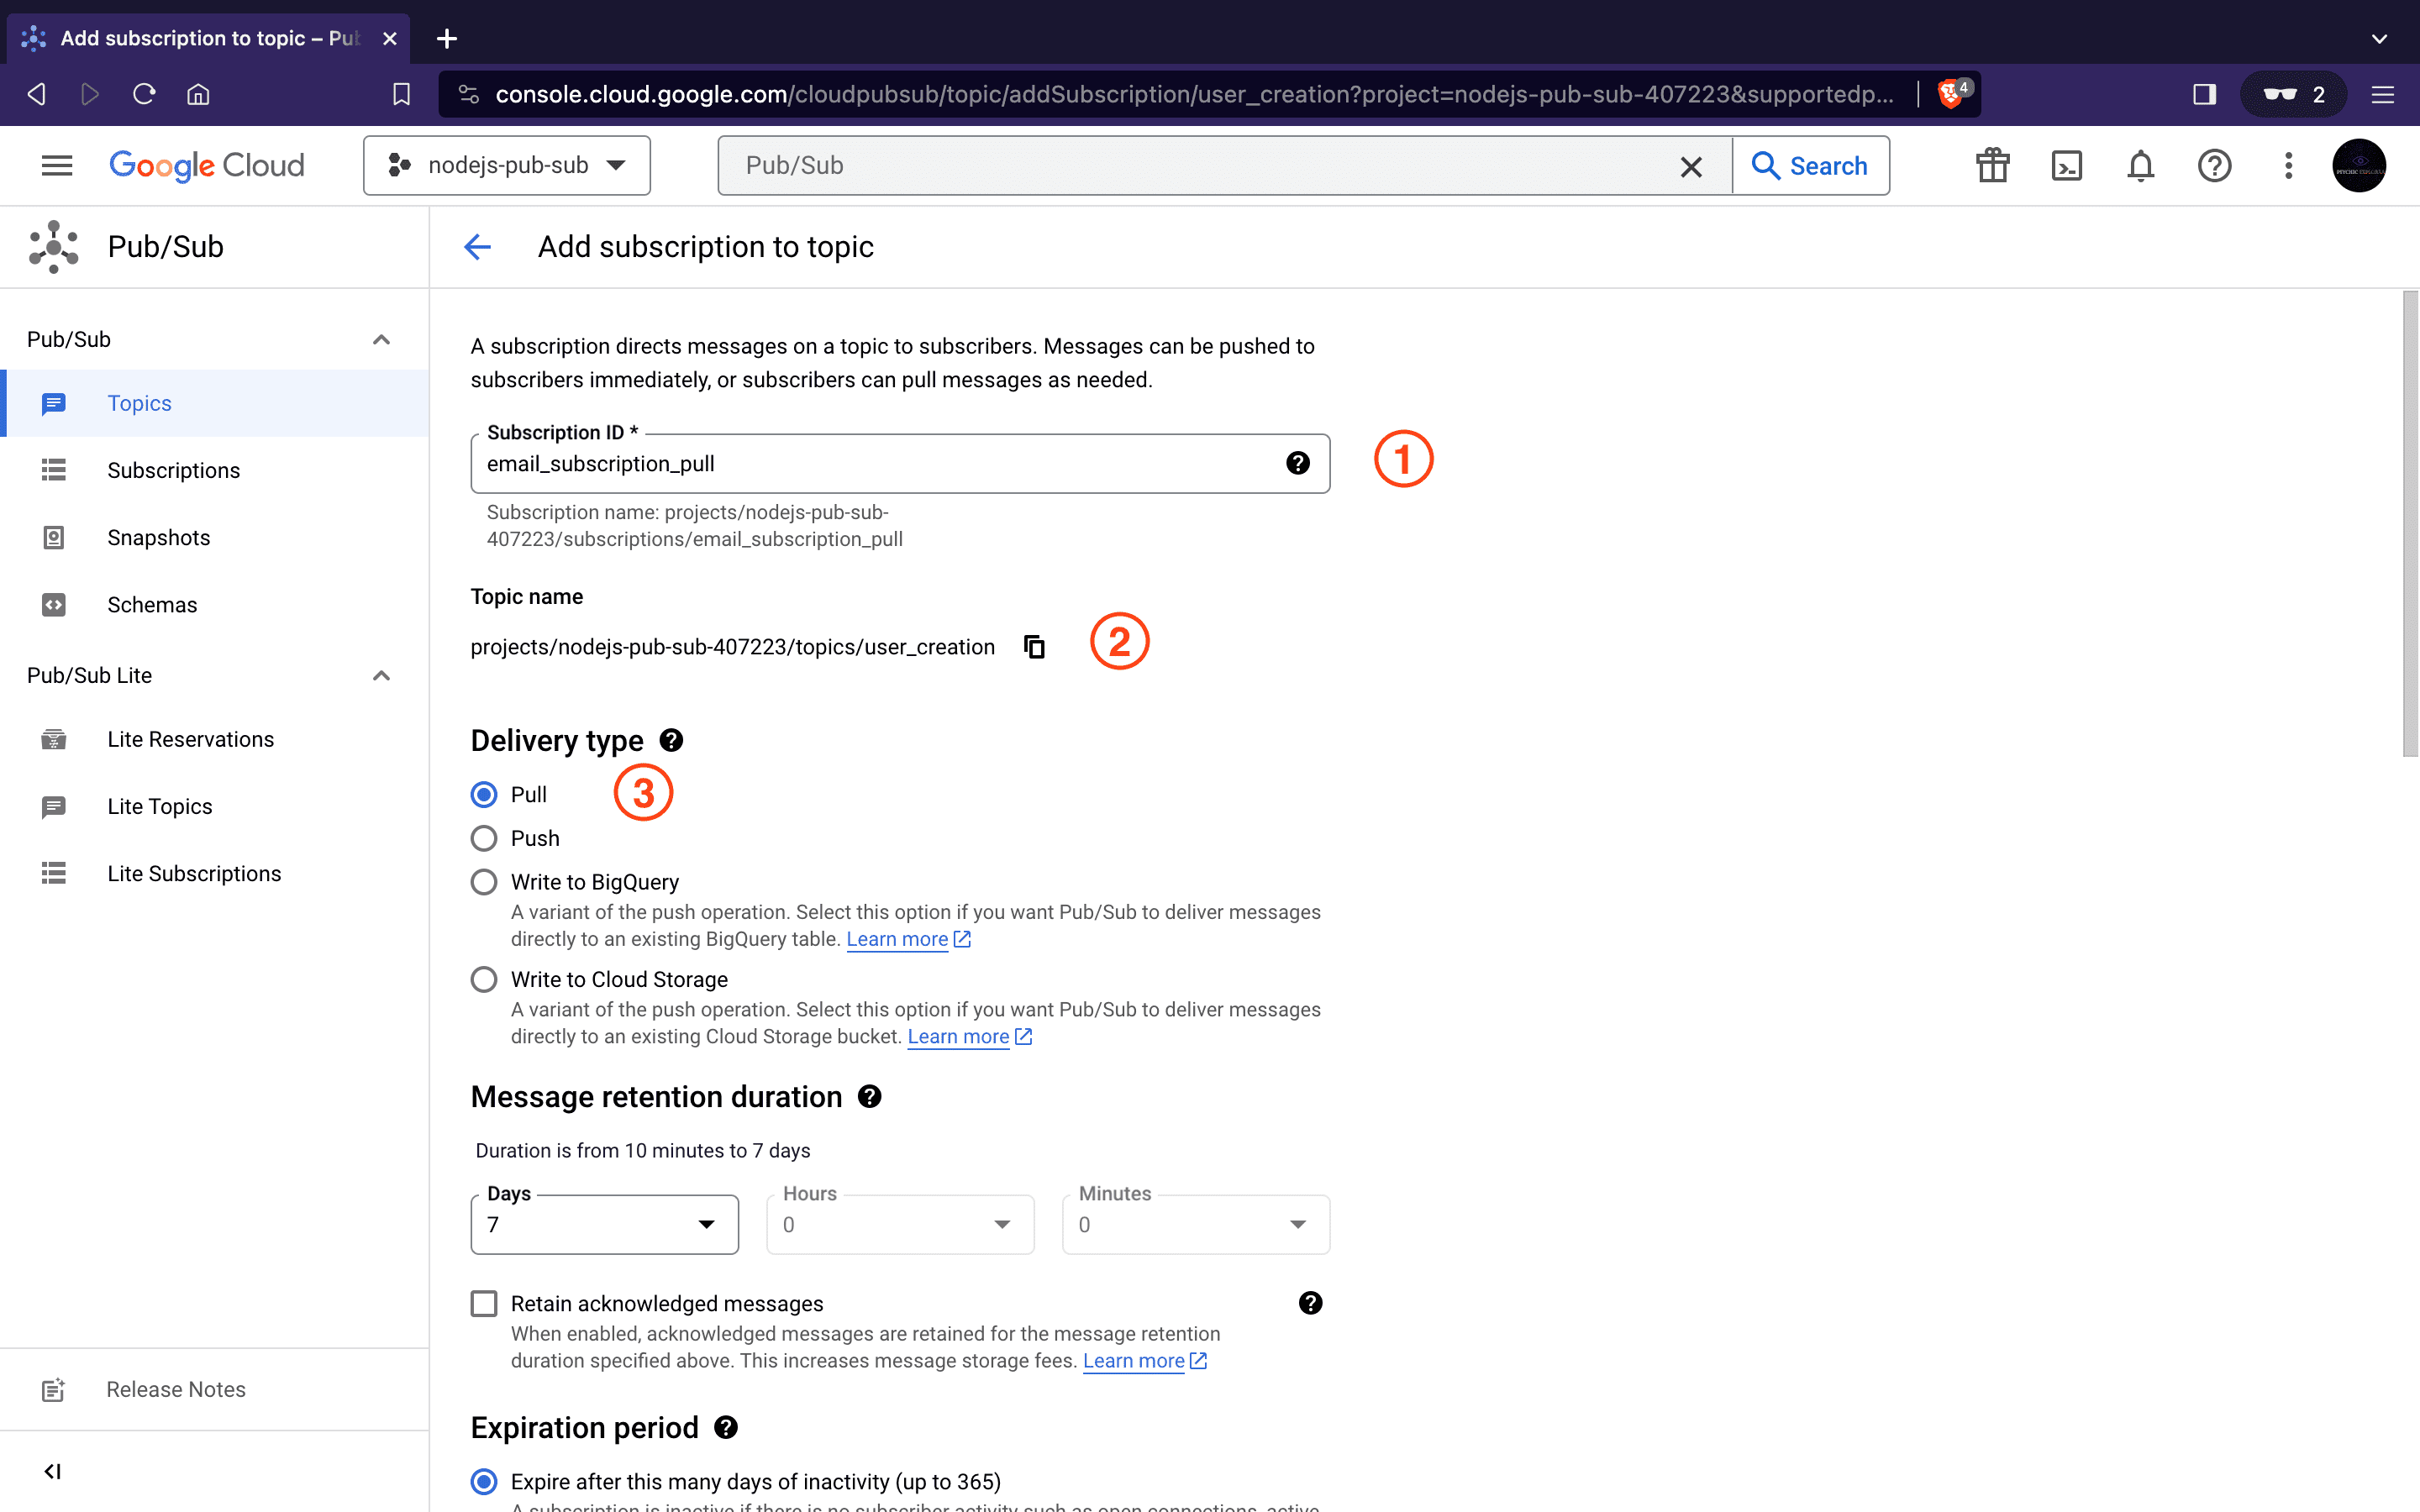
Create a Pull Subscription
- Subscription ID:
email_subscription_pull - Specify the Topic Name
- Select the delivery type as
pull - Click on the CREATE button at the bottom of the page to initiate the subscription creation process.
Create a Push Subscription
- Subscription ID:
email_subscription_push - Specify the Topic Name
- Select the delivery type as
push. - Specify the live Endpoint URL for Pub/Sub to notify our subscriber service about new messages.
- Click on the CREATE button at the bottom of the page to finalize the subscription setup.
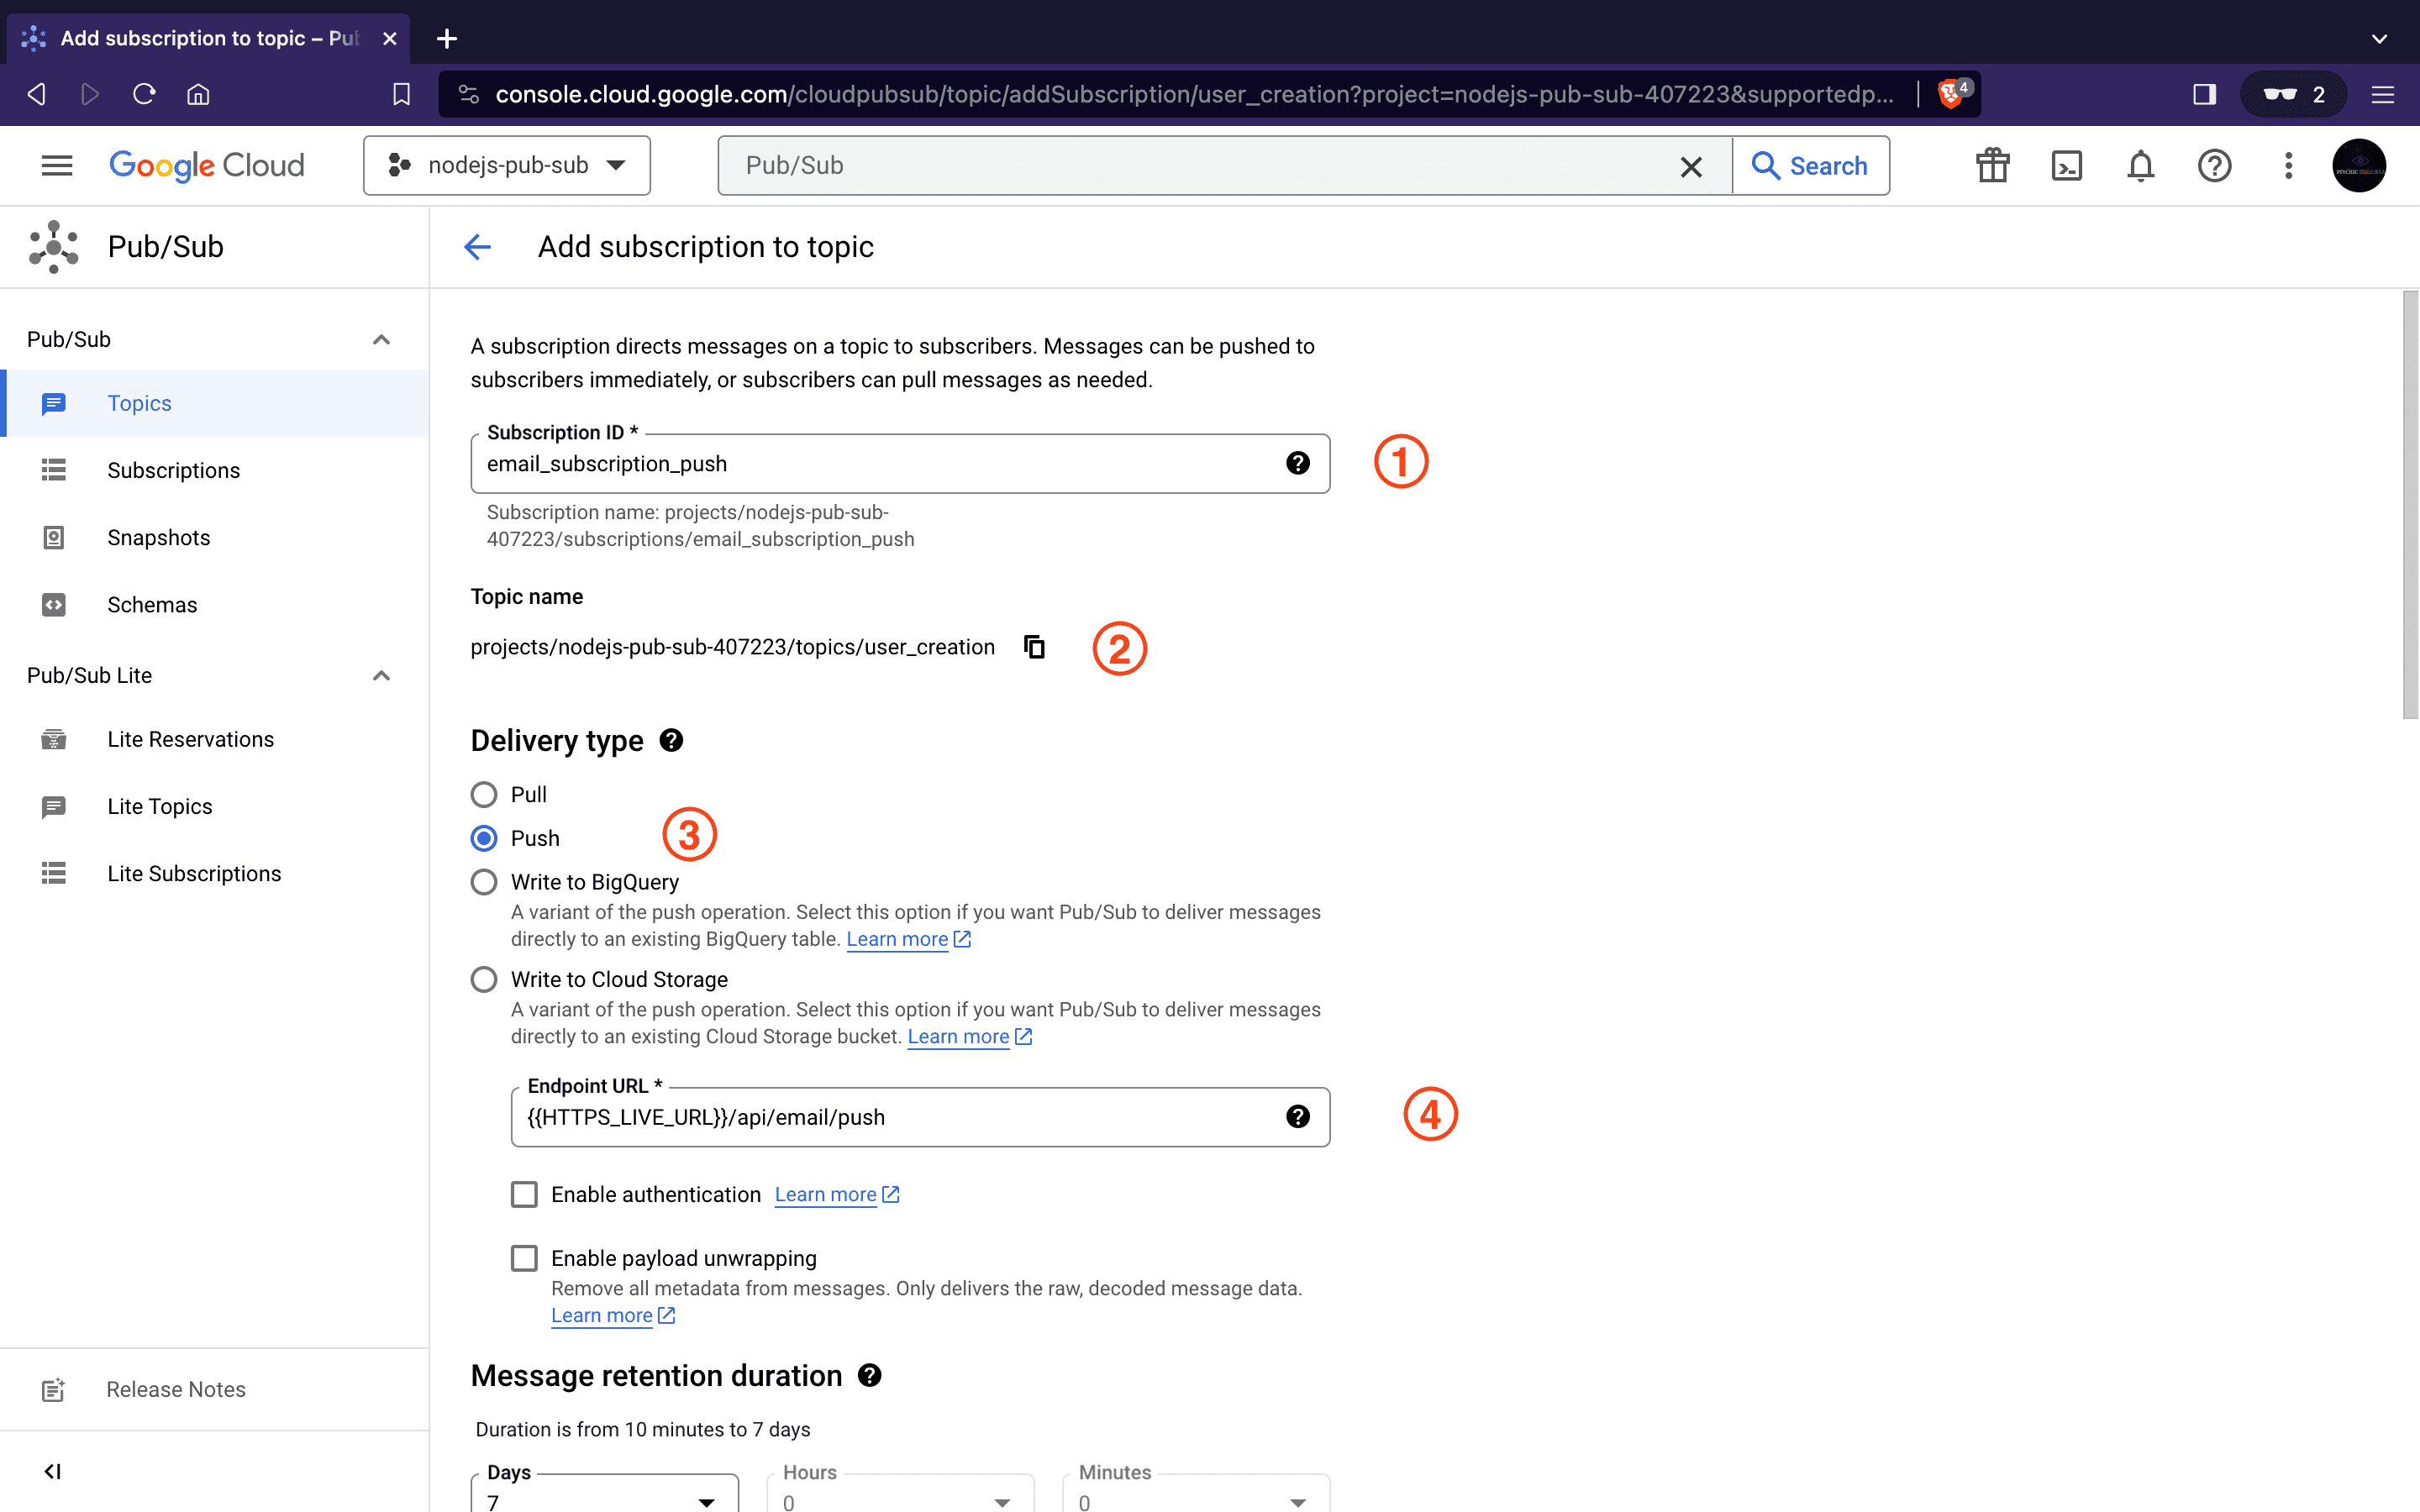
The HTTPS_LIVE_URL parameter used above signifies the HTTPS host URL where the subscriber service is hosted. For push subscriptions, Google Cloud Pub/Sub requires all endpoints to be deployed on HTTPS.
Next, To connect to Google Cloud Pub/Sub from a Node.js application, authentication credentials are necessary. This typically involves obtaining a service account key. Let’s proceed by setting up our service account.
Setting up a Service Account for Google Cloud Pub/Sub
This involves configuring a service account with Pub/Sub access on the Google Cloud Console. A service account acts as a means for our application to authenticate itself with Google Cloud services. Once created, we can download its key in JSON format. The service account key contains essential information for our application to prove its identity and gain access to the Pub/Sub functionalities.
Follow these steps to set up a service account::
- Navigate to the Pub/Sub Section and enable Pub/Sub API for our project
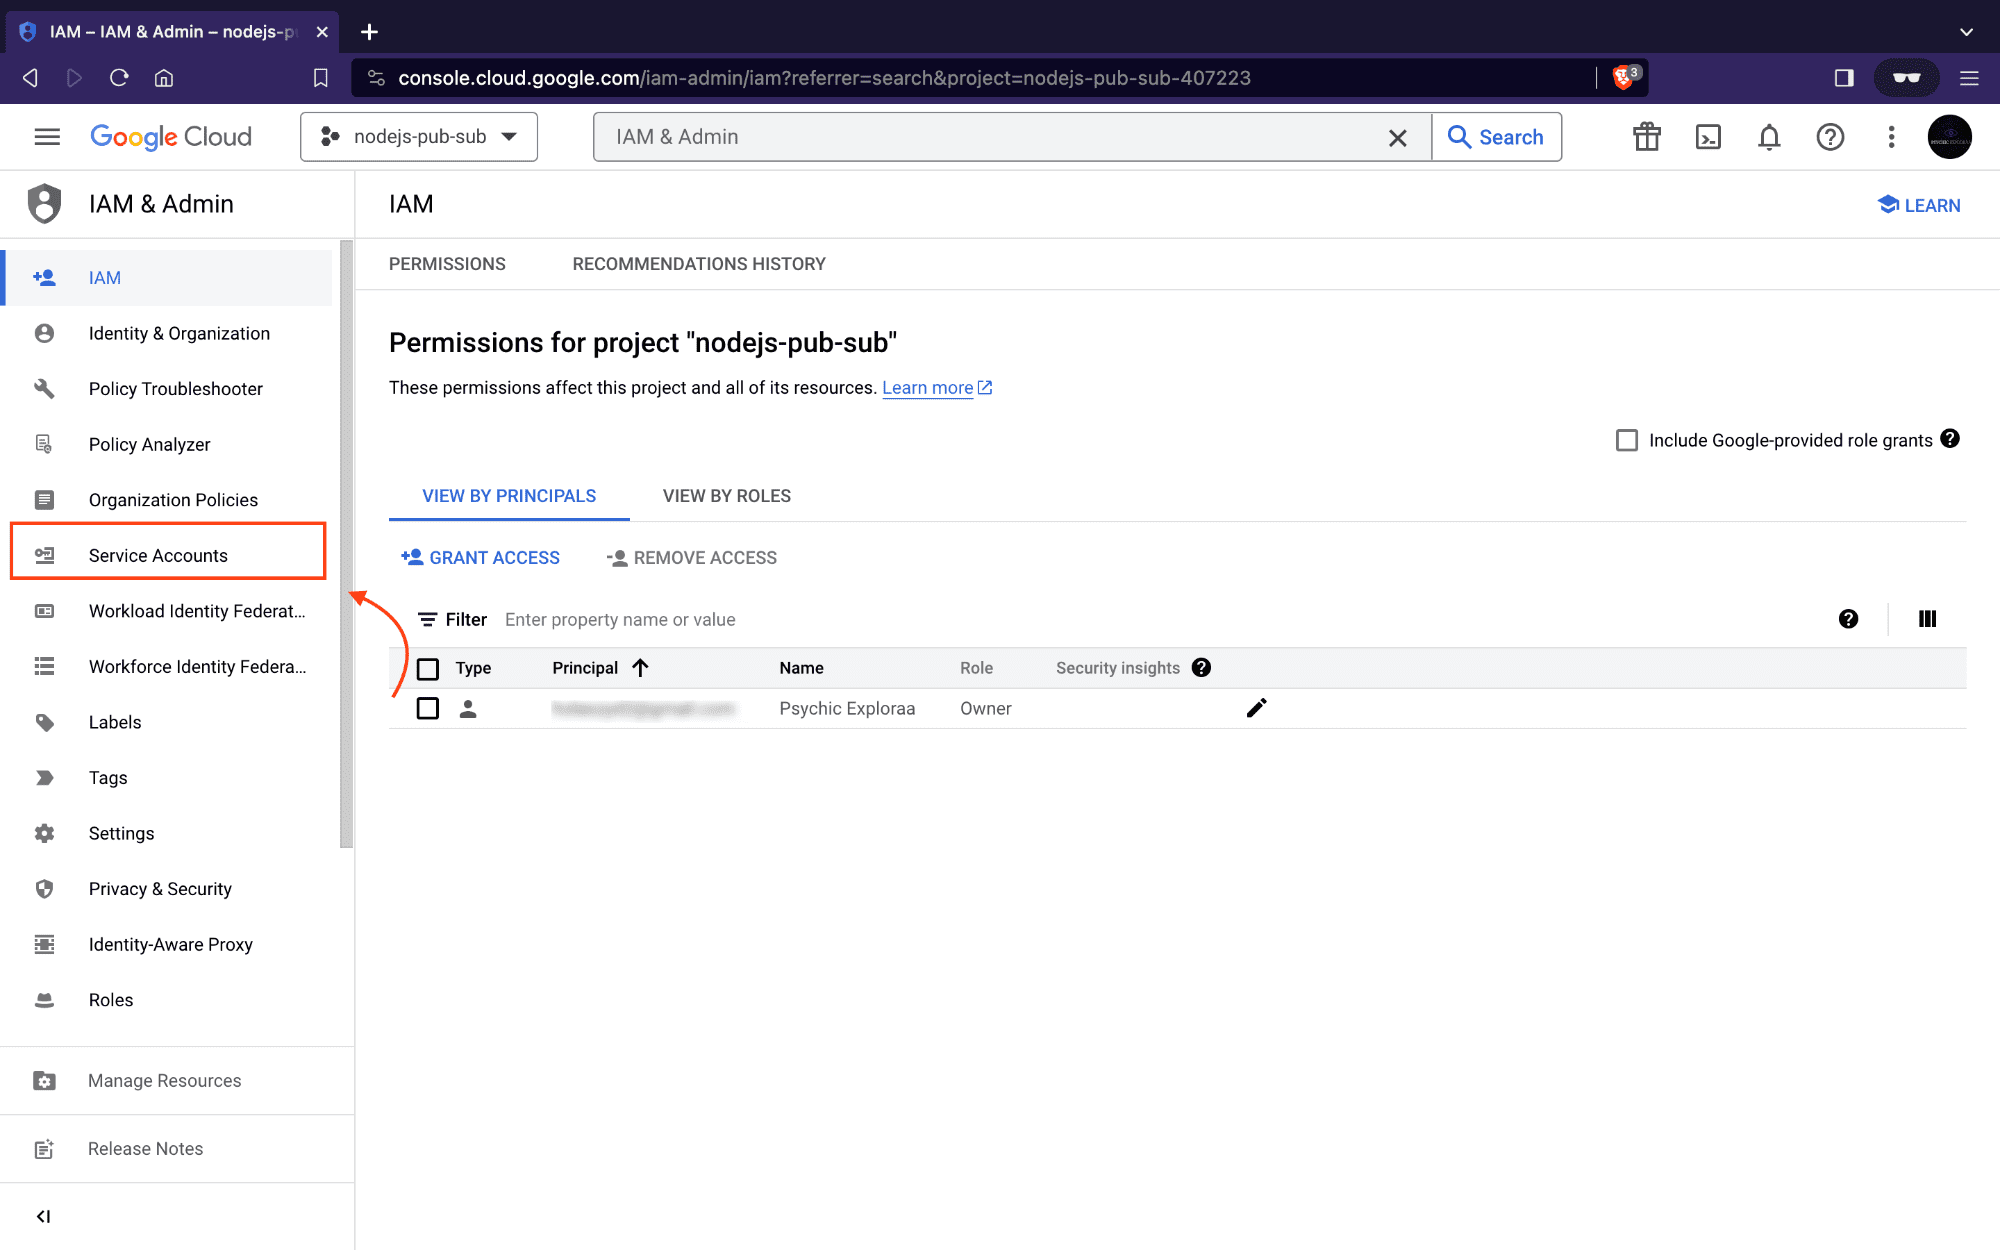
- Next, In the Google Cloud Console, go to the IAM & Admin section using the search bar.
- Click on Service accounts
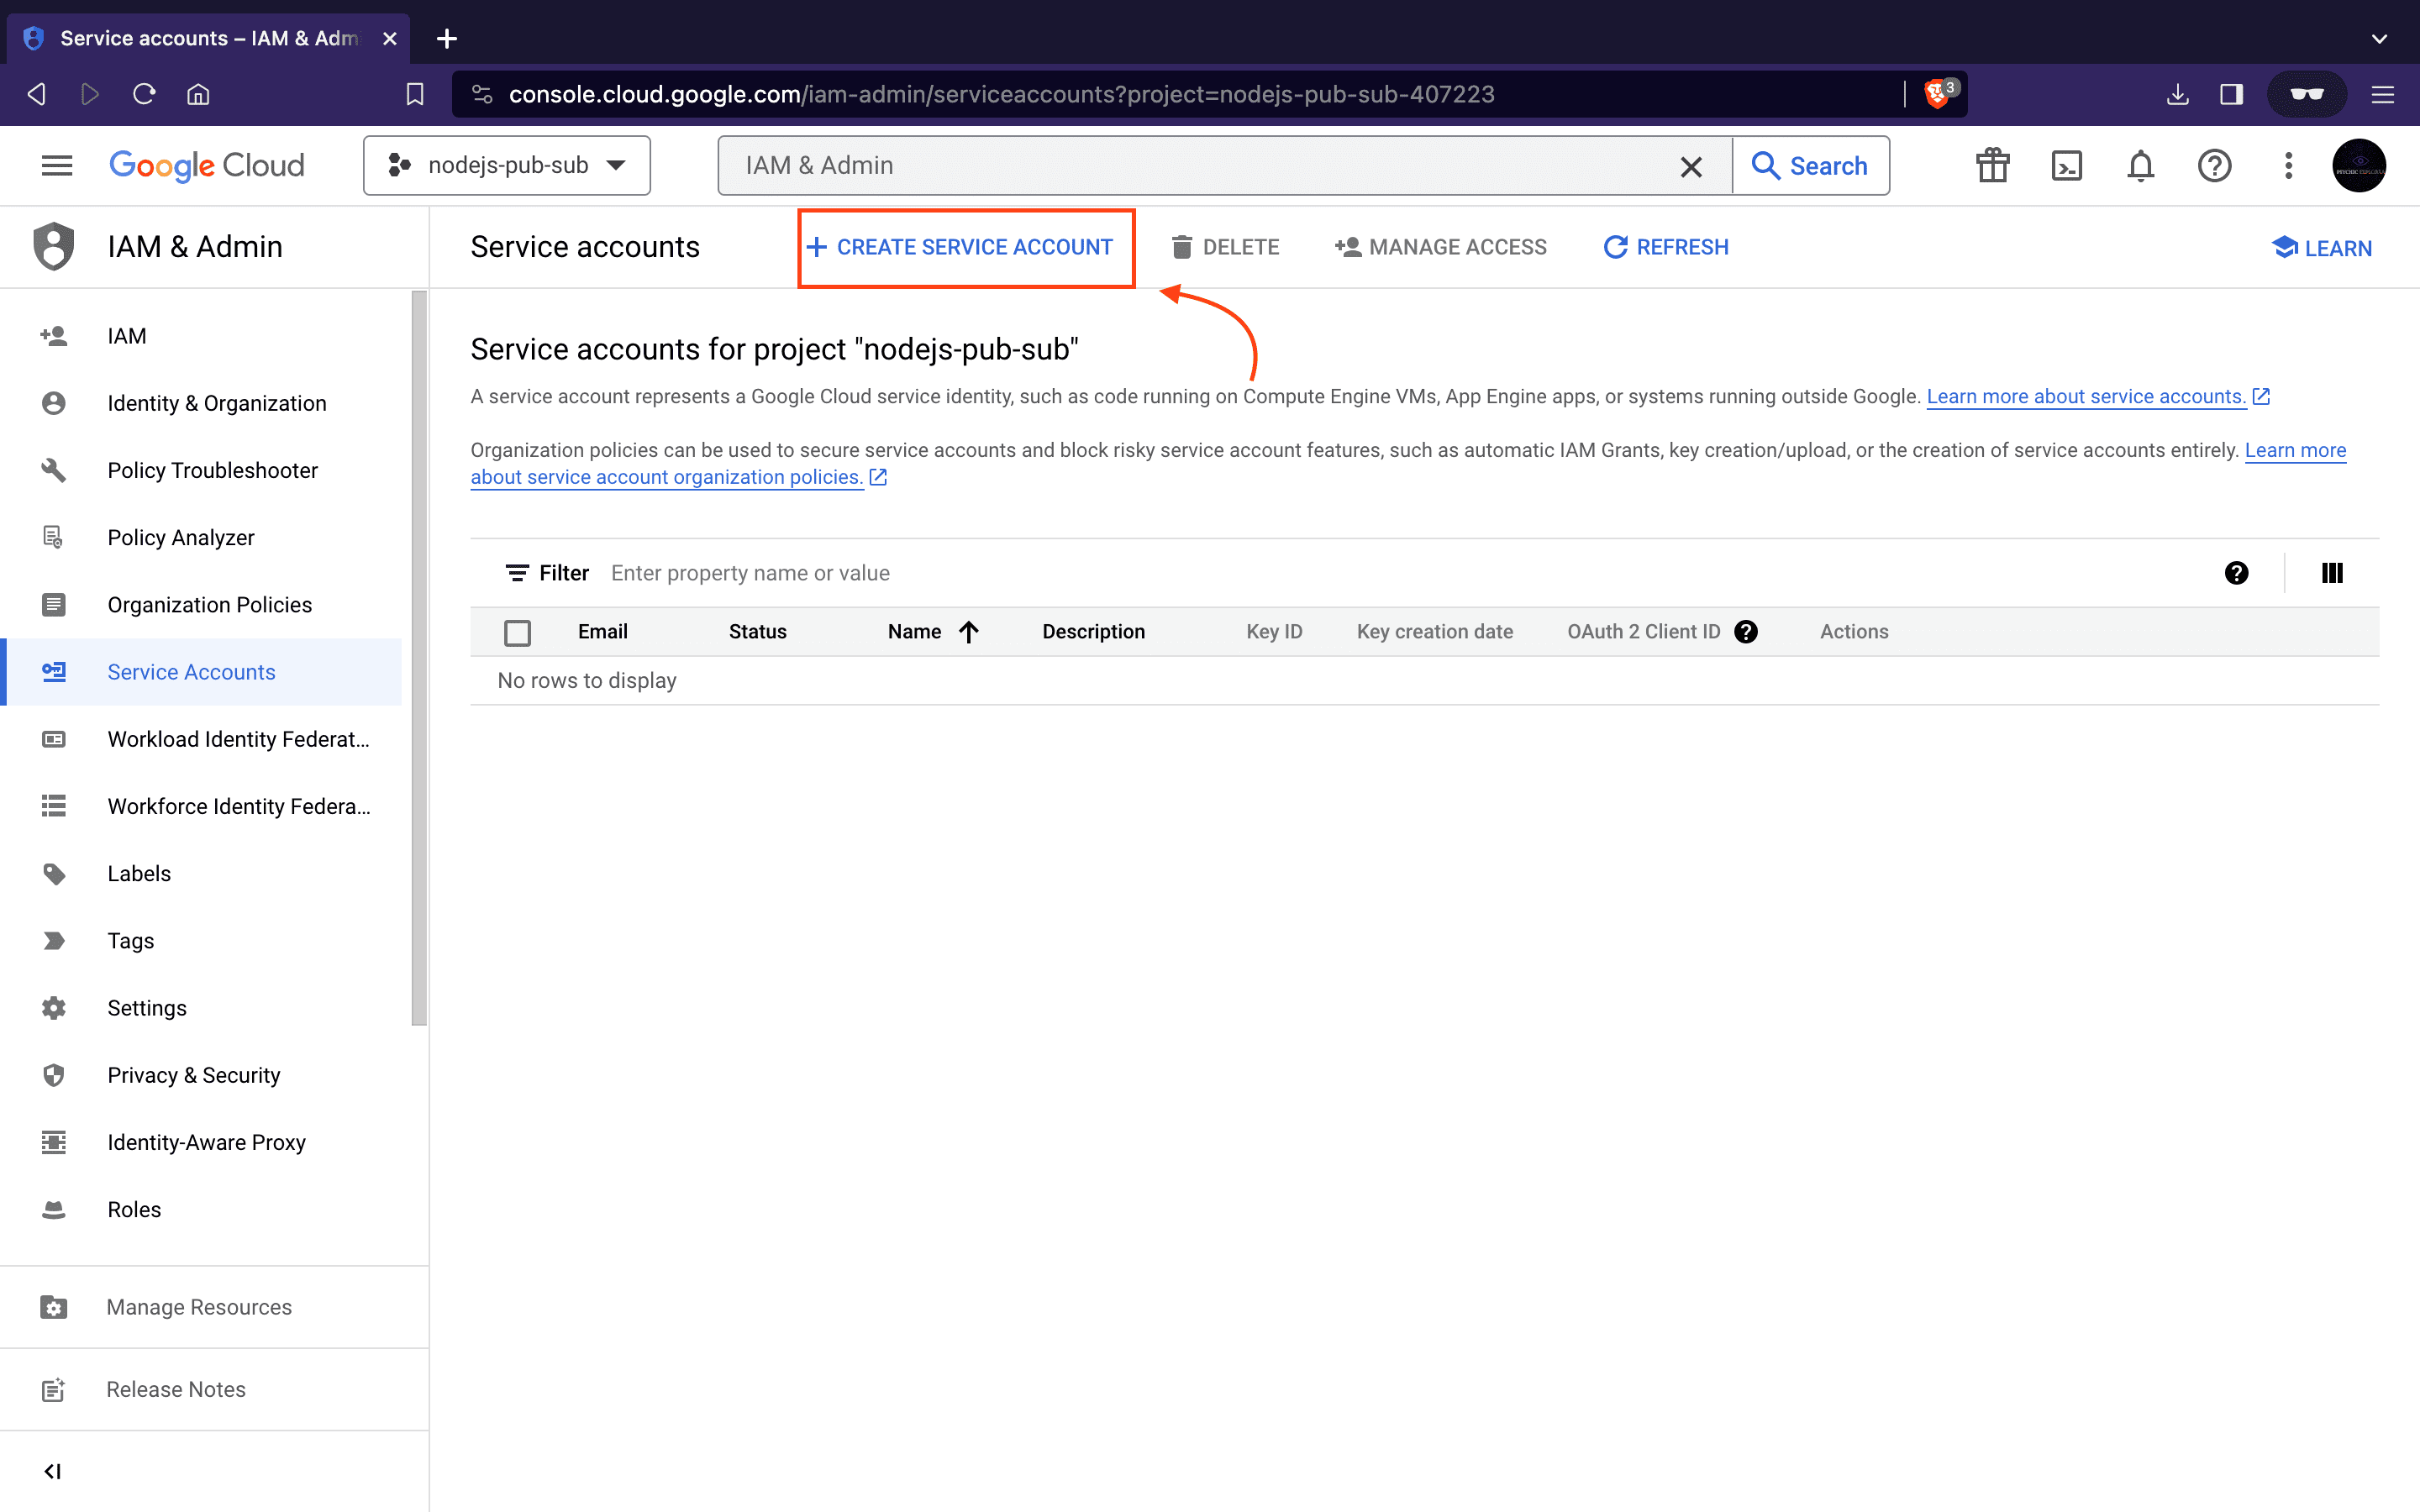
- Then click Create Service Account button.
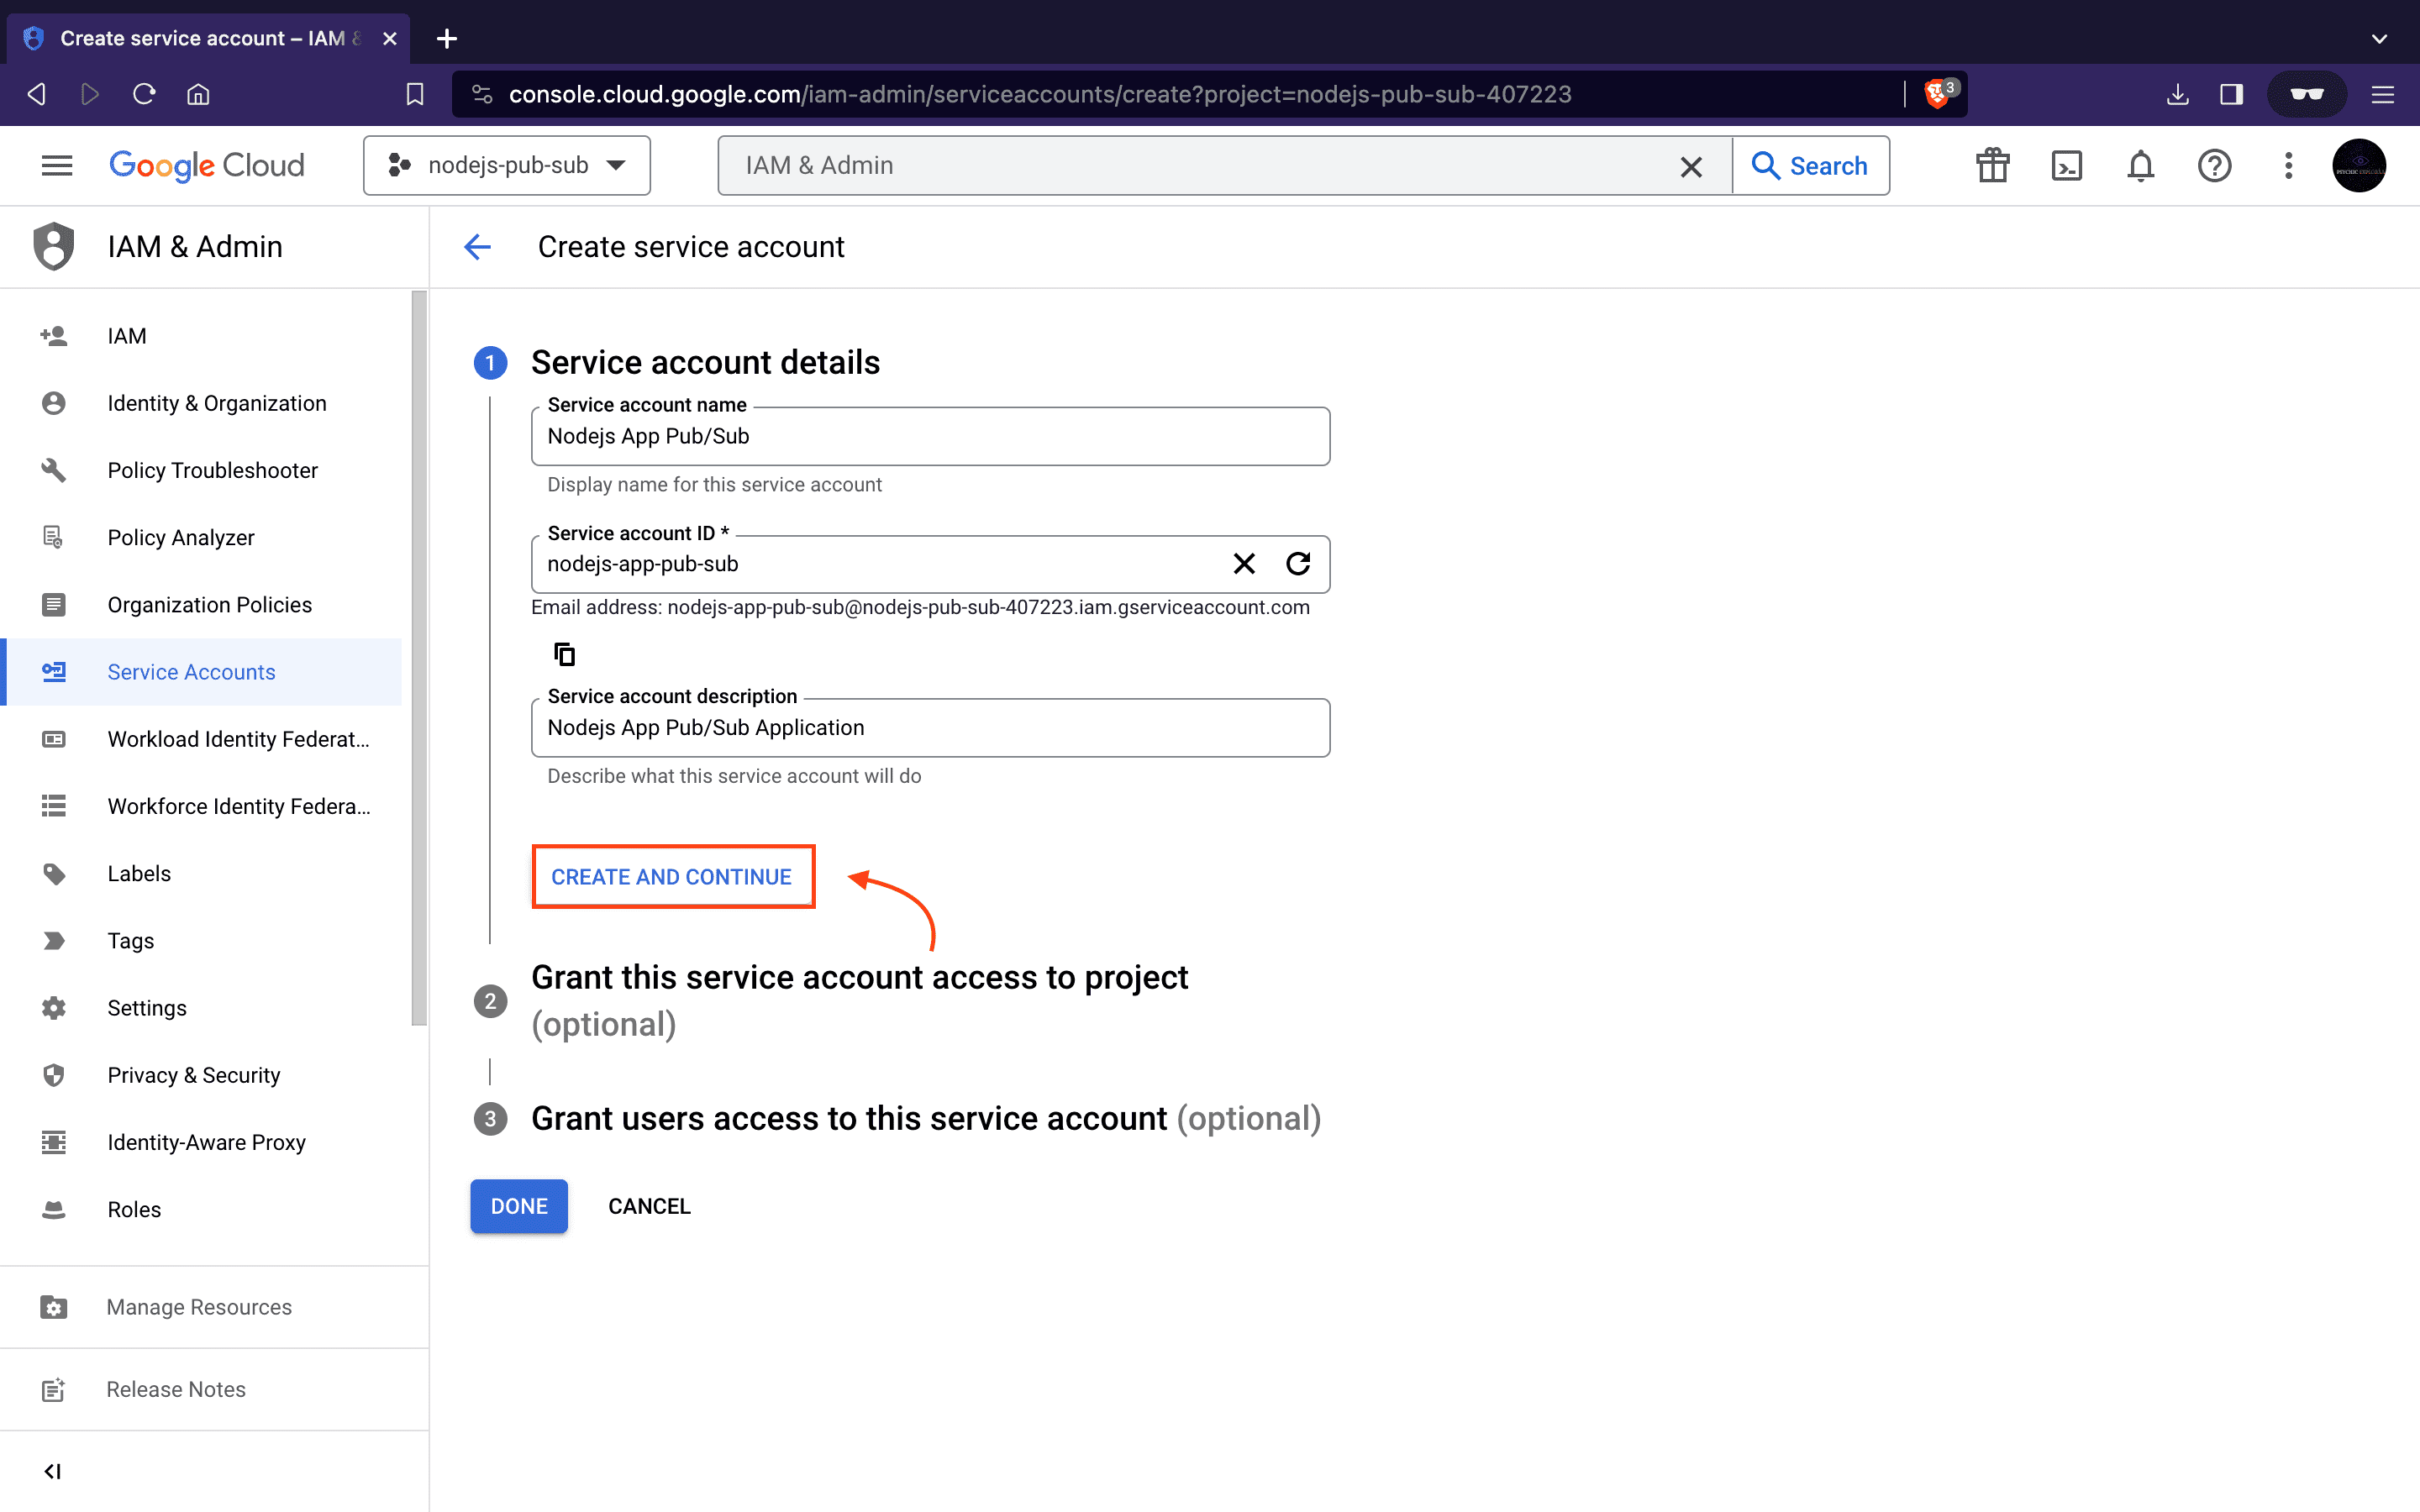
- Enter a service account name
nodejs_app-pub-suband description then click on the CREATE AND CONTINUE button.
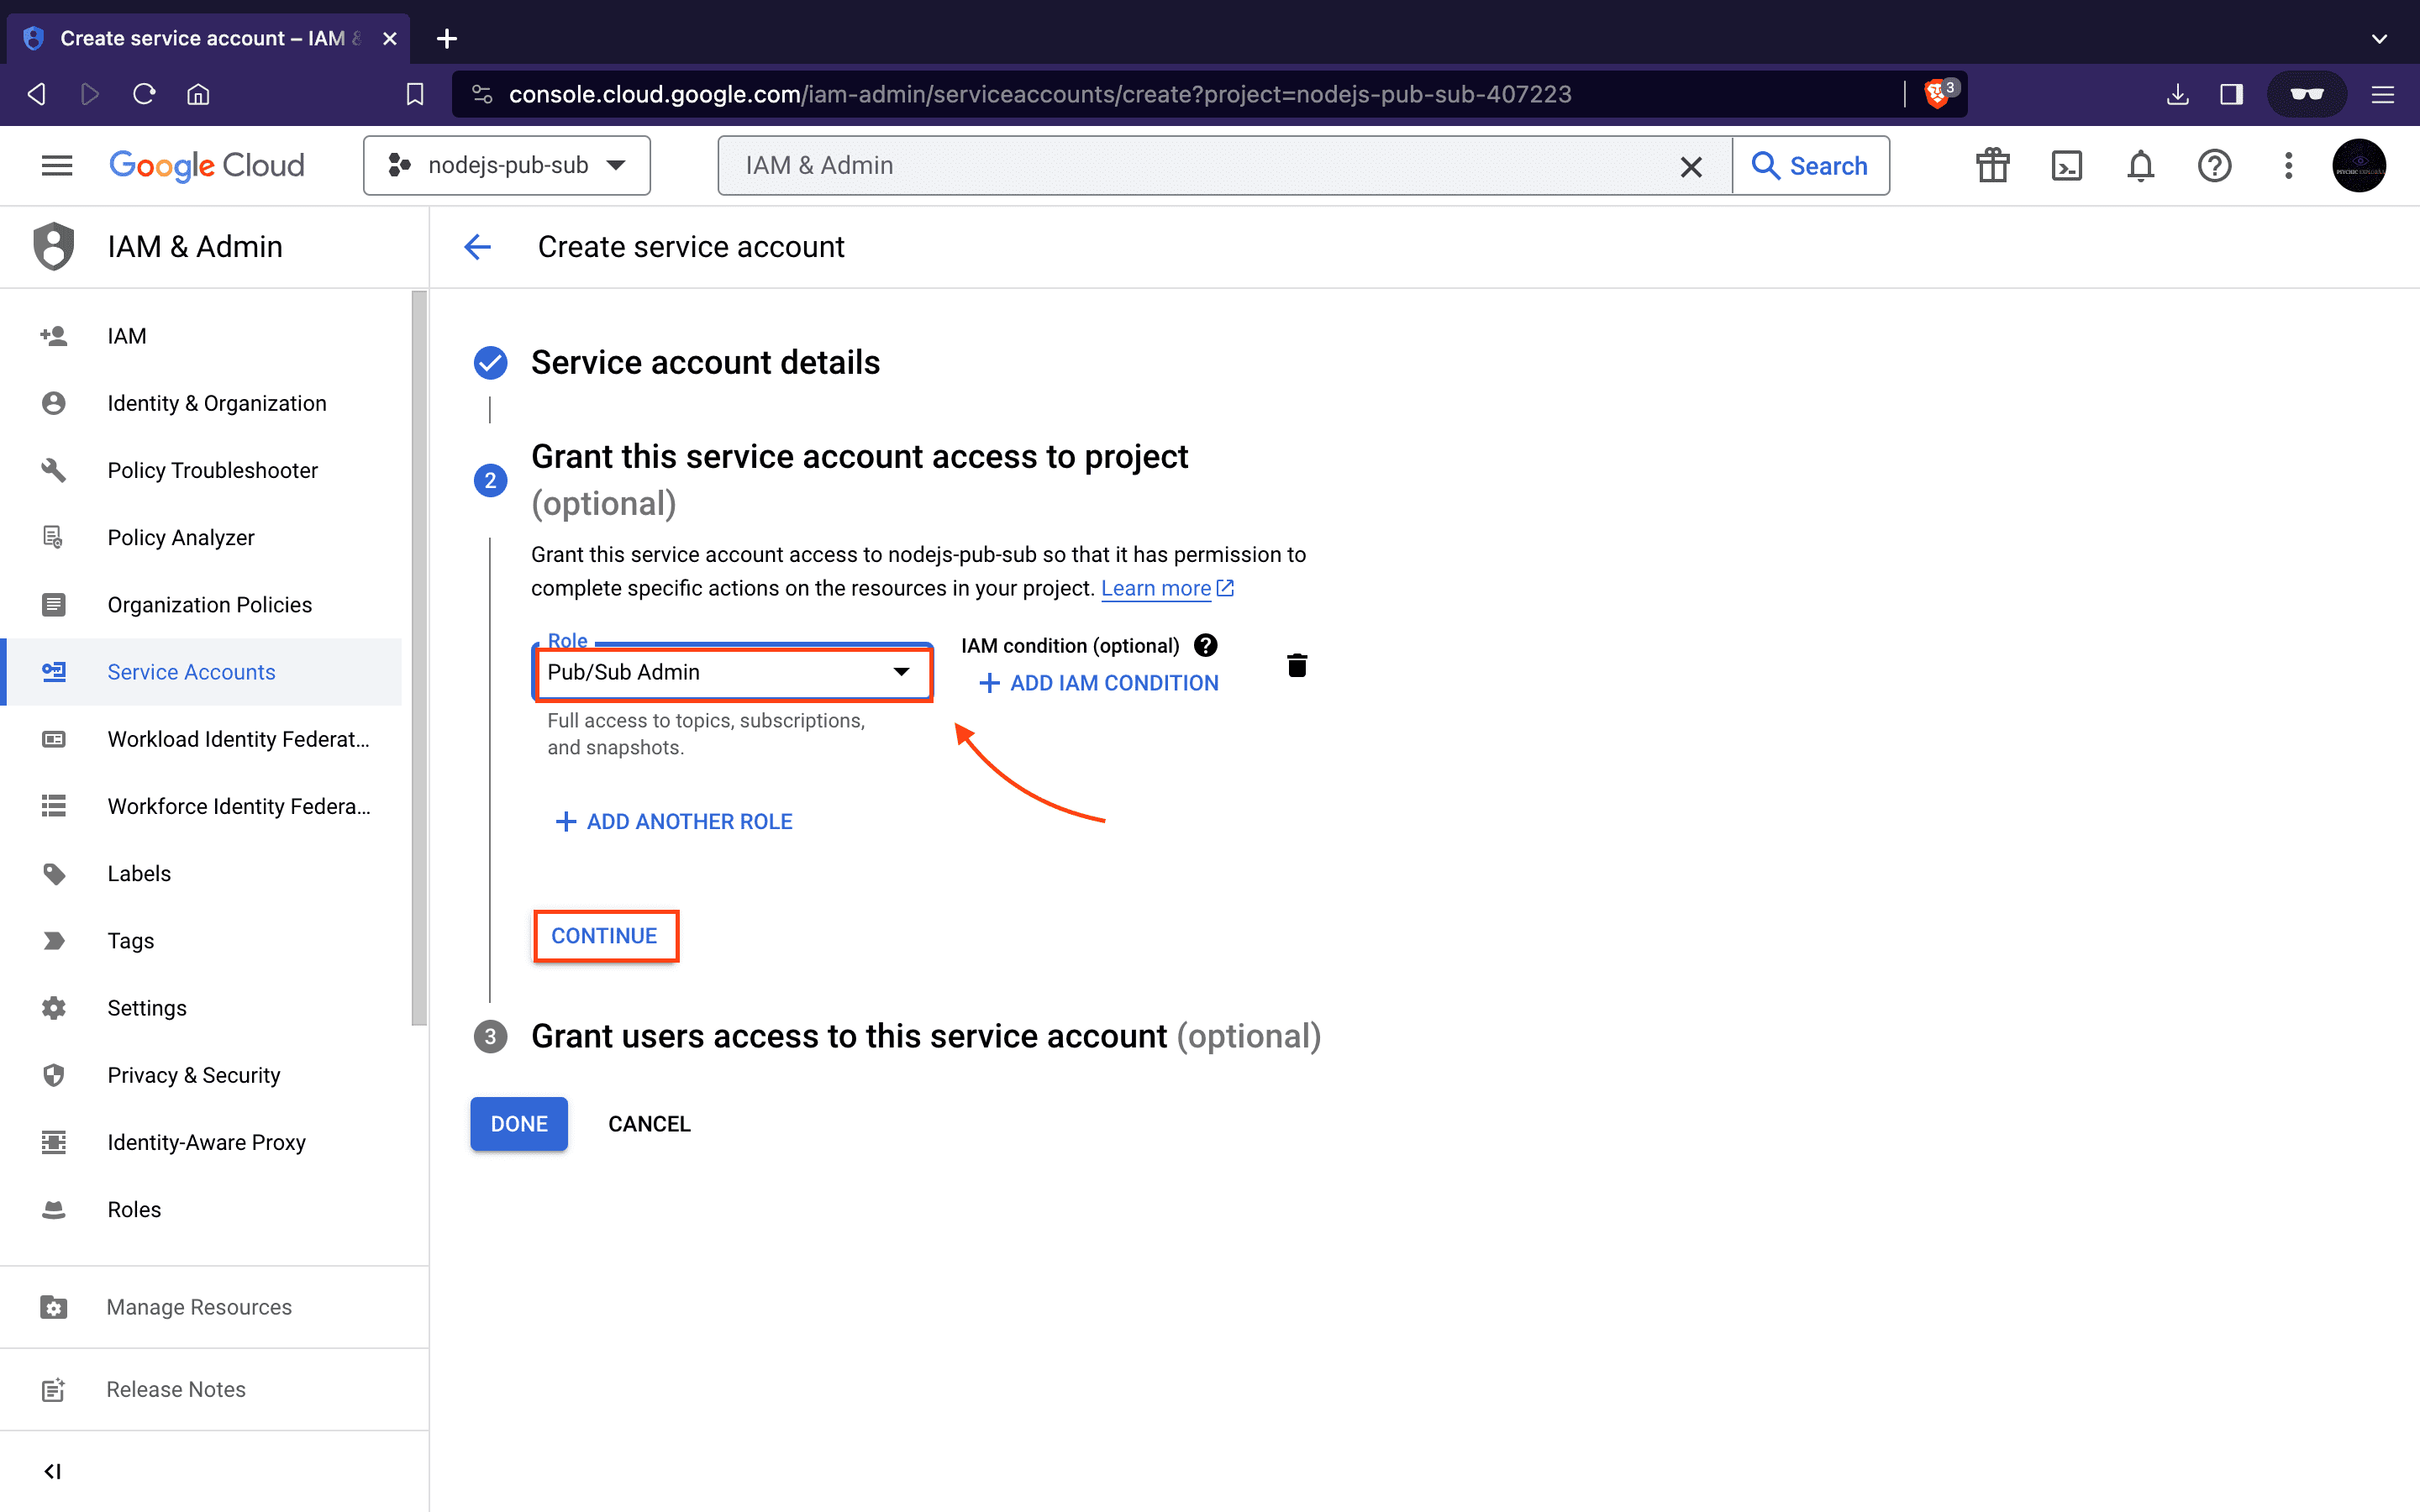
- Next, to give us full access to topics and subscriptions, filter and assign the role
Pub/Sub Adminto our service accountnodejs_app-pub-sub. After that, click the Continue button.
-
We can skip the Grant users access to this service account option since we are not giving access to other users or groups in this article. Finally, click on the Done button.
-
This should redirect us to the Service accounts page.
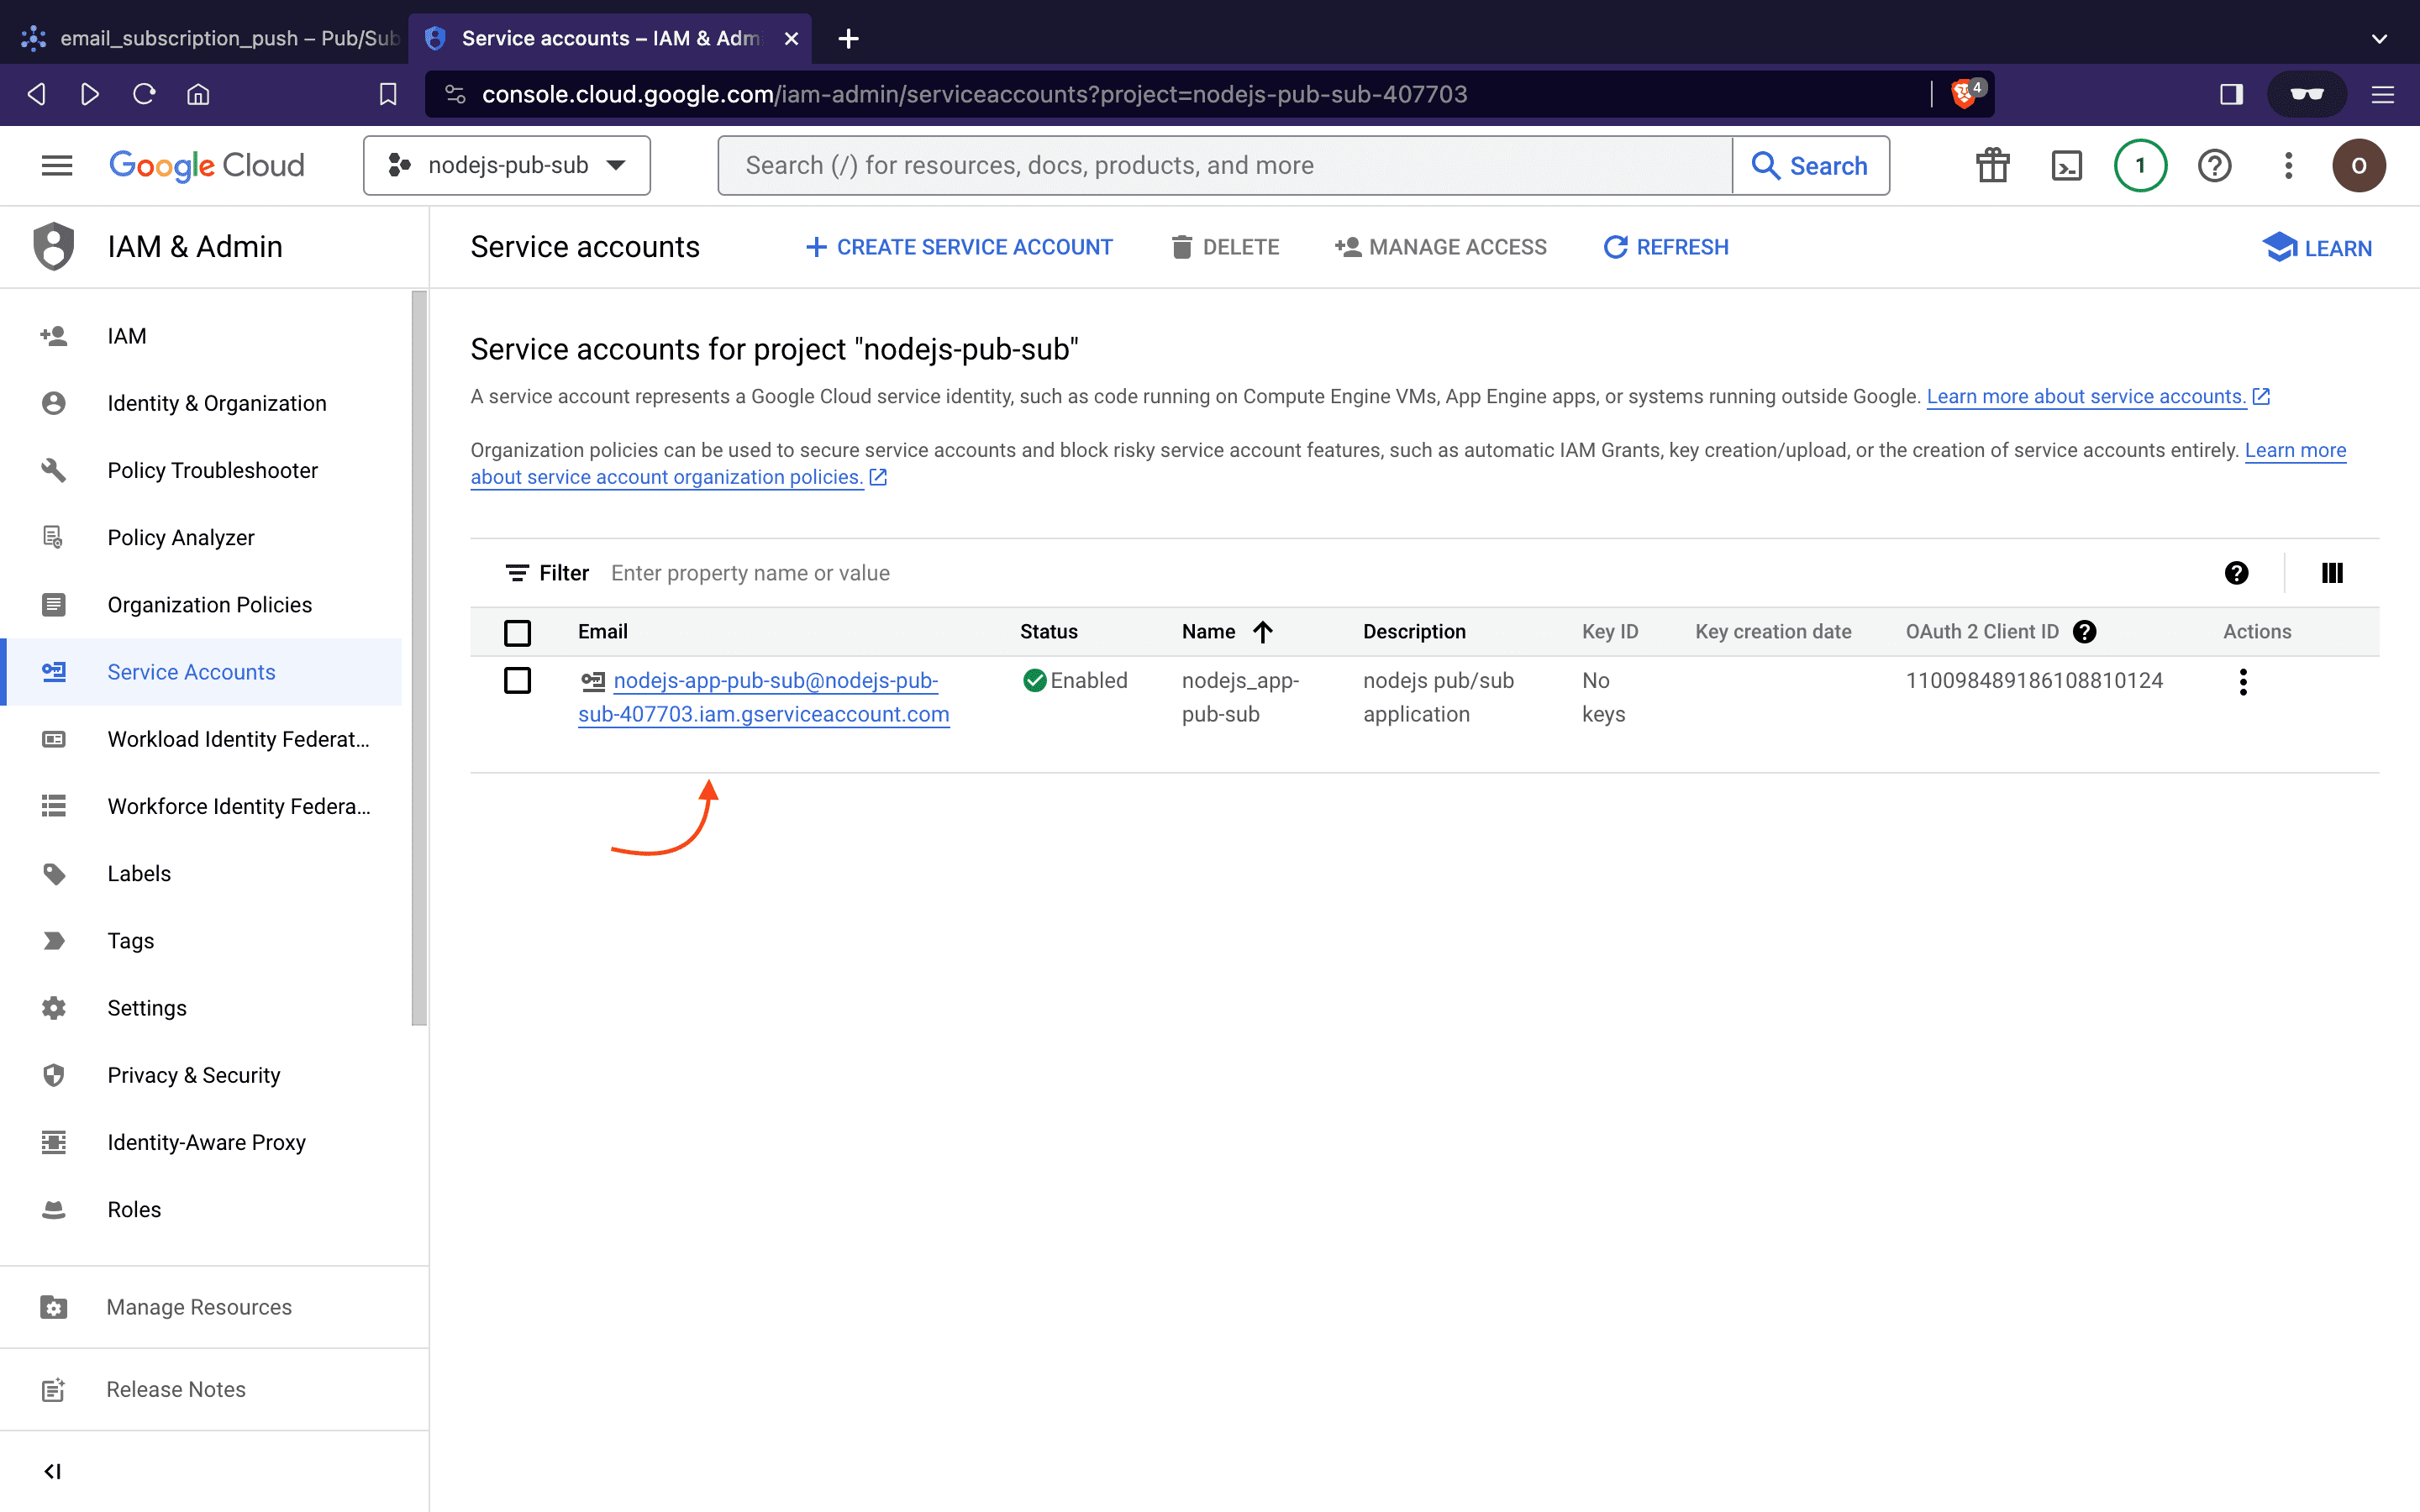
-
Next, click to open the newly created service account and locate the key section.
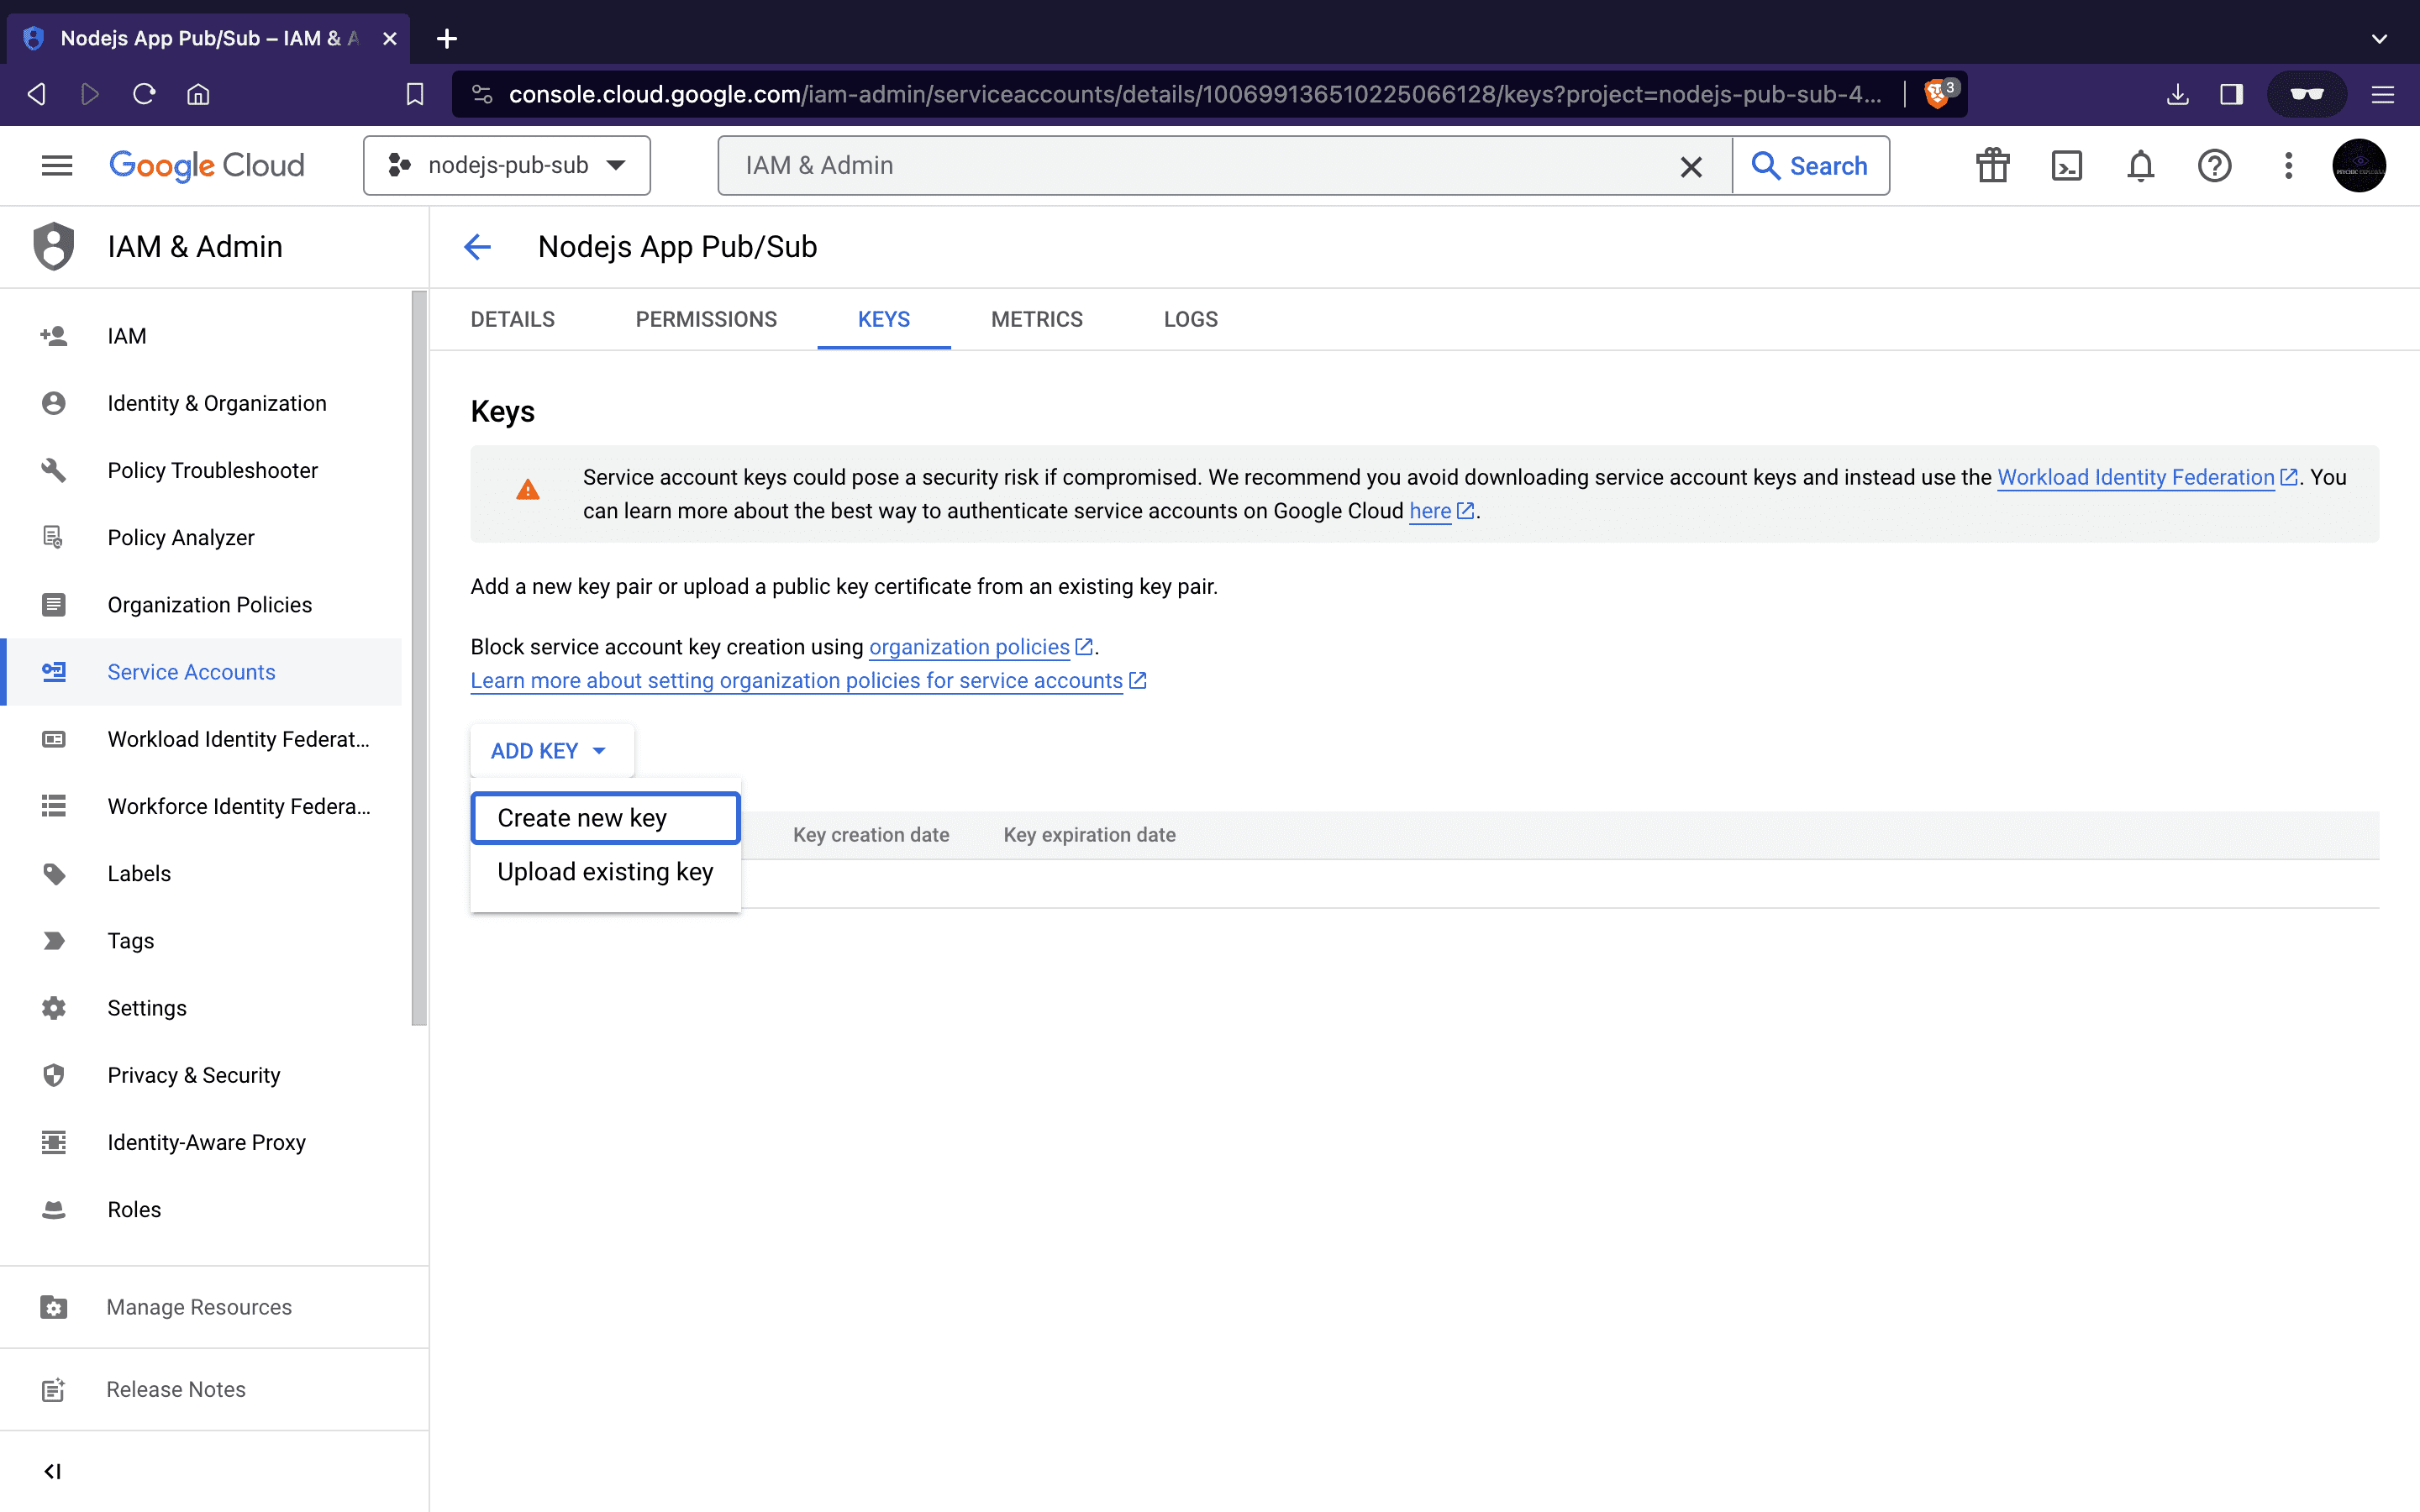
-
Click on Add Key, then select Create new Key, choose the JSON option, and download the JSON file. This file is essential for authentication within our Node.js project directory for our Pub/Sub setup.
Great! We’re ready to begin integrating Google Cloud Pub/Sub into our application.
How to Integrate Google Pub/Sub in Node.js
In our Node.js application, we will use Pub/Sub to handle sending data from a User profile creation service to an Email subscription service in real-time. Instead of basic HTTP, Google Pub/Sub connects the User Service and Email Service in real-time, preventing data loss during service downtime and ensuring scalability and flexibility when adding new services.
Here’s the process: When a new user is created, the User service announces it through a Pub/Sub topic. The Email service listens to this topic and promptly receives the data input.
To implement this, we’ll create the logic for our User service (publisher) in user-pub.js and the Email service (subscriber) in email-sub.js. Each service will have its routes and controllers but both will share the same pub-sub configuration.
Let’s kick off by setting up our Node.js application. Copy and paste the following commands into your terminal:
mkdir nodejs-pub-sub
cd nodejs_app-pub-sub
npm init -y
Above, we created a new folder for our application and initialized Node.js within it.
Now, let’s install the required packages:
npm install @google-cloud/pubsub express
Here, @google-cloud/pubsub manages Pub/Sub functionality, serving as a fully managed real-time messaging service for sending and receiving messages between applications. While express is a Node.js framework designed to streamline API development.
Next, to create the needed folders and files for our application, run the following:
mkdir src src/routes \
 src/controllers \
 src/helper
touch src/user-pub.js \
 src/email-sub.js \
 src/routes/email.js \
 src/routes/user.js \
 src/controllers/emailController.js \
 src/controllers/userController.js \
 src/helper/pub-sub-config.js
Our file structure is nearly complete. Lastly, move the service account key we downloaded earlier into the src/helper folder.
Our application’s file structure should now look like this:
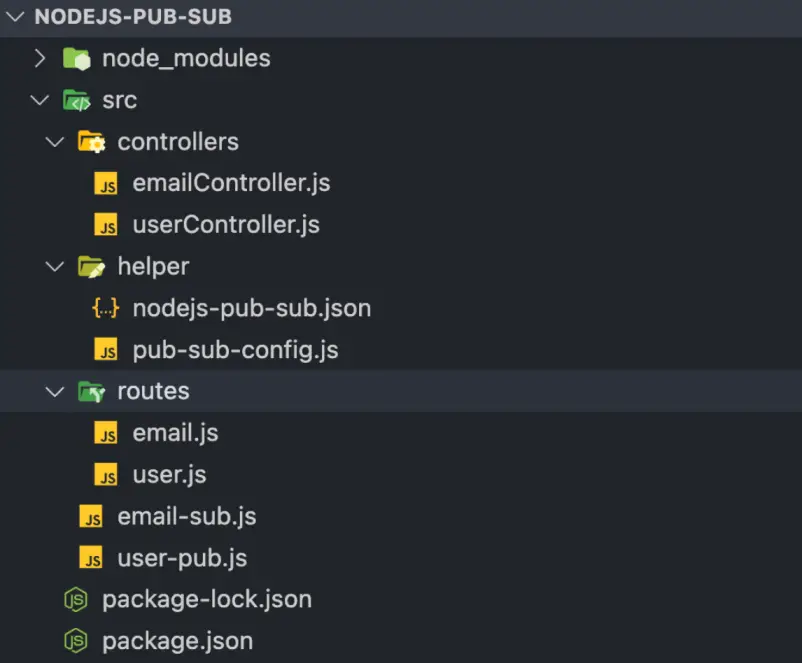
Next up we will start by writing our Pub/Sub helper functions. Copy and paste the following code into the src/helper/pub-sub-config.js file:
const { PubSub } = require("@google-cloud/pubsub");
const path = require("path");

const keyFilePath = path.join(__dirname, "nodejs-pub-sub.json");
const projectId = "nodejs-pub-sub";

// Create an instance of PubSub with the provided service account key
const pubSubClient = new PubSub({
  keyFilename: keyFilePath,
});

const publishMessage = async (topicName, payload) => {
  const dataBuffer = Buffer.from(JSON.stringify(payload));
  try {
    const messageId = await pubSubClient
      .topic(topicName)
      .publishMessage({ data: dataBuffer });
    console.log(`Message ${messageId} published.`);
    return messageId;
  } catch (error) {
    console.error(`Received error while publishing: ${error.message}`);
  }
};

const listenForPullMessages = async (subscriptionName, timeout) => {
  const subscription = pubSubClient.subscription(subscriptionName);
  let messageCount = 0;
  let data = [];
  const messageHandler = message => {
    const jsonData = JSON.parse(message.data);

    data.push({
      id: message.id,
      attributes: message.attributes,
      ...jsonData,
    });
    messageCount += 1;
    message.ack();
  };
  subscription.on("message", messageHandler);

  setTimeout(() => {
    console.log("Message Pulled: \n", data);
    console.log(`${messageCount} message(s) received.`);
    subscription.removeListener("message", messageHandler);
  }, timeout * 100);
};

const listenForPushMessages = payload => {
  const message = Buffer.from(payload, "base64").toString("utf-8");
  let parsedMessage = JSON.parse(message);
  console.log("Message Pushed: \n", parsedMessage);
  return parsedMessage;
};

module.exports = {
  publishMessage,
  listenForPullMessages,
  listenForPushMessages,
};
The above snippet is where we define all functions that will allow us to carry out all of our Pub/Sub related tasks, where:
publishMessage: This function takes two parameters,topicName, andpayload. It serializes the JSON payload into a buffer and publishes it to the specified topic upon execution.listenForPullMessages: This subscriber function pulls messages broadcasted to a subscription associated with a topic. When called, this function listens to messages distributed by the publisher.listenForPushMessages: This function receives a message from a configured subscriber endpoint and parses the buffer into JSON format for consumption by individual subscribers.
Now, let’s begin creating our Publisher and Subscribers Service.
Building the Publisher Service
The core logic for our publisher resides in the User service. This service accepts user data, creates a user profile, and then uses Pub/Sub to send a message to connected services (email), notifying them of the newly created user.
Copy and paste the following code into the src/user-pub.js file, which will serve as the entry point for our User service:
const express = require("express");
const app = express();
const userRoute = require("./routes/user");
const PORT = 3000;

app.use(express.urlencoded({ extended: true }));
app.use(express.json());

app.use("/api/user", userRoute);

app.listen(PORT, () => {
  console.log(`User service is running at http://localhost:${PORT}`);
});
For our User service route, copy and paste the following code into the `src/routes/user.js`` file:
const express = require("express");
const router = express();
const userController = require("../controllers/userController");

router.get("/", userController.welcome);
router.post("/create", userController.createUser);

module.exports = router;
Next, in the src/controllers/userController.js file, paste the following code:
const { publishMessage } = require("../helper/pub-sub-config");
const topicName = "user_creation";

const welcome = (req, res) => {
  return res.status(200).json({
    success: true,
    message: "Welcome to User Profile Service:)",
  });
};

const createUser = async (req, res) => {
  let userObj = req.body;
  // create user profile logic goes here....

  let messageId = await publishMessage(topicName, userObj);
  return res.status(200).json({
    success: true,
    message: `Message ${messageId} published :)`,
  });
};
module.exports = { welcome, createUser };
In the above code, the welcome function is a simple welcome message for our service, while the createUser function will contain our user profile creation logic. It invokes the Pub/Sub function to publish the user data. This publication allows any subscriber subscribed to our user_creation topic to listen and receive the update.
Our publisher service is ready, and we can begin creating users and publishing their data to our Pub/Sub. Next, let’s set up our Email service.
Building the Subscribers
The Email service acts as our subscriber.
To start creating our subscriber logic, copy and paste the following code into the src/email-sub.js file to set up our email service server entry:
const express = require("express");
const app = express();
const emailRoute = require("./routes/email");
const PORT = 5000;

app.use(express.urlencoded({ extended: true }));
app.use(express.json());
app.use("/api/email", emailRoute);

app.listen(PORT, () => {
  console.log(`Email Notification Service is running at http://localhost:${PORT}`);
});
For the Email service routes, paste the following in the src/routes/email.js:
const express = require("express");
const router = express();
const emailController = require("../controllers/emailController");

router.get("/", emailController.welcome);
router.post("/pull", emailController.pullEmail);
router.post("/push", emailController.pushEmail);

module.exports = router;
Next, for our email service configuration copy and paste the following into the src/controllers/emailController.js:
const {
  listenForPullMessages,
  listenForPushMessages,
} = require("../helper/pub-sub-config");
const subscriptionName = "email_subscription_pull";
const timeout = 60;

const welcome = (req, res) => {
  return res.status(200).json({
    success: true,
    message: "Welcome to Email Service:)",
  });
};

const pullEmail = async (req, res) => {
  try {
    await listenForPullMessages(subscriptionName, timeout);
    return res.status(200).json({
      success: true,
      message: "Pull message received successfully :",
    });
  } catch (error) {
    return res.status(500).json({
      success: false,
      message: "Couldn't receive pull message :(",
      data: error.message,
    });
  }
};

const pushEmail = async (req, res) => {
  try {
    let messageResponse = await listenForPushMessages(req.body.message.data);
    return res.status(200).json({
      success: true,
      message: "Push Message received successfully :)",
      data: messageResponse,
    });
  } catch (error) {
    return res.status(500).json({
      success: false,
      message: "Couldn't receive push message :(",
      data: error,
    });
  }
};

module.exports = { welcome, pullEmail, pushEmail };
In the above code, we have a welcome function sending a simple welcome message for our service. The pullEmail function contains logic to pull published messages from the topic our subscriber is subscribed to. The pushEmail function works as a webhook ready to receive calls from our pub/sub about any new updates or user data.
Now that our entire setup is complete, let’s begin testing.
Testing Our Services
To do this, open two terminals in your project directory to run both our services concurrently.
To run the User service (publisher), copy and paste the following command into one of the terminals:
node src/user-pub.js
The above command will start our User service
Next, Start the Email service (subscriber) service by running the following code in the other terminal.
node src/email-sub.js
This will start our Email service.
We’ll start testing by publishing a message through the User Service, then pulling and pushing this published messages from our Email service.
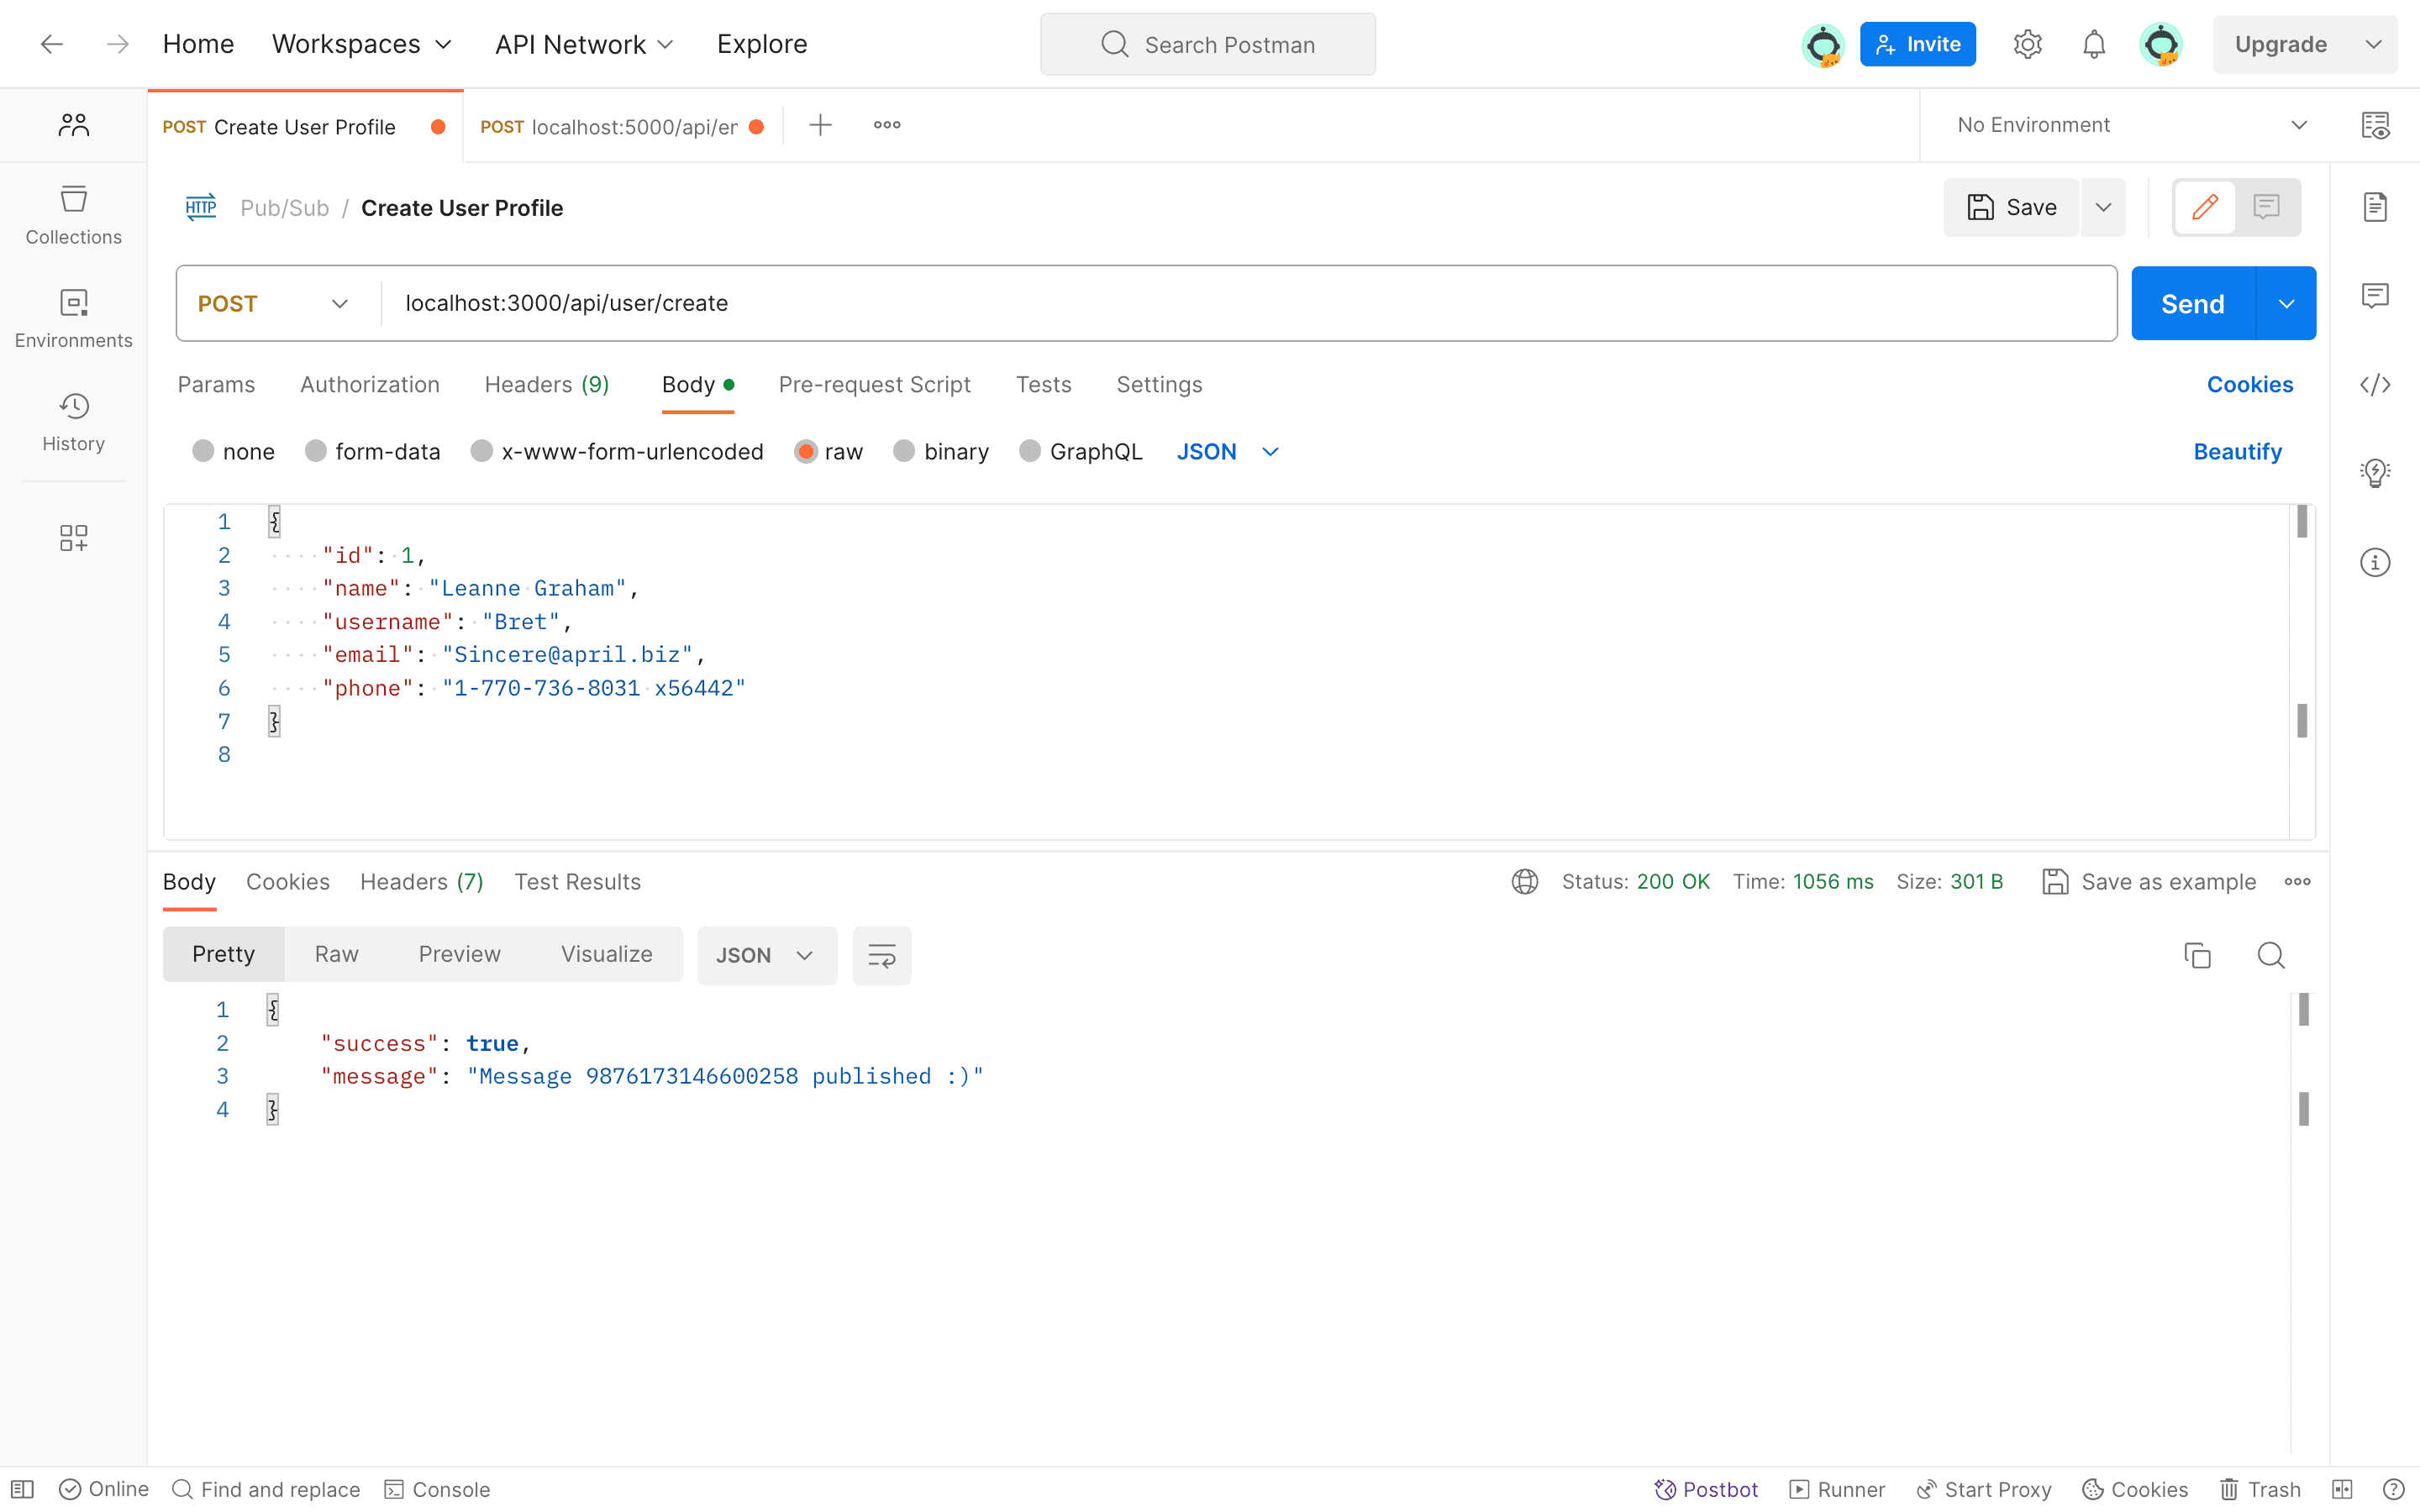
Publish Message
To publish a message, initiate a POST request to the User Service route /api/user/create using Postman. This process will generate a new user profile, and the user data will be published through Pub/Sub to our topic, allowing it to be accessed by any subscriber.
Now, we can retrieve the published message in two ways:
Receive Message Via Pull
To verify message publication, our Email service can make an API call to the /api/email/pull route using the pull subscription.
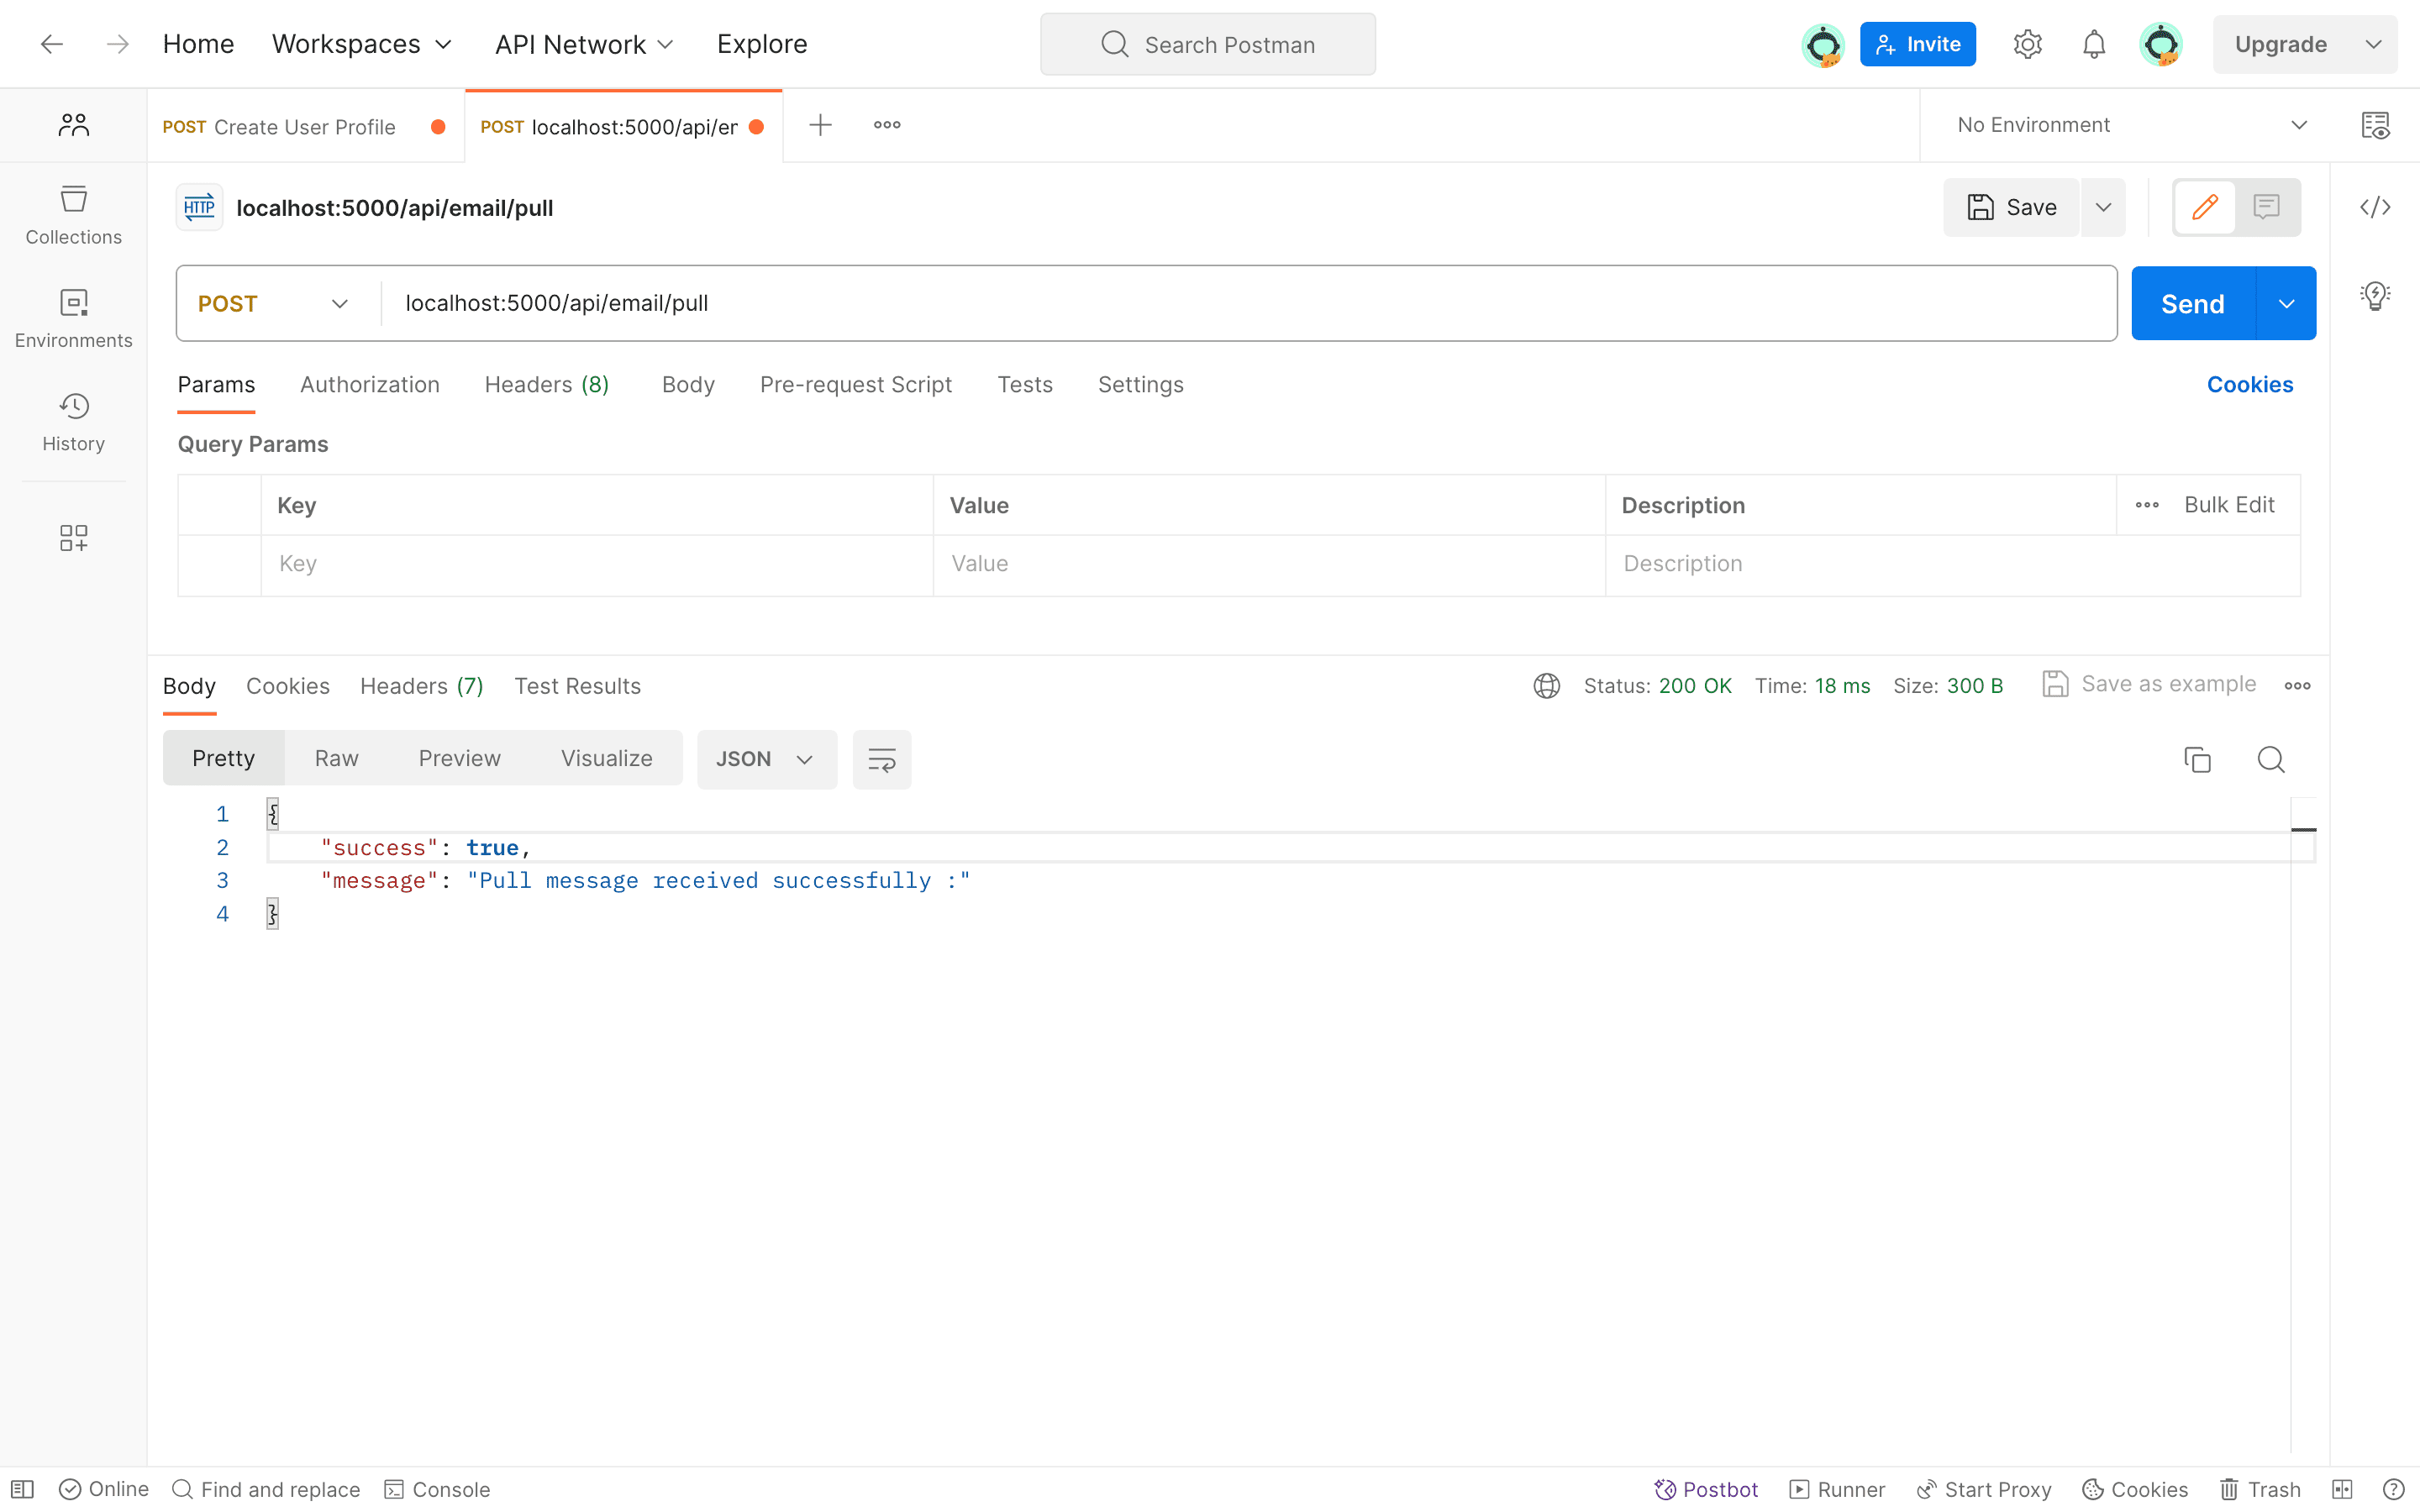
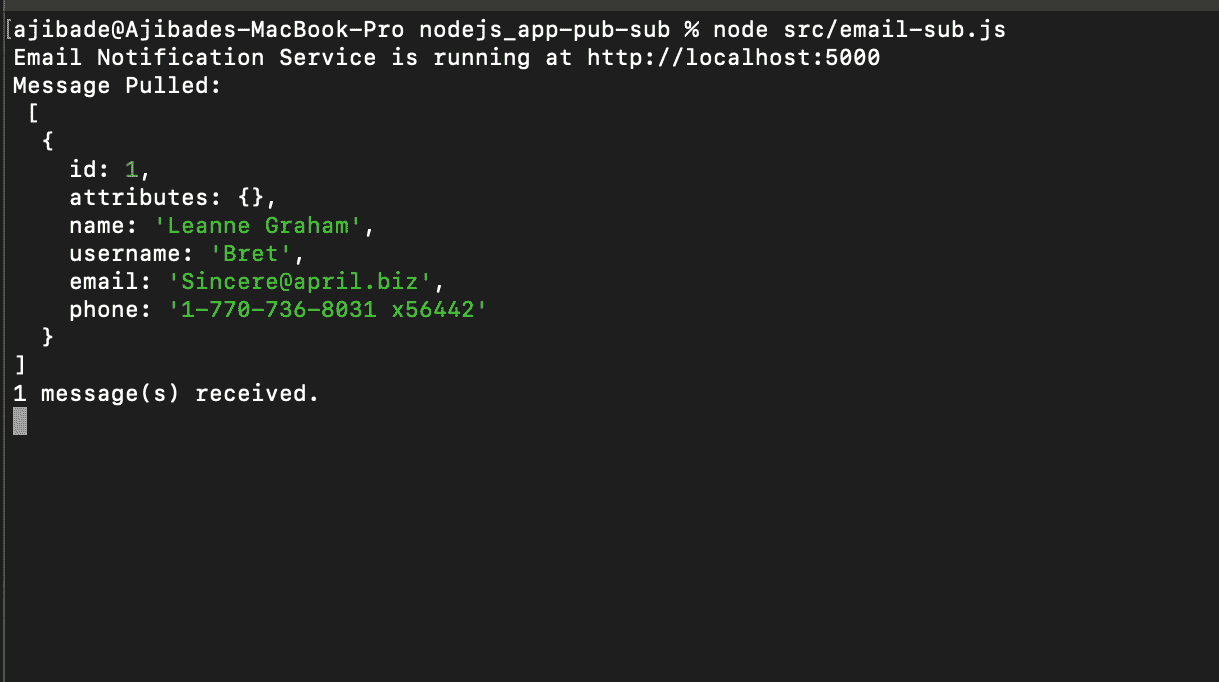
After making this call, check the Email service terminal; we should be able to see the received data in our terminal logs.
Receiving Message Via Push
To receive push messages, we will use an HTTPS endpoint for our webhook. You can achieve this with either a live endpoint or, if using local routes, employ Ngrok to expose them.
Ngrok creates secure tunnels from localhost, making a locally running web service remotely accessible. It’s often used during development and testing to make a locally running web service accessible remotely.
Ngrok generates a public URL (e.g. https://random-string.ngrok.io) to forward traffic to our local server. This URL is used to create a PUSH subscriber endpoint for Google Pub/Sub. Consequently, when a message is published, Google Pub/Sub pushes the message data to our subscriber endpoint.
If you haven’t set up Ngrok on your device yet, click here
Open a new terminal to run the Ngrok command, Copy and Paste the following command to confirm that Ngrok is installed:
ngrok --version
To expose our Email service port as an HTTPs URL, run the following command, ensuring that the port used matches your Email service port:
ngrok http 5000

Using Ngrok, our server is currently operational on the highlighted HTTPS URL displayed in the image.
Return to the Google Cloud Console and update the push subscription webhook endpoint using our Ngrok URL. It will look like this:
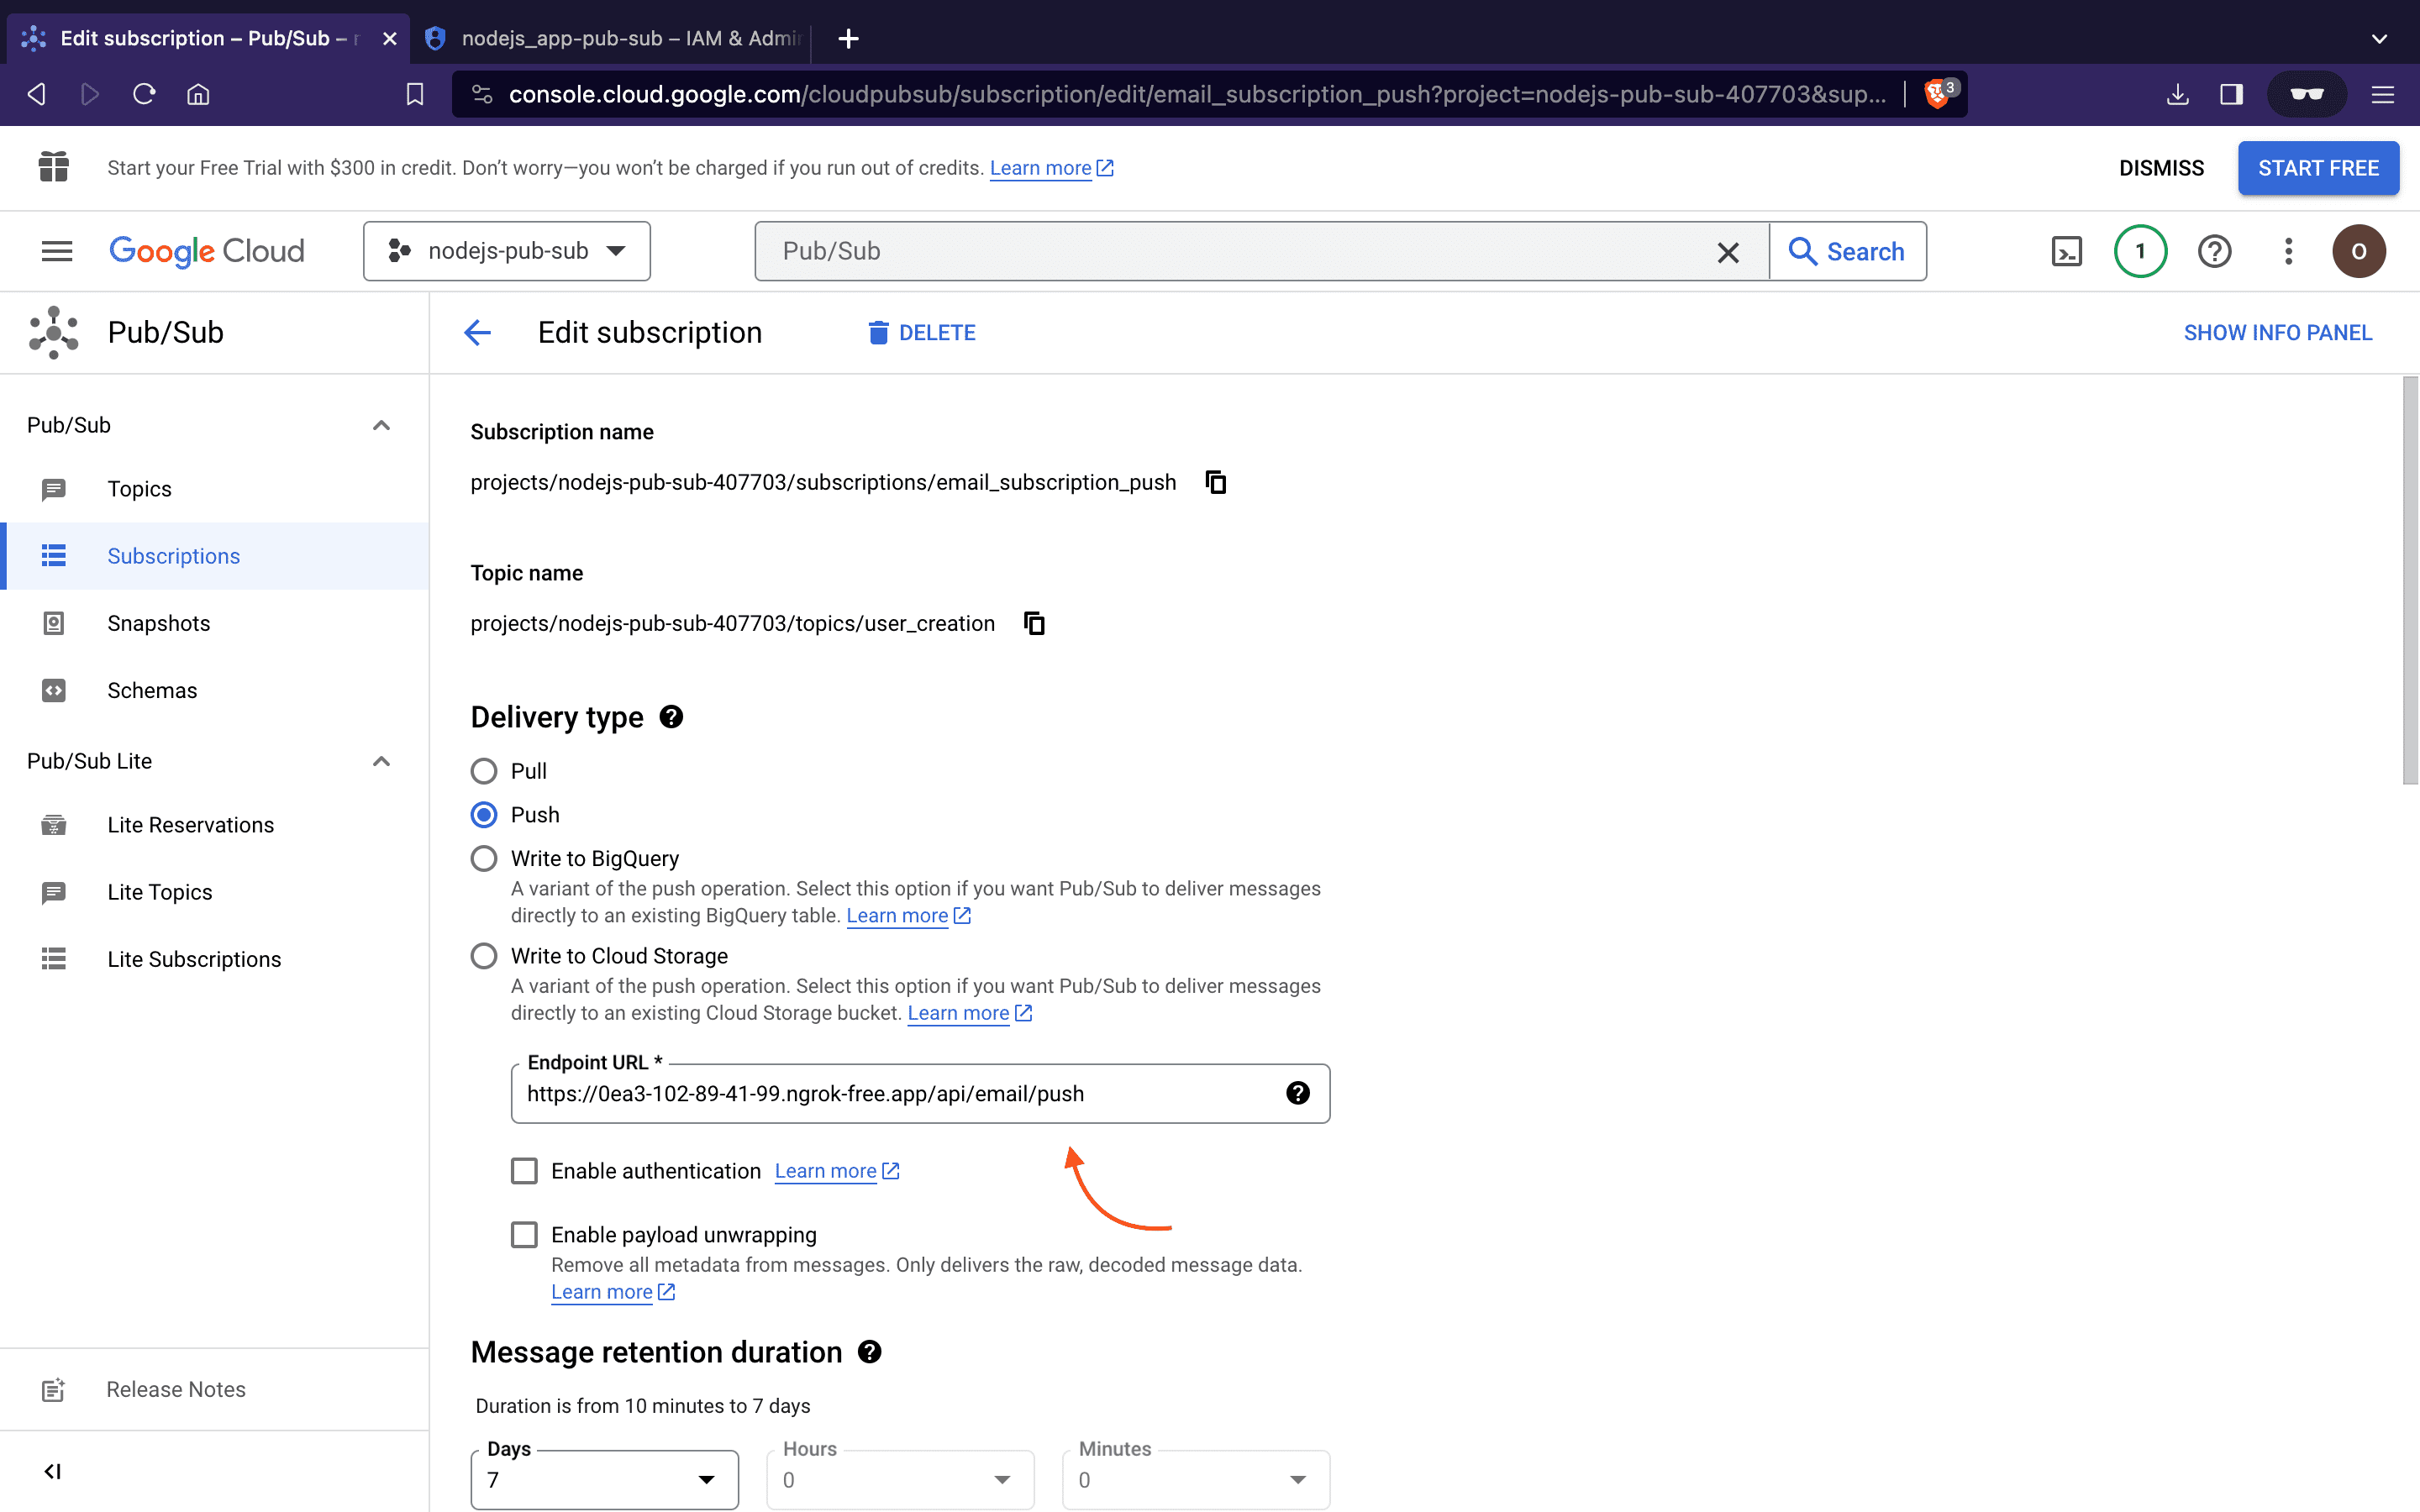
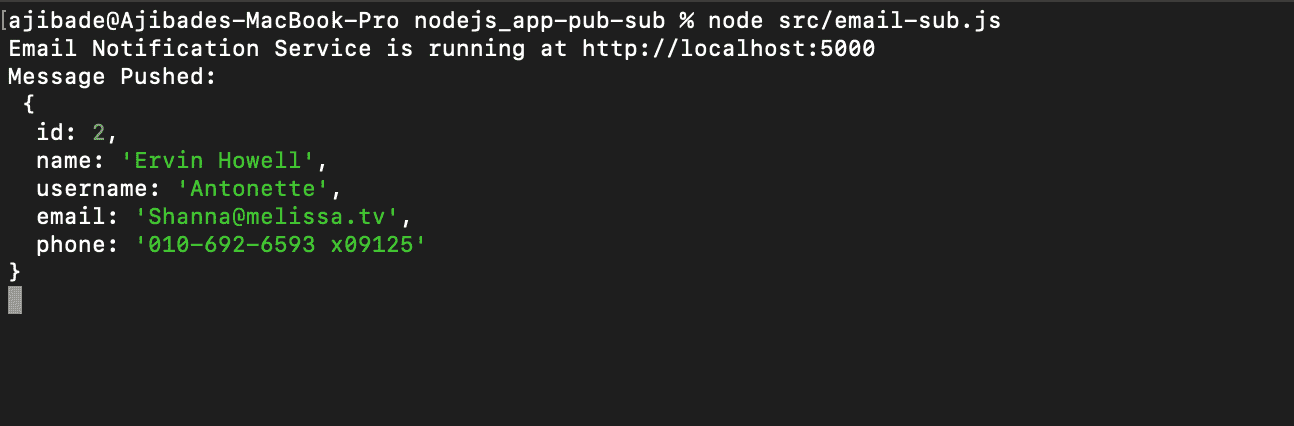
Finally, attempt to create a new User. After completing this action, inspect the Email Service terminal log to observe the automatic pushing of published data to our subscriber webhook in real-time.
Conclusion
In this tutorial, we’ve covered what Google Cloud Pub/Sub is and how to integrate it into a Node.js application. Typically our code will do a lot more than just print log messages, however, this should be sufficient to kickstart our utilization of Pub/Sub in Node.js applications. For more detailed information on Google Cloud Pub/Sub, refer to the official documentation.