Amazon Elastic Compute Cloud (EC2) is a compute service with which we can create virtual machines in the AWS Cloud. We can configure the computing capacity of an EC2 instance and attach different types and capacities of storage which we can further scale up or down to handle changes in server load and consumer traffic, thereby reducing our need to forecast the capacity for investing in hardware upfront.
In this article, we will introduce the Amazon EC2 service and understand some of its core concepts like instances, instance types, disk storage, networking, elastic capabilities, and security by creating a few instances of EC2 and applying different configurations to those instances.
Creating an Amazon EC2 Instance
Let us get an idea of the EC2 service by creating what we call an “EC2 instance”.
An EC2 instance is a virtual machine in the cloud. Like most AWS resources we can create an EC2 instance from the AWS administration console, the AWS Command Line Interface(CLI), or by leveraging infrastructure-as-code services like Cloudformation and AWS CDK.
The minimum information required for creating an EC2 instance is the operating system like Linux, Windows, or Mac along with the size (CPU, memory, storage) of the virtual machine. We select the operating system when we select the AMI (Amazon Machine Image). The size of the virtual machine is specified through the “instance type” configuration.
Creating a Linux EC2 instance
Let us create an EC2 instance that will have Linux as the operating system and a size of 1 CPU from the AWS administration console as per this screenshot:
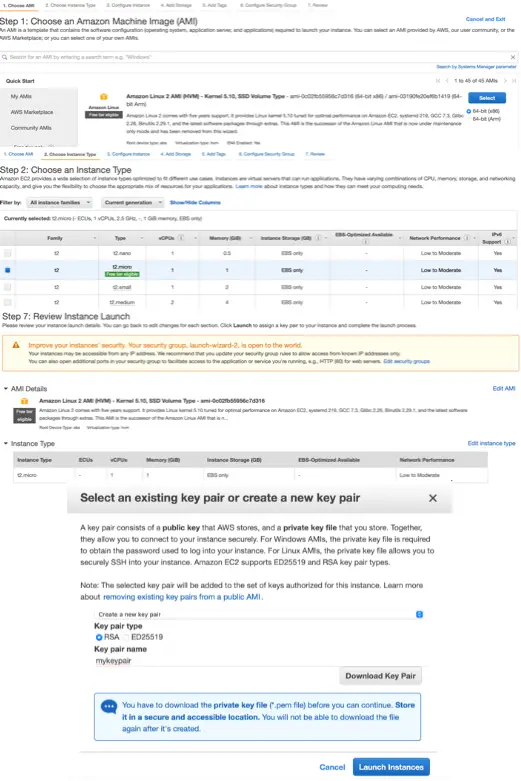
For creating the instance, we have selected an AMI named Amazon Linux 2 AMI (HVM) - Kernel 5.10, SSD Volume Type and an instance type t2.micro.
An Amazon Machine Image (AMI) is a template that contains a base configuration for the virtual machine that we want to create. It includes the operating system, root storage volumes, and some pre-installed applications. The Amazon Linux AMI used in this example includes packages and configurations for integration with Amazon Web Services and is pre-installed with many AWS API tools.
Instance types comprise varying combinations of CPU, memory, storage, and networking capacity and give us the flexibility to choose the appropriate mix of resources for our applications. We have selected our instance type as t2.micro in this example, which is a low-cost, general-purpose instance type that provides a baseline level of CPU performance with the ability to burst above the baseline when needed.
In the last step of creating the instance, we need to choose from an existing key pair or create a new key pair which we use to connect to our instance when it is ready. A key pair is a combination of a public key that is stored by AWS and a private key that we need to store. Let’s create a new key pair, download the private key and store it in our local workstation. We will explore this further in the next section when we will connect to this EC2 instance.
We have accepted default properties for all other configurations like storage volume and security group.
When we launch an EC2 instance, it takes a short time for the instance to be ready and it remains in its initial state of pending. The state of the EC2 instance changes to running after it starts and it receives a public DNS name. We can see the EC2 instance in the running state as shown below:
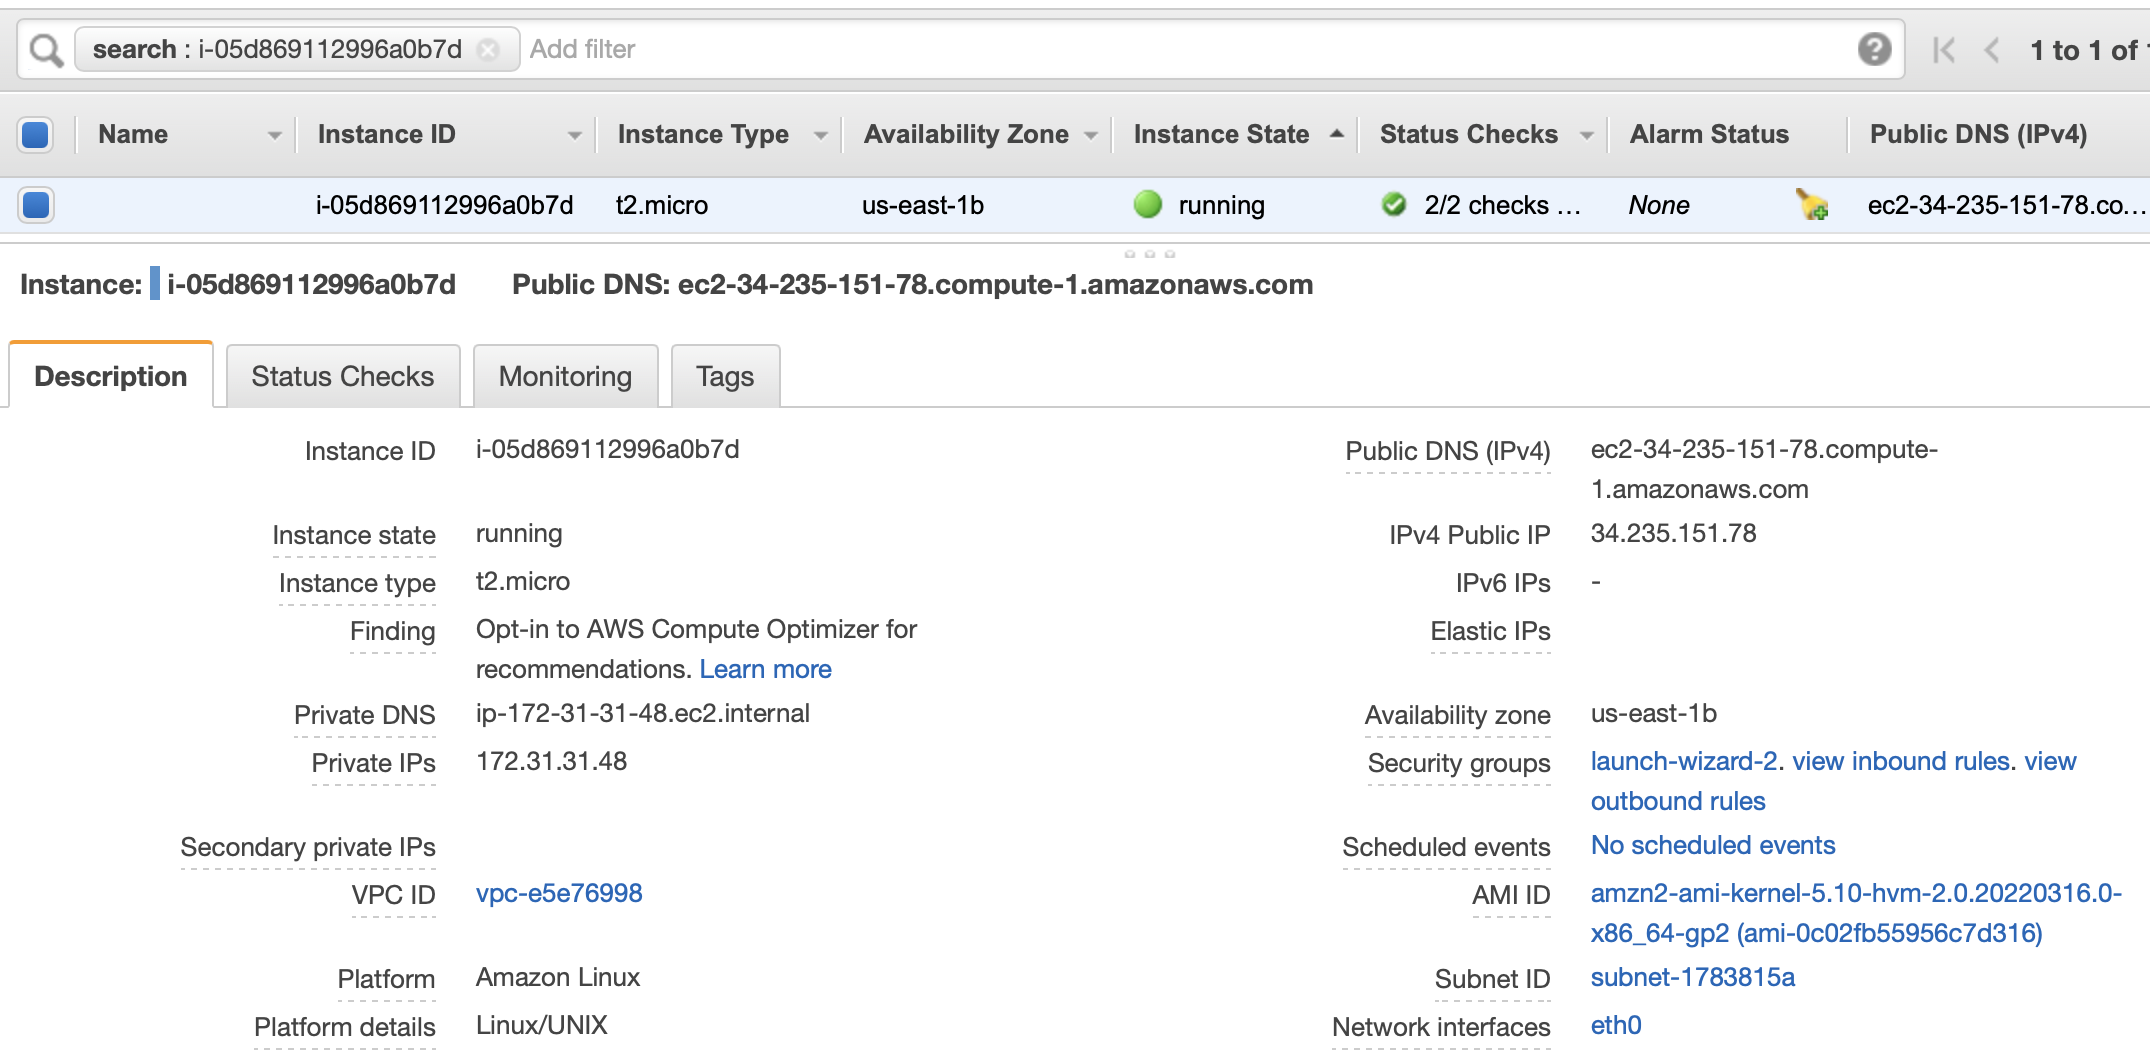
We can also see attributes of the running instance in the lower block. Some of the important attributes to note are:
- Instance ID: This is the identifier of the instance
- Public DNS name: Public DNS name of the instance
- Availability Zone: Availability Zone where the instance is created
- Security Group: Set of rules to allow or disallow incoming and outgoing traffic to the EC2 instance
We will use these attributes to add or modify the configurations of our EC2 instance in the subsequent sections.
Creating a Windows EC2 Instance
Let us similarly create a Windows EC2 instance by selecting an AMI for Windows Operating System as shown below:

As we can see from the description of the AMI, this will create an EC2 instance with the 2019 version of the Microsoft Windows operating system.
Connecting to an Amazon EC2 Instance
We can connect to the shell of our Linux instance or via remote desktop to our Windows instance. Let’s explore both.
Connecting to the EC2 Linux Instance
We connect to EC2 instances created with Linux AMIs using an SSH client.
For accessing the EC2 instance we had created an SSH key pair during instance creation for connecting to the instance. The SSH key pair is used to authenticate the identity of a user or process that wants to access the EC2 instance using the SSH protocol.
A key pair as explained earlier is a combination of the public key which is stored by AWS and a private key which we need to store. We had downloaded the private key and stored it in our workstation in the path: ~/Downloads/mykeypair.pem.
The public key is saved in a file .ssh/authorized_keys in the EC2 instance that contains a list of all authorized public keys.
We use the below ssh command to connect to our instance with our private key:
chmod 400 ~/Downloads/mykeypair.pem
ssh -i ~/Downloads/mykeypair.pem ec2-user@ec2-34-235-151-78.compute-1.amazonaws.com
Before running the ssh command, we change the permission of our private key file. We have used the public DNS name: ec2-34-235-151-78.compute-1.amazonaws.com to connect to our instance. The logged-in ssh session for our EC2 instance looks like this:
       __|  __|_  )
       _|  (     /   Amazon Linux 2 AMI
      ___|\___|___|

https://aws.amazon.com/amazon-linux-2/
[ec2-user@ip-172-31-31-48 ~]$
As we can see, we have logged in as ec2-user and can execute commands in the Linux shell.
Connecting to the EC2 Windows Instance
We connect to an EC2 Windows instance with a Remote Desktop client. For Windows AMIs, the private key file is required to obtain the initial administrator password to log into our instance. Let us retrieve this password using the private key file by performing the following actions in the EC2 console:
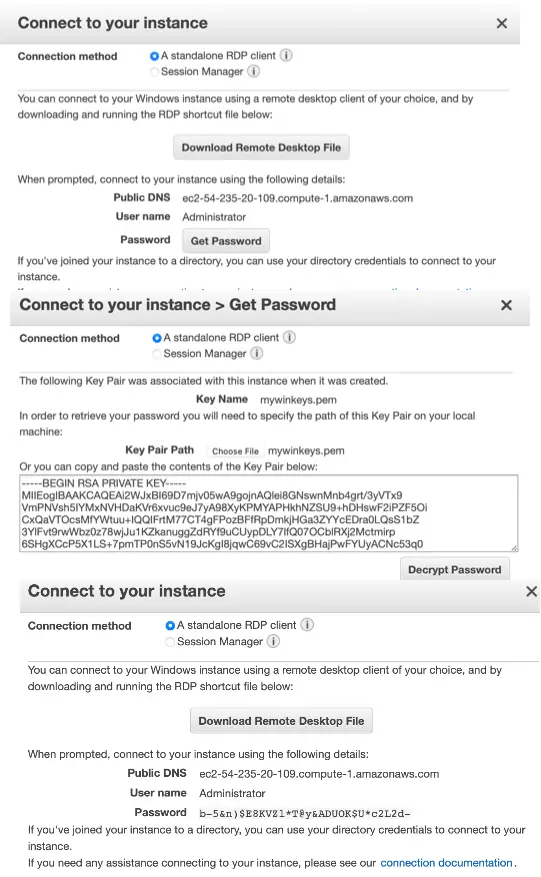
As we can see here, we have specified the connection method as a standalone RDP client which gives us the option to download the Remote Desktop file and get the password. We have downloaded the Remote Desktop file and saved it as ec2-54-235-20-109.compute-1.amazonaws.com.rdp.
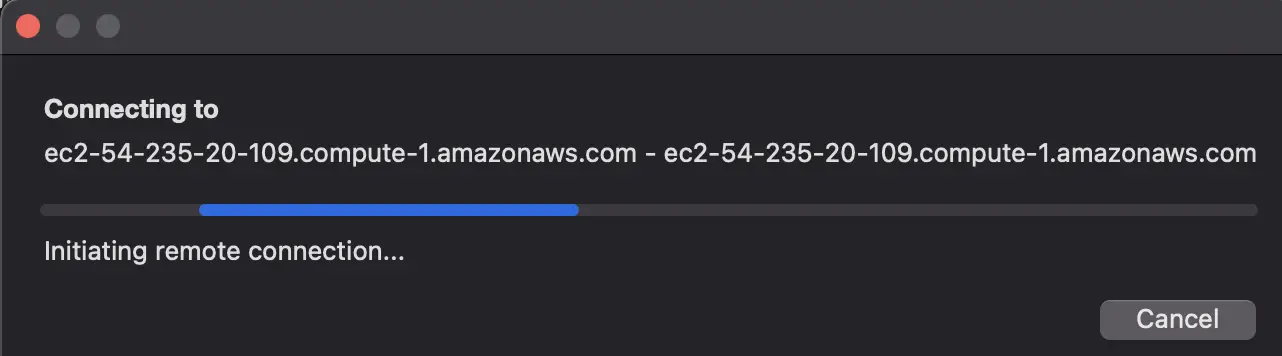
The name of the administrator account depends on the language of the operating system. For example, for English, it’s Administrator. We initiate the connection with our Windows EC2 instance by running the Remote Desktop file as shown below:
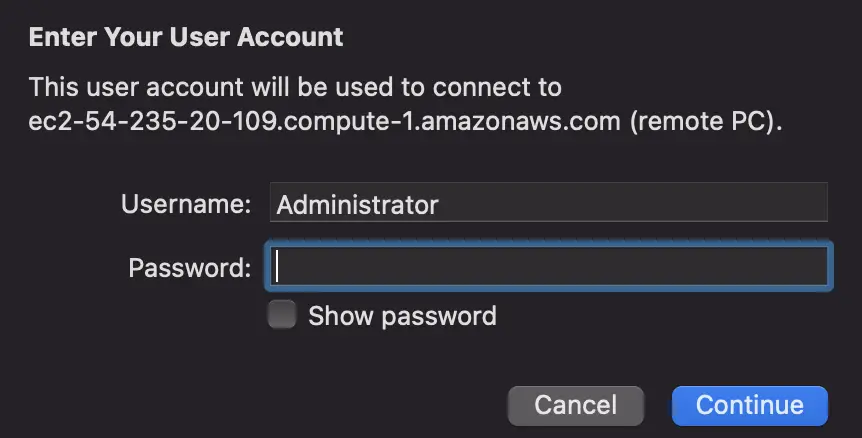
We log in to the EC2 Windows instance by providing the password generated using the private key file earlier.
If our instance is joined to a domain, we can connect to our instance using the Remote Desktop client with domain credentials defined in AWS Directory Service.
Adding Storage for an EC2 Instance
The EC2 instances created earlier were configured with a Root Storage Device which contained all the information necessary to boot the instance. A root storage device is created for an instance when we launch an instance from an AMI.
EC2 provides the following data storage options with each option having a unique combination of performance and durability:
- Elastic Block Store (EBS): We use EBS as a primary storage device for data that requires frequent and granular updates, for example, a write-heavy database. EBS provides durable, block-level storage volumes that we can attach to a running instance. For more details, see Amazon EBS volume types:
- General Purpose SSD (gp2 and gp3),
- Provisioned IOPS SSD (io1 and io2),
- Throughput Optimized HDD (st1),
- Cold HDD (sc1)
- EC2 instance store: We use an instance store for the temporary storage of information that changes frequently, such as buffers, caches, scratch data, and other temporary content, or for data that is replicated across a fleet of instances, such as a load-balanced pool of web servers. It is located on disks that are physically attached to the host computer.
- Elastic File System (EFS): We use an EFS file system as a common data source for workloads and applications running on multiple instances. EFS provides scalable file storage.
- Simple Storage Service (S3): S3 provides access to reliable and inexpensive data storage infrastructure.
We can attach an EBS volume to an EC2 instance in the same Availability Zone. After we attach a volume, it appears as a native block device similar to a hard drive or another physical device. At that point, the instance can interact with the volume just as it would with a local drive.
Controlling Incoming and Outgoing Connections to the EC2 Instance with Security Groups
We control incoming and outgoing traffic to EC2 instances by configuring a security group.
A security group is composed of inbound rules which control the incoming traffic to the EC2 instance, and outbound rules that control the outgoing traffic from the instance.
We can specify one or more security groups when we launch an instance or even when the instance is running.
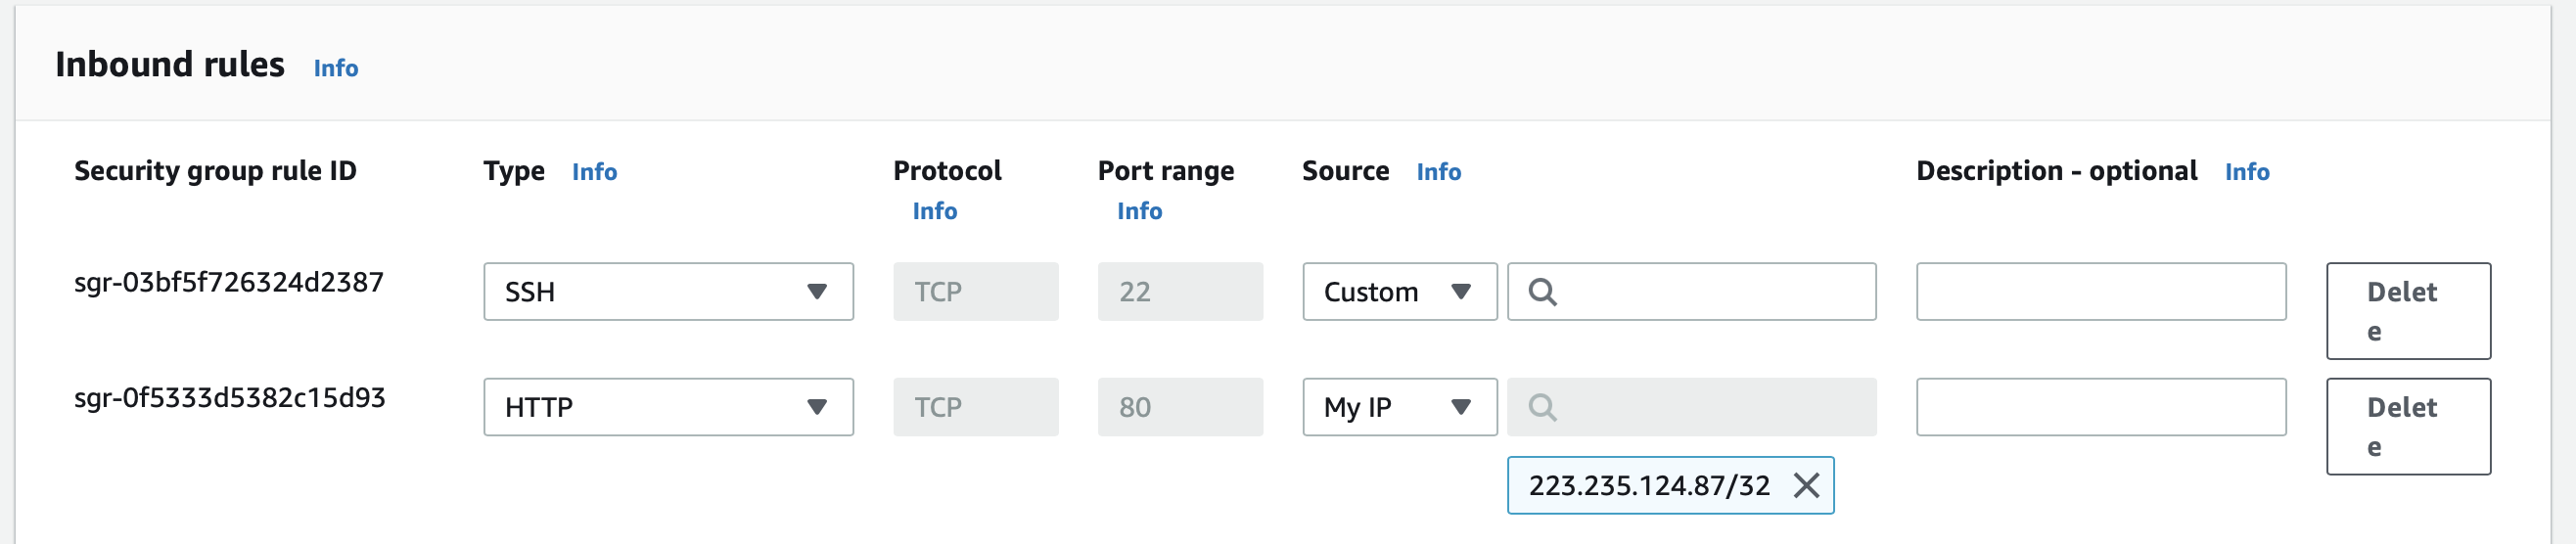
Let us configure our EC2 instance to allow only SSH and HTTP requests. For this we will add two inbound rules to the security group associated with our EC2 instance as shown below:

Here we created two inbound rules:
- for protocols SSH and port 22
- for protocol HTTP and port 80.
A security group is a tool for securing our EC2 instances, and we need to configure them to meet our security needs.
Configuring EC2 Instances
An EC2 instance that we launched earlier is a bare-bones virtual machine which is not very useful. We need to further configure the instance by installing OS upgrades, security patches, and common software mandated by organization policies before being used for regular operations.
Some of the configurations that we apply to an EC2 instance are:
-
Installing and updating software: Software packages for Linux are stored in software repositories. We can add a software repository and use the package management tool provided by Linux to search, install, and update software applications in the repository.
-
Adding Users: We can create user accounts for individual users who can have their own files and workspaces in the EC2 instance.
-
Setting System Time: By default, the latest versions of Amazon Linux 2 and Amazon Linux AMIs synchronize with the Amazon Time Sync Service. For EC2 instances created with others AMIs, we can configure the Amazon Time Sync Service on the instance using the chrony client or can use external NTP and public time sources.
-
Changing Hostname: We can use a public DNS name registered for the IP address of our instance for the hostname.
-
Setting up Dynamic DNS: Dynamic DNS services provide custom DNS hostnames within their domain area that are easy to remember. We can use a dynamic DNS provider to configure the instance to update the IP address associated with a public DNS name each time the instance starts.
-
Running Commands at launch: We can perform initial configuration tasks by running scripts during the launching of an EC2 instance. The scripts are attached using a feature called user data.
Let us configure our EC2 instance to install an Apache HTTP Server at launch by adding the below script to the user data configuration:
#!/bin/bash
yum update -y
yum -y install httpd
usermod -a -G apache ec2-user
chown -R ec2-user:apache /var/www
chmod 2775 /var/www
echo "Hello from $(hostname -f)" > /var/www/html/index.html
systemctl start httpd
systemctl enable httpd
As we can see, the script starts with #!/bin/bash and is run with root privilege so we should not add sudo to any command.
To run this script at instance startup, we need to add this script to the user data configuration of the EC2 instance as shown below:

For running instances, we need to stop the instance before adding user data.
We also need to add an inbound security rule to allow traffic from port 80 as shown below:
We should be using AWS CloudFormation and AWS OpsWorks for more complex automation scenarios.
Custom images are created from instances or snapshots, or imported from your local device. You can create a custom image from an ECS instance that have applications deployed, and then use the custom image to create identical instances. This eliminates the need for repeated configurations.
Register EC2 Instances as Targets of an Application Load Balancer
In the last section, we started the Apache Httpd server in our EC2 instance. The Apache Httpd server is used to serve web pages in response to HTTP requests sent from web browsers. But a single instance of EC2 instance running Apache Httpd server can get overwhelmed and run out of resources when it receives a very high number of requests simultaneously.
To mitigate this situation, we can register multiple EC2 instances as targets of an Application Load Balancer. An Application Load Balancer distributes incoming application traffic across multiple EC2 instances placed in multiple Availability Zones thereby increasing the availability of our application.
Here is an example of creating an Application Load Balancer with our EC2 instances as targets:
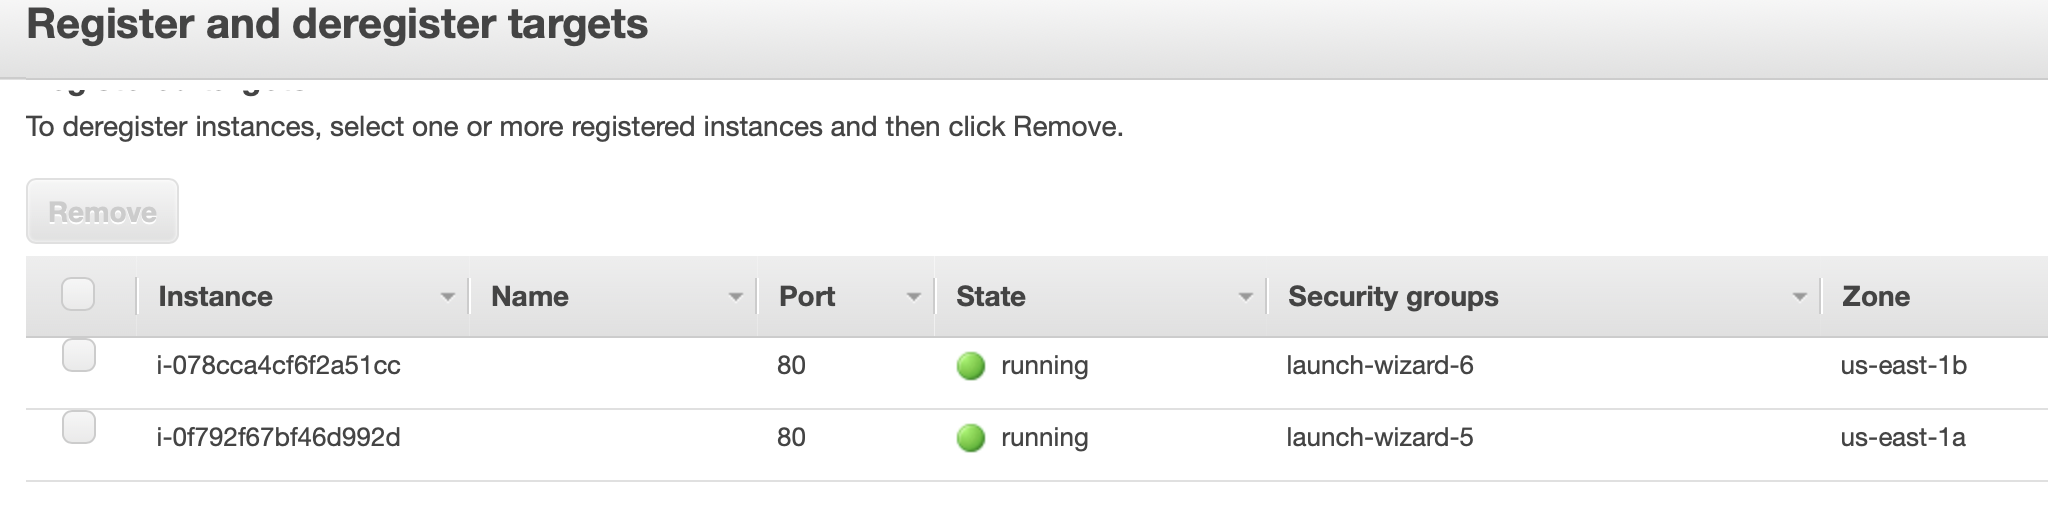
Here we can see two EC2 instances put in a target group which we will register as a target of an Application Load Balancer.
Then we configure the routing property of the load balancer with this target group:
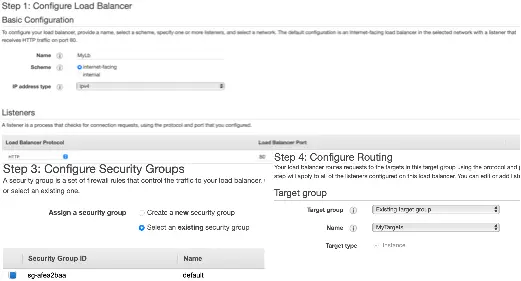
Additionally, we have configured an HTTP listener and a security group to control traffic for this load balancer.
We can set up the Application Load Balancer to route traffic based on advanced application-level information that includes the content of the request.
Auto Scaling an EC2 Fleet
An EC2 fleet contains a group of On-Demand and Spot instances. We can automate the management of a fleet of EC2 instances with Auto Scaling to meet a pre-defined target capacity.
EC2 Auto Scaling ensures that we always have the correct number of EC2 instances available to handle the load for our application.
The key components of EC2 Auto Scaling are:
- Auto Scaling Group
- Launch Template
- Scaling Policies
For configuring Auto Scaling, we need to create an Auto Scaling Group and associate it with a launch template.
The Auto Scaling group contains a collection of EC2 instances along with the maximum and the minimum number of EC2 instances and scaling policies, based on which EC2 instances are launched or terminated as demand on our application increases or decreases.
A launch template contains the configuration information required to launch an instance and contains the instance-level settings such as the Amazon Machine Image (AMI), instance type, key pair, and security groups.
A snippet of a launch template as displayed in the EC2 administration console is shown below:
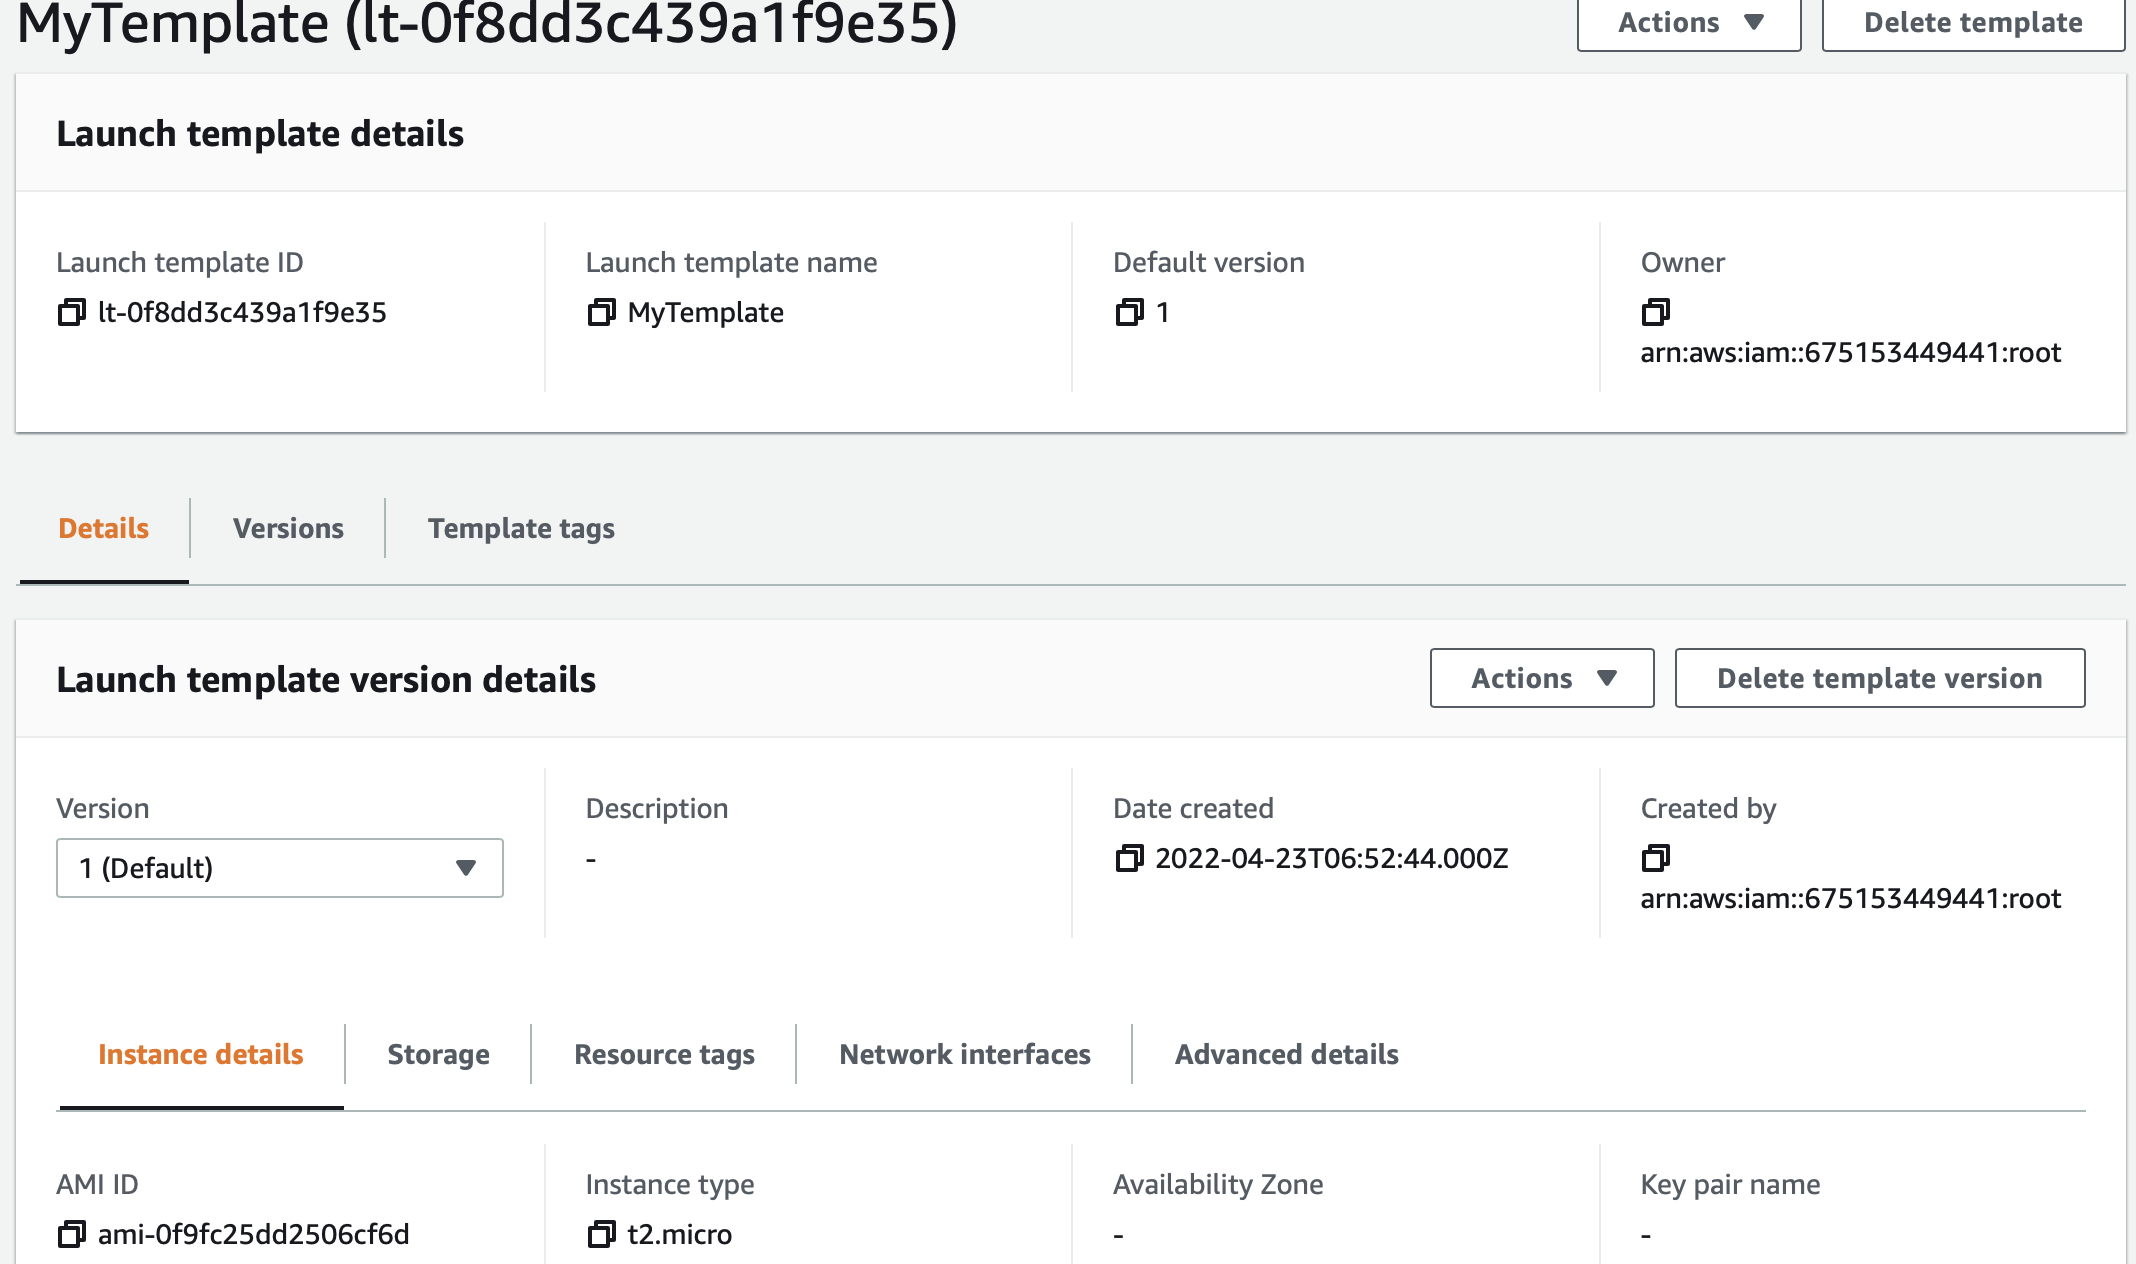
As we can see, this launch template has the instance type property set to t2.micro.
When we create the Auto Scaling Group, we specify this launch template:
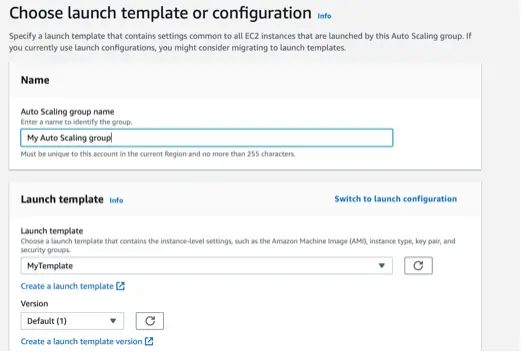
The Auto Scaling Group will use the configurations in this launch template to launch new EC2 instances.
We further specify the group size and scaling policies of the Auto Scaling Group as shown below:
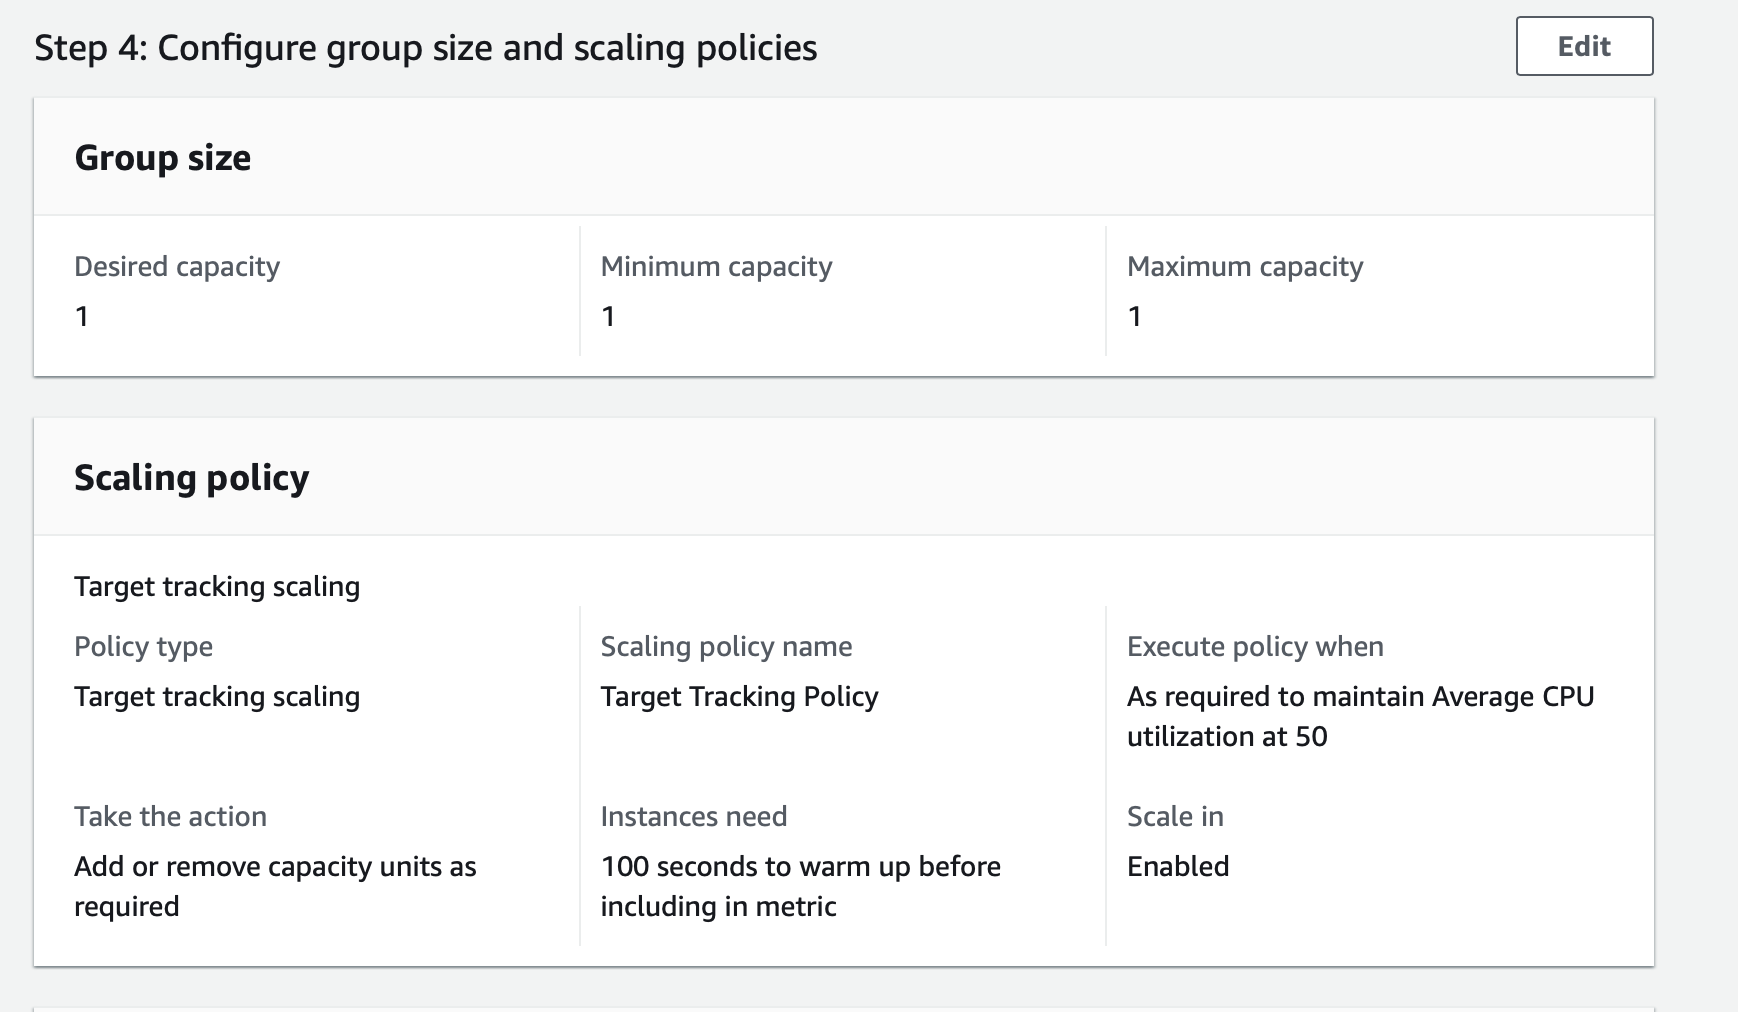
Here we have set the scaling policy of the Auto Scaling Group to maintain Average CPU utilization at 50.
Monitoring an EC2 Instance
The primary metrics which we monitor in EC2 instances are:
CPUUtilizationfor CPU utilizationNetworkInandNetworkOutfor Network utilizationDiskReadOpsandDiskWriteOpsfor Disk performanceDiskReadBytesandDiskWriteBytesfor Disk Reads/Writes
By default, EC2 sends metric data to CloudWatch in 5-minute intervals. We can enable detailed monitoring on the EC2 instance to send metric data for our instance to CloudWatch in 1-minute intervals. The Amazon EC2 console displays a series of graphs based on the raw data from Amazon CloudWatch.

Depending on our needs, we might prefer to get information about our instances from the Amazon CloudWatch service instead of the graphs in the EC2 console. For example, we can configure alarms to alert us for specific events in our EC2 instance. An example of creating a Cloudwatch alarm is shown below:
Here we have set up an alarm that will publish an information message to an SNS topic when the CPU utilization in the EC2 instance is below 1%.
Optimizing Costs with Purchasing Options
We can use the following purchasing options for EC2 to reduce our cost of using EC2:
- On-Demand Instances: We pay by the second for the running instances.
- Savings Plans: We commit to a consistent amount of usage, in USD per hour, for a term of 1 or 3 years.
- Reserved Instances: We commit to a consistent instance configuration, including instance type and region, for a term of 1 or 3 years.
- Spot Instances: We can request unused EC2 instances and use them as part of an autoscaling group.
- Capacity Reservations: We can reserve capacity for our EC2 instances in a specific Availability Zone for any duration.
Platform Services Based on EC2
EC2 is a foundation-level service in the Amazon Cloud. AWS provides multiple platform level services which take care of the provisioning of EC2 instances and allow us to focus on building applications:
- Elastic Container Service (Amazon ECS): ECS is a highly scalable and fast container management service (more in this article about CloudFormation and ECS).
- Fargate: With AWS Fargate, we do not need to manage servers, handle capacity planning, or isolate container workloads for security.
- AWS Elastic Beanstalk: makes it easy for us to create, deploy, and manage scalable, fault-tolerant applications running on the AWS Cloud.
Conclusion
Here is a list of the major points for quick reference:
- EC2 is a foundation-level compute service in AWS.
- For creating an EC2 instance we provide an AMI and instance type.
- We can attach different types of storage to EC2: EBS, EFS, S3, and Instance Store.
- We control incoming and outgoing traffic to EC2 with security groups.
- EC2 provides various cost-optimizing options like reserved and spot instances for running our workloads on EC2.
- We define EC2 instances as targets of an Application Load Balancer for increasing the availability of our application.
- We can use the auto-scaling feature to automatically scale a fleet of EC2 instances for consistent and predictable performance in cases of fluctuating load.
- We use the AWS Cloudwatch service to monitor the health of our EC2 instances.